Flyfishing, flytying and hooks
Home » Posts tagged "silk" (Page 2)

Green Highlander- #3/0

2014.11.25.dryfly.me.gh

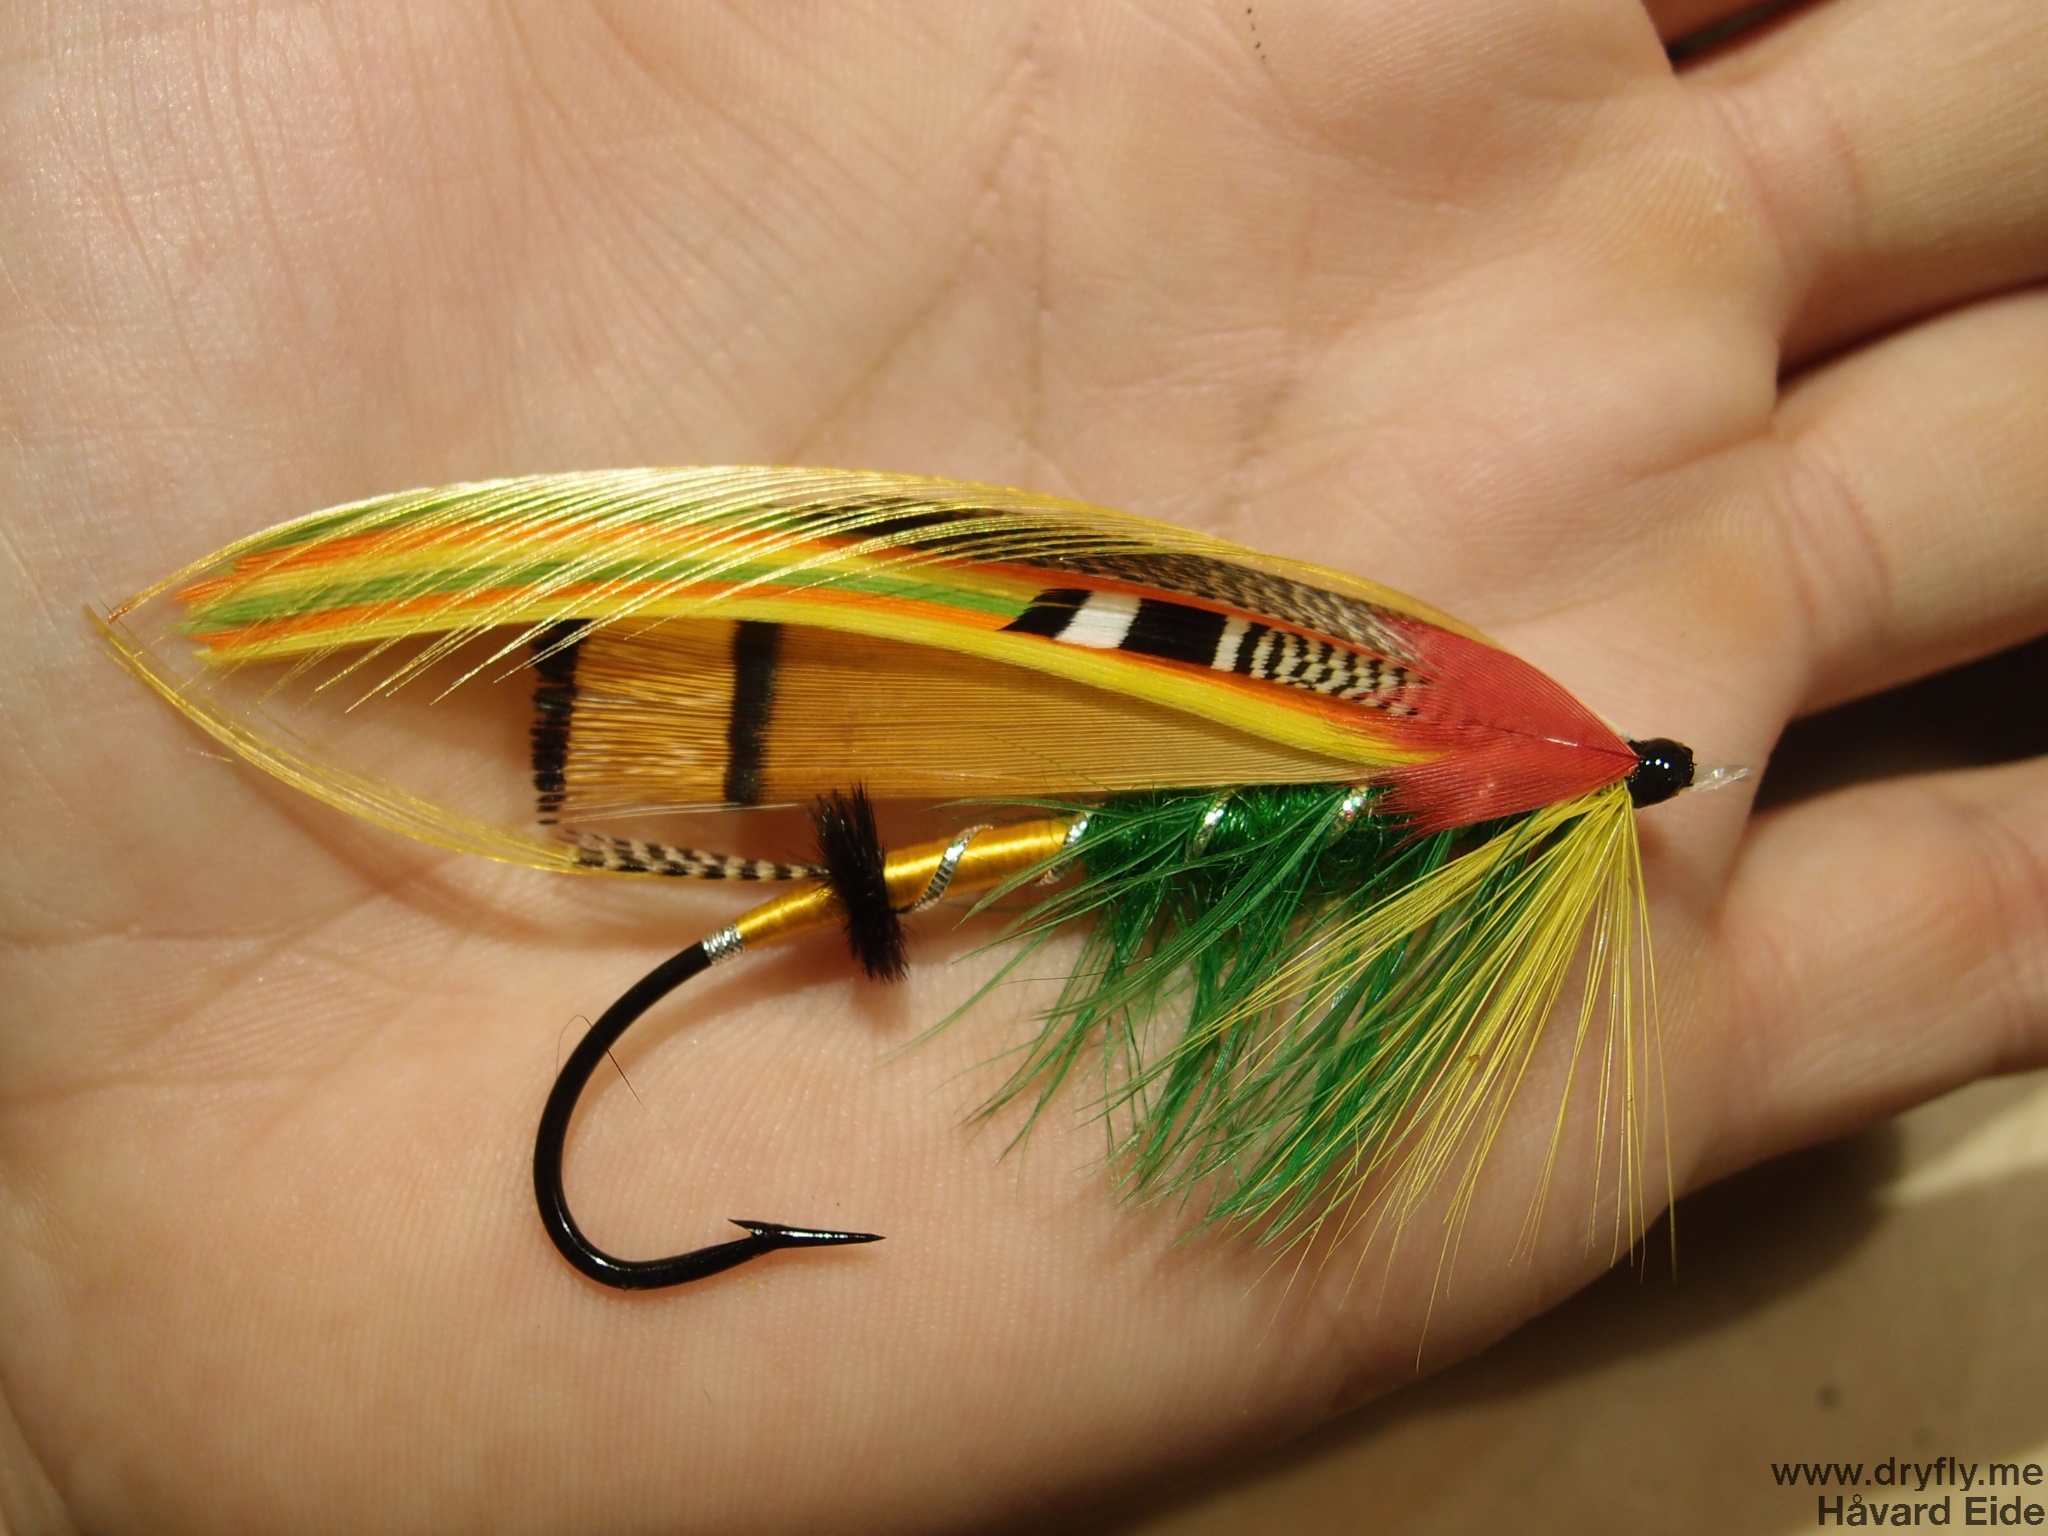
Hook: Partridge Bartleet Blind-Eye #3/0
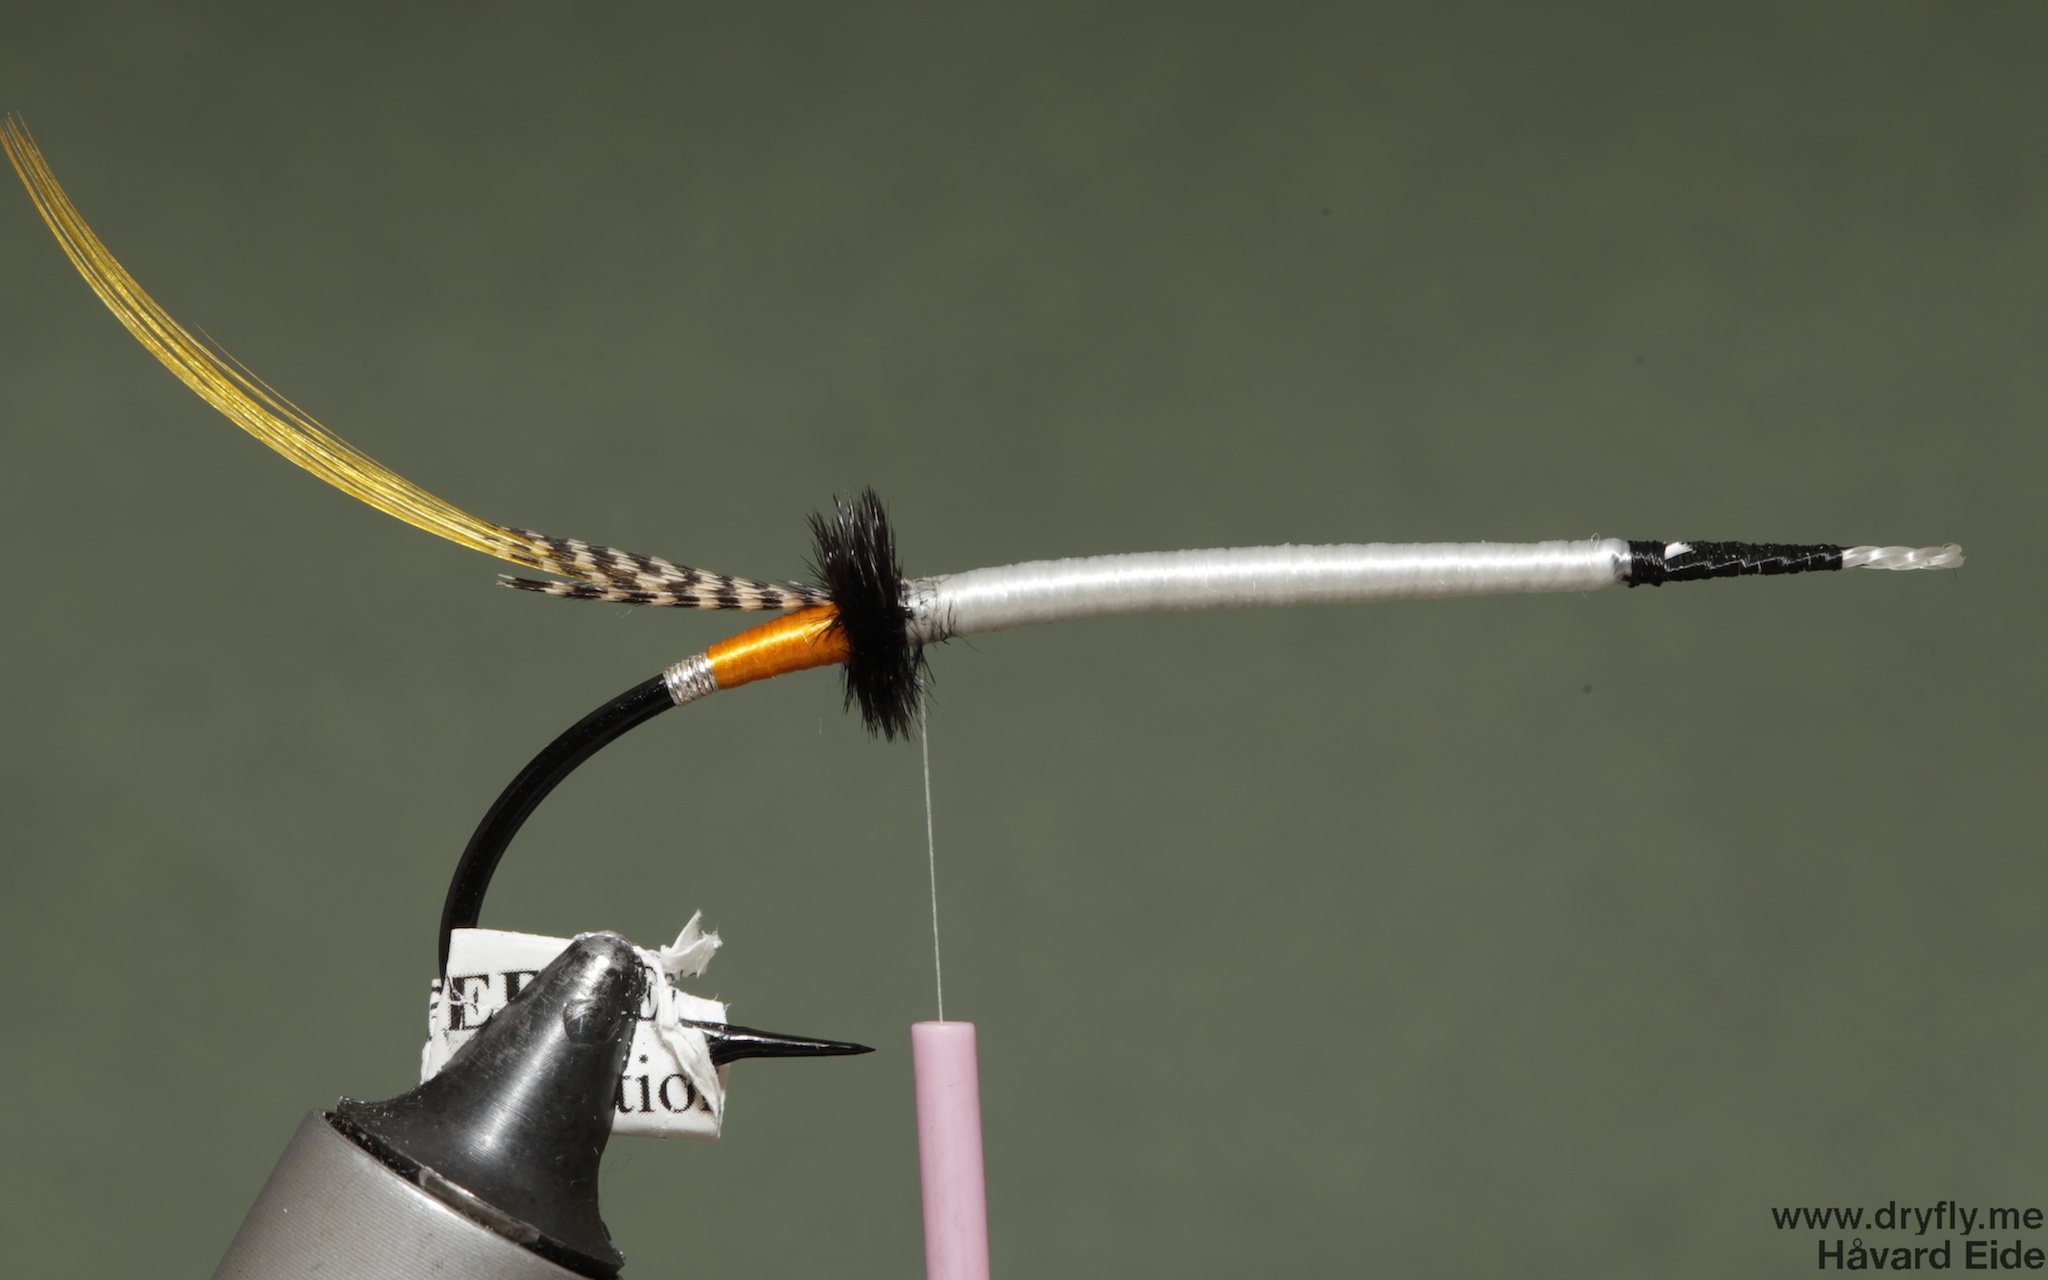
Thread: UNI 17/0 Trico White, Sheer 14/0 Black
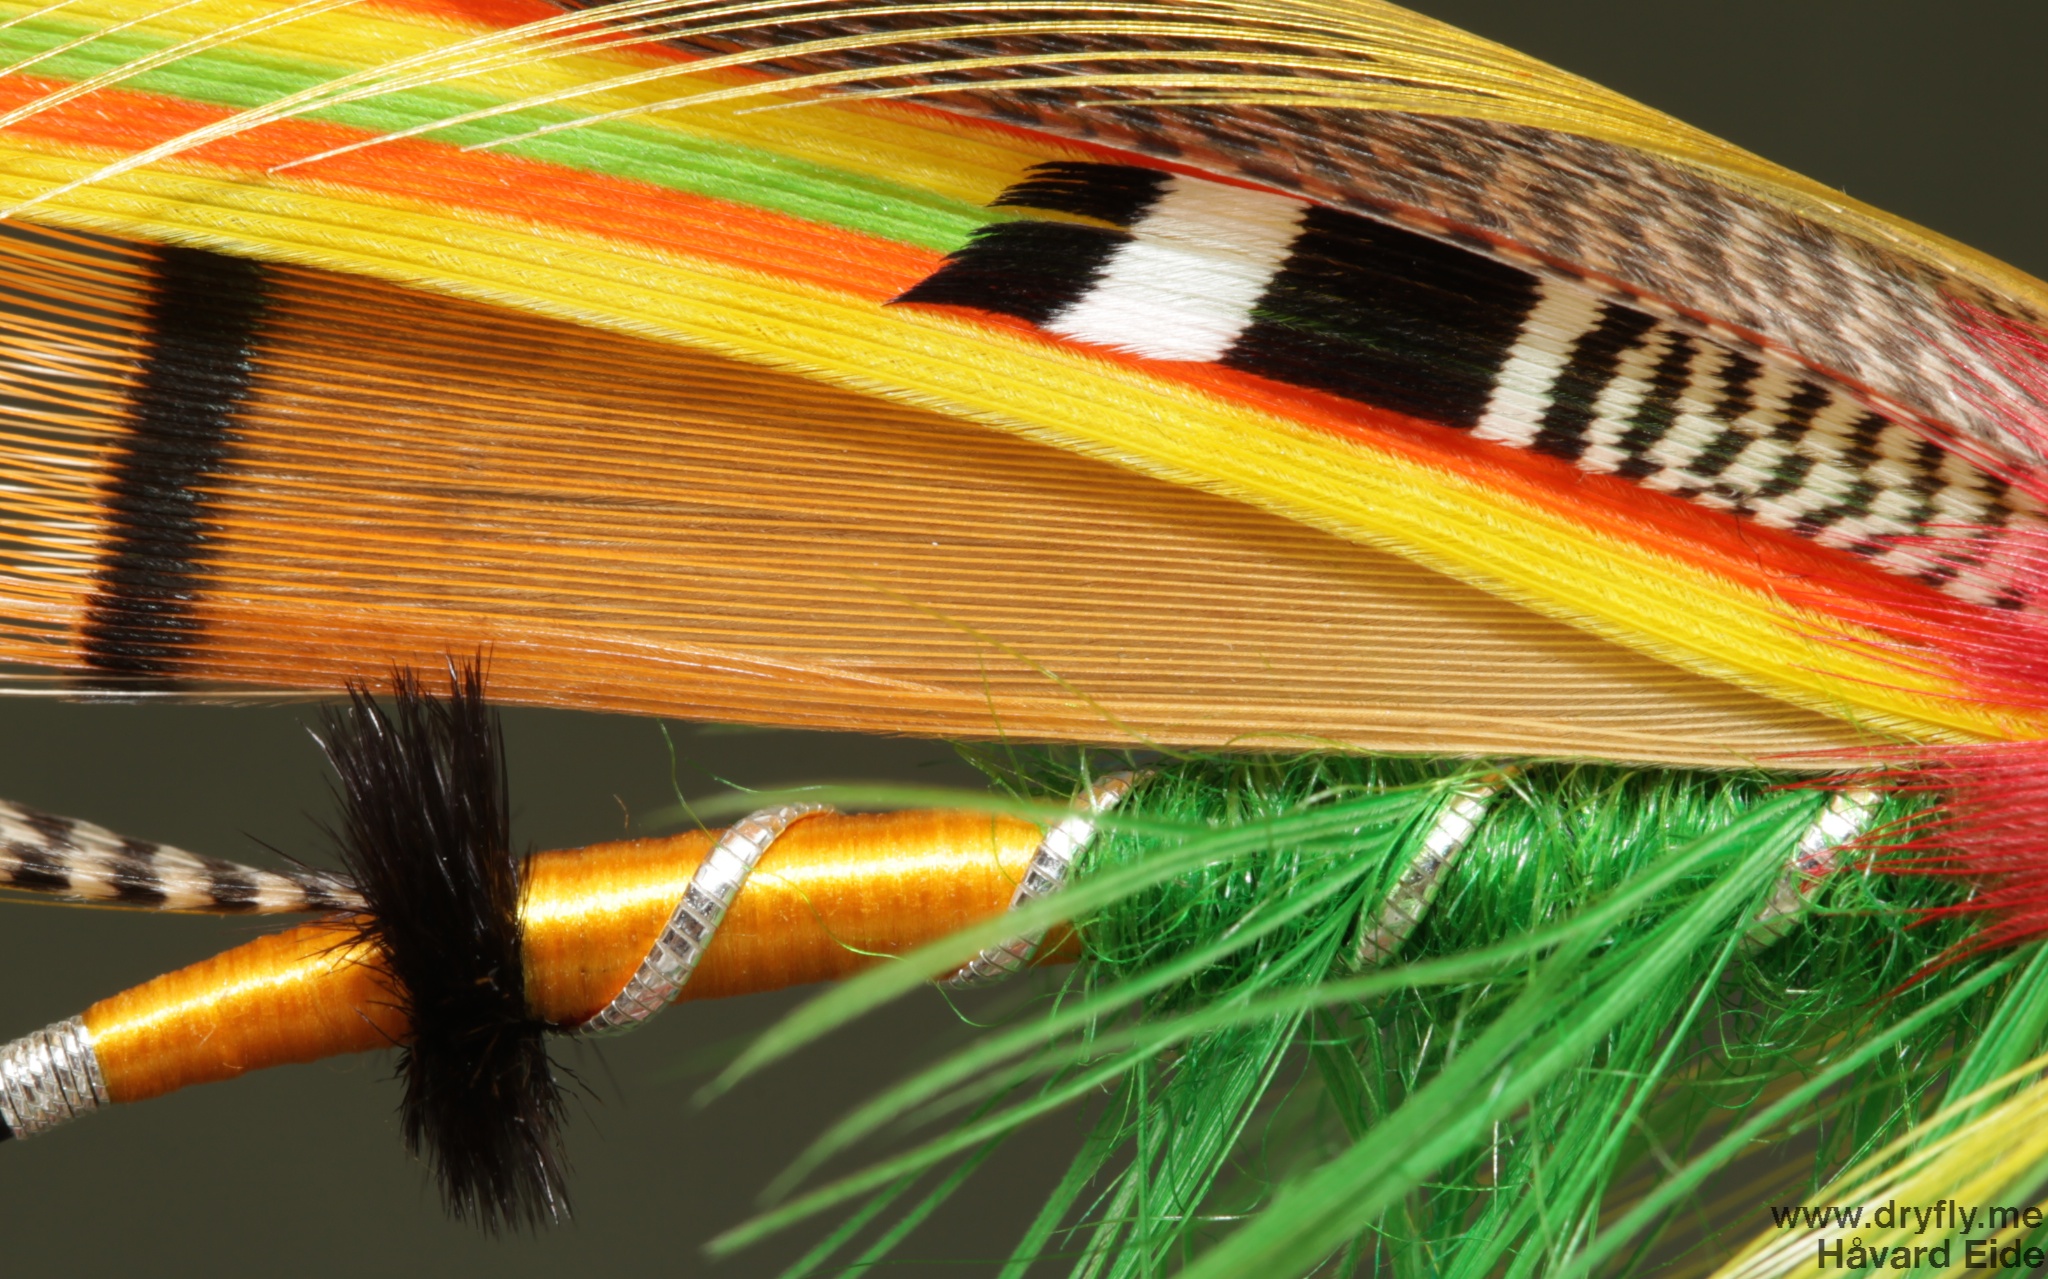
Tag: Lagartun Oval X-Strong Fine French Tinsel, Lagartun French Silk Floss
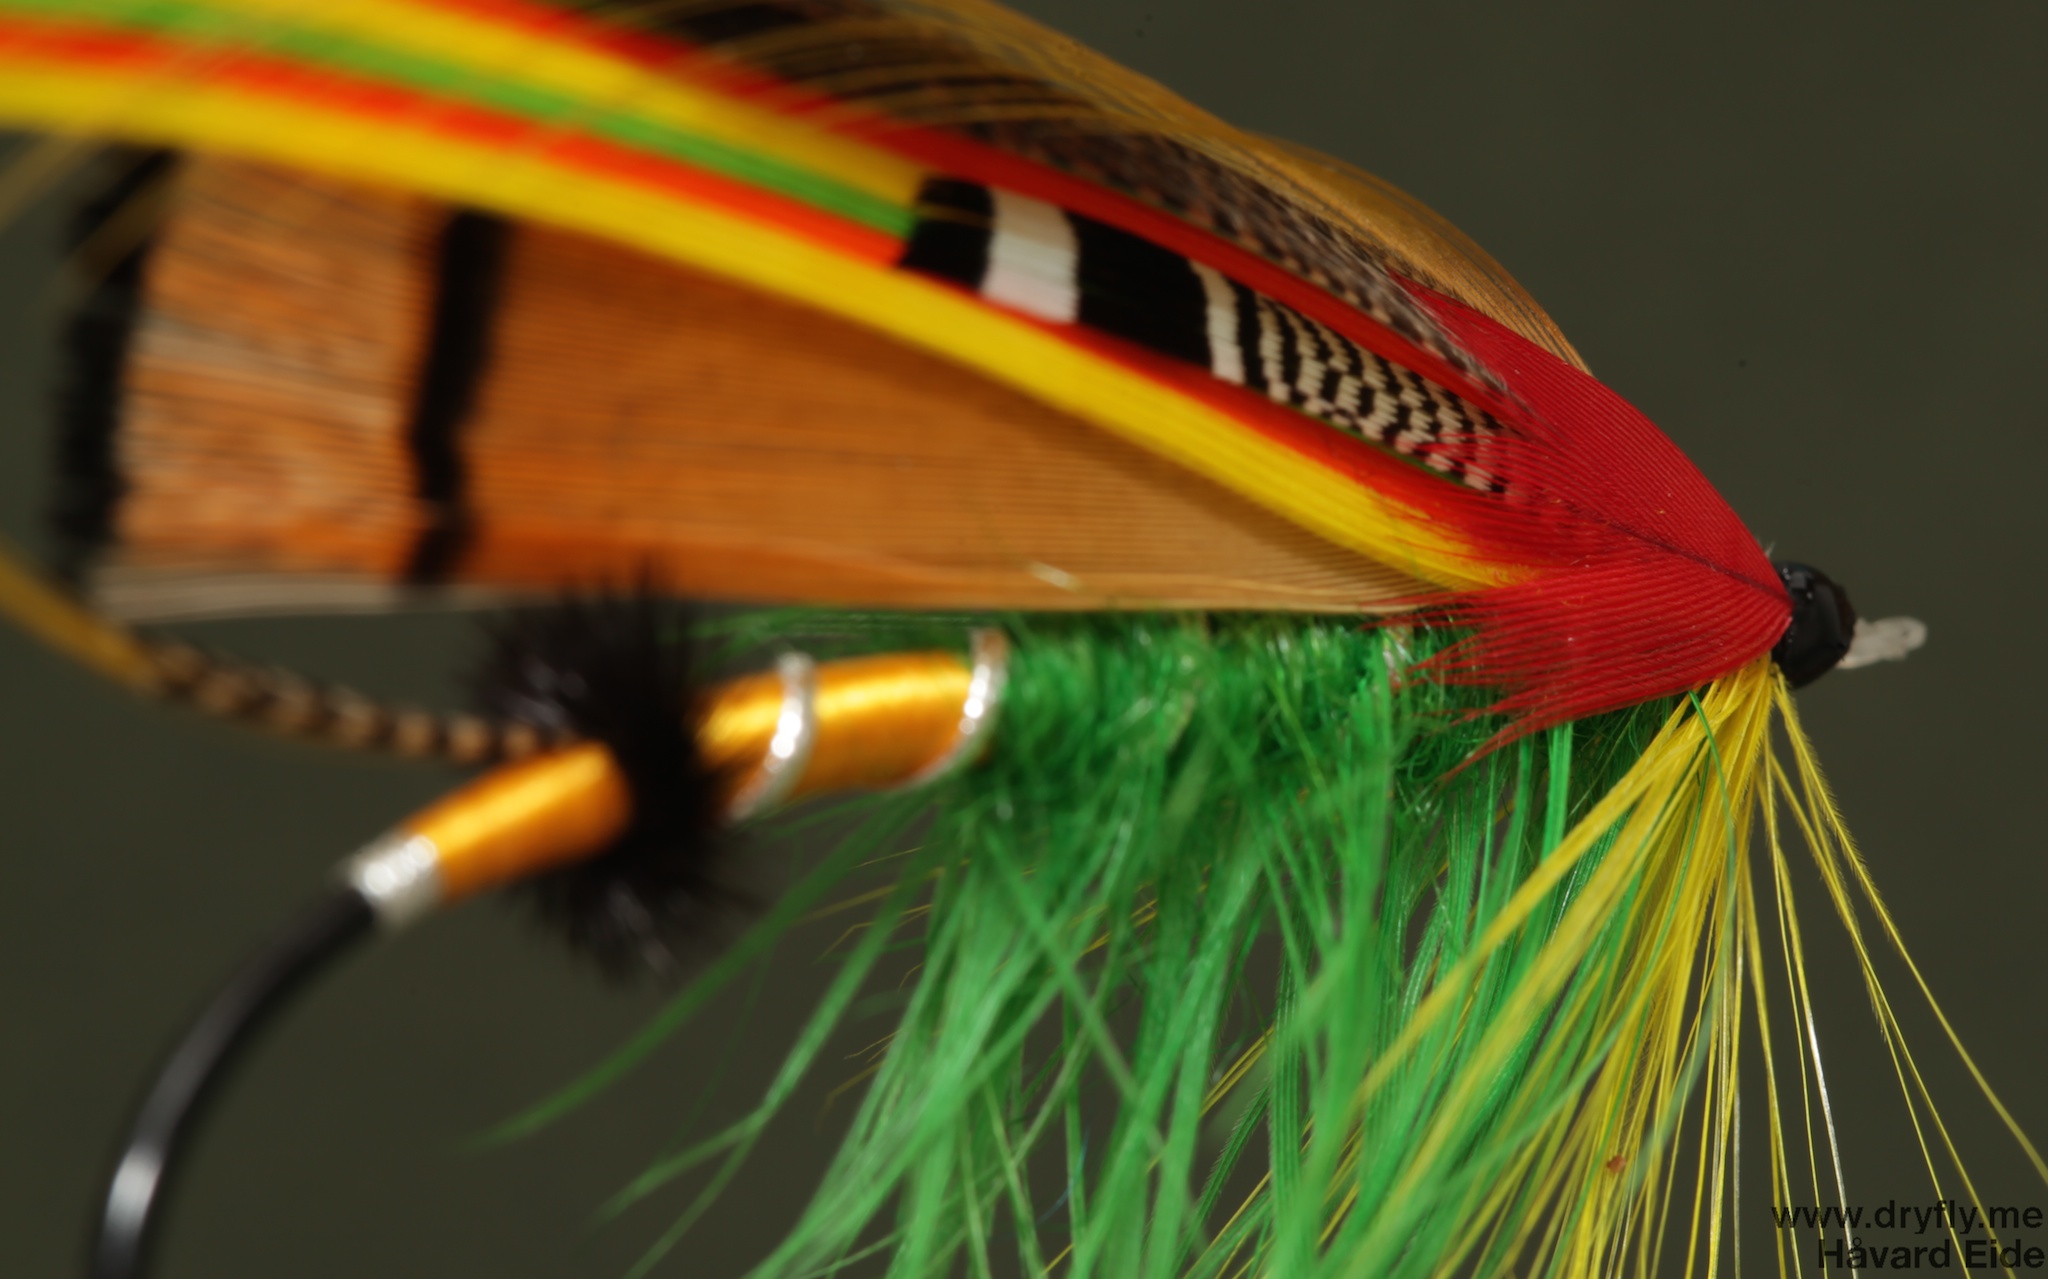
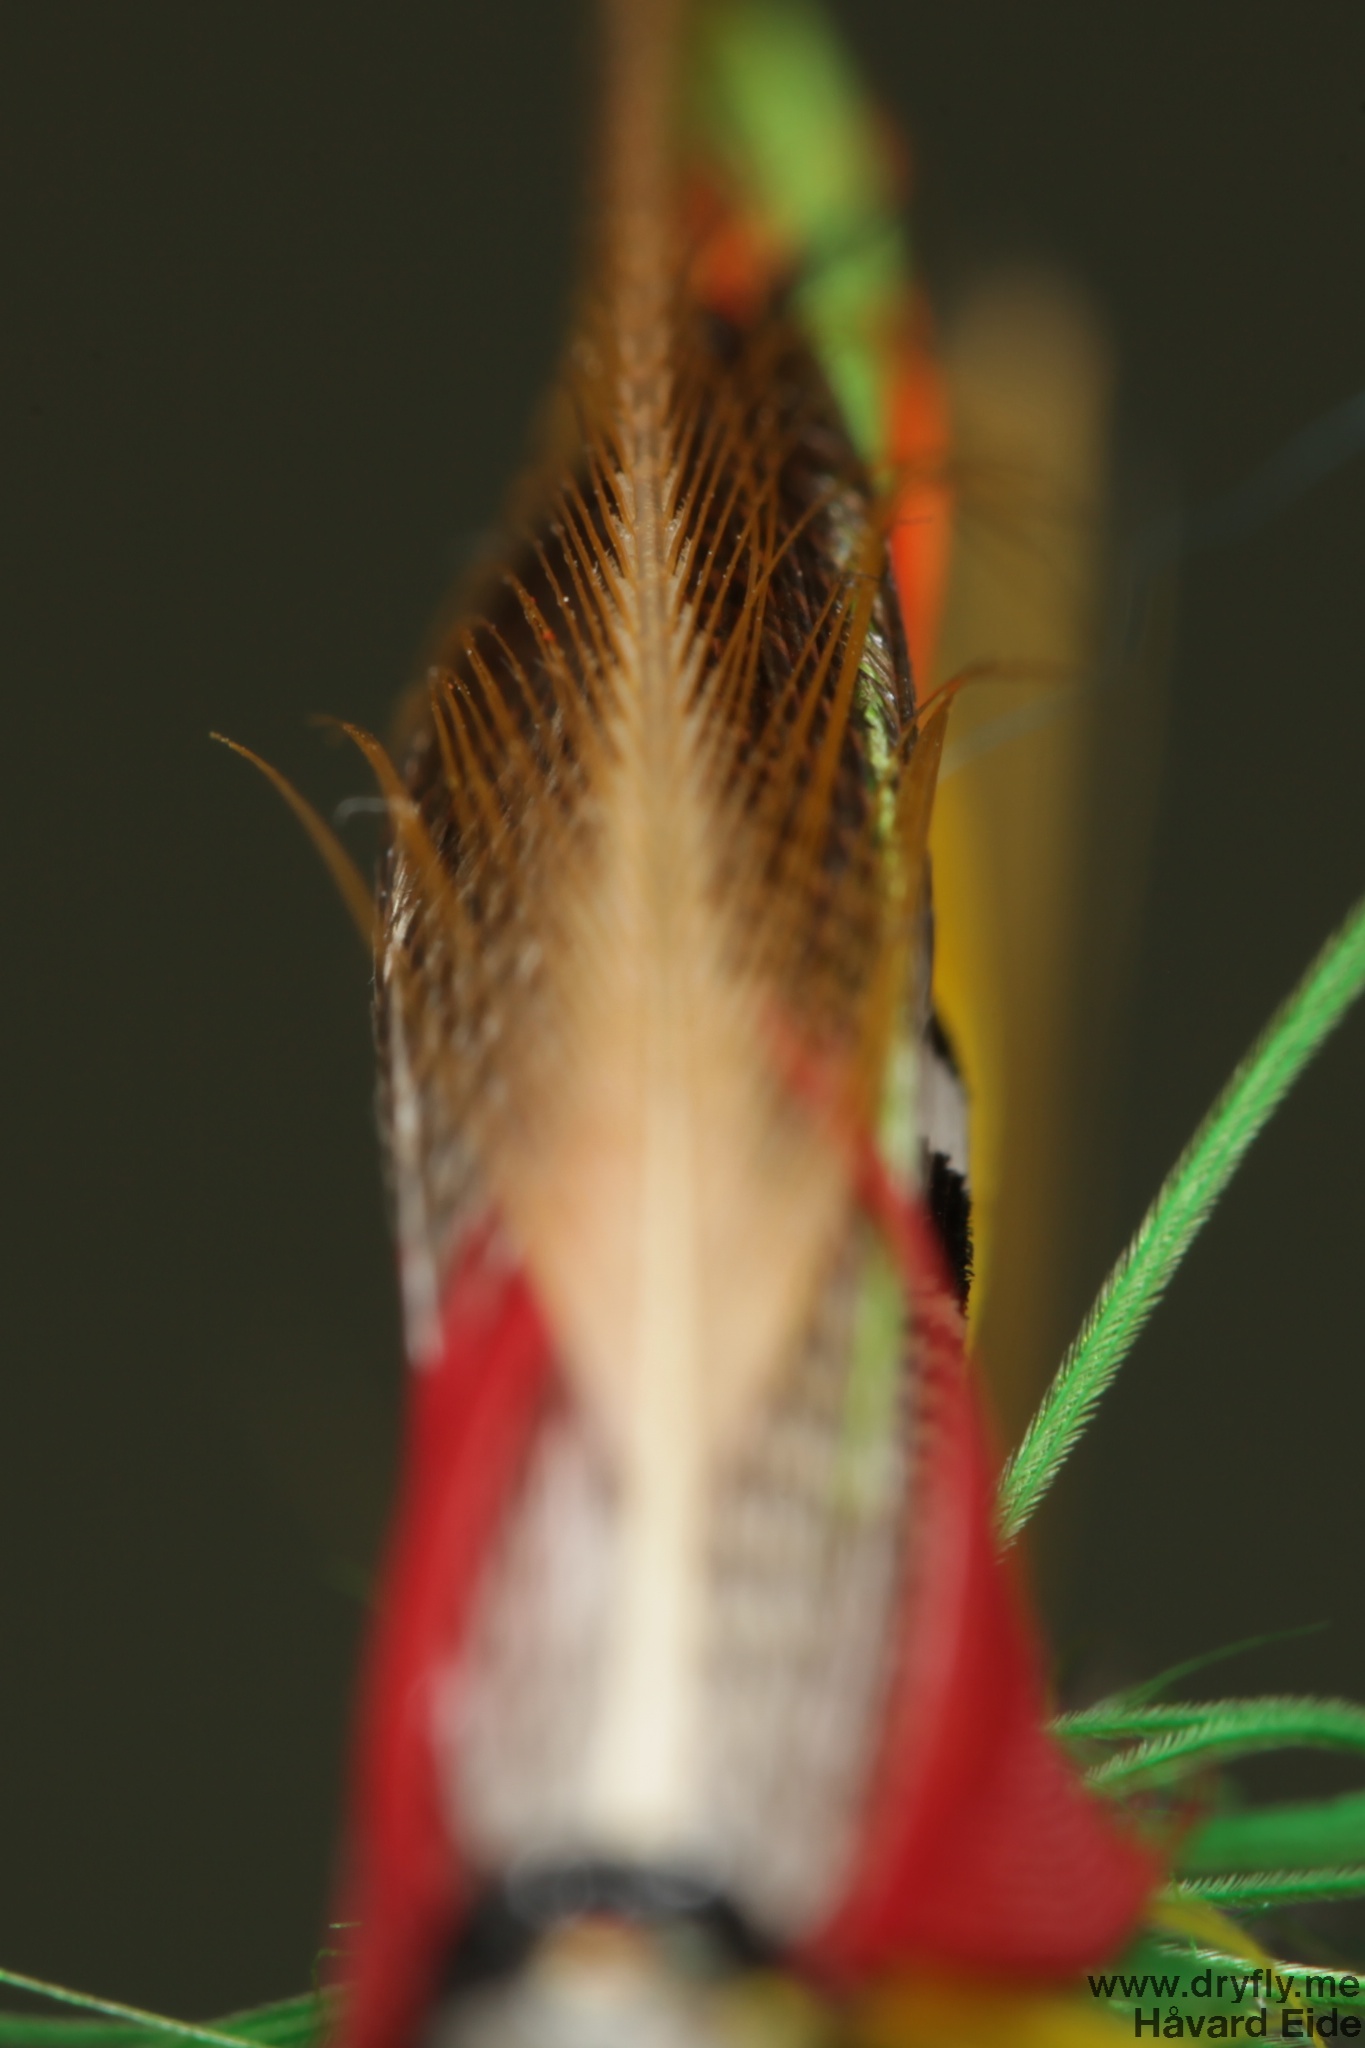
Tail: GP topping, Wood Duck
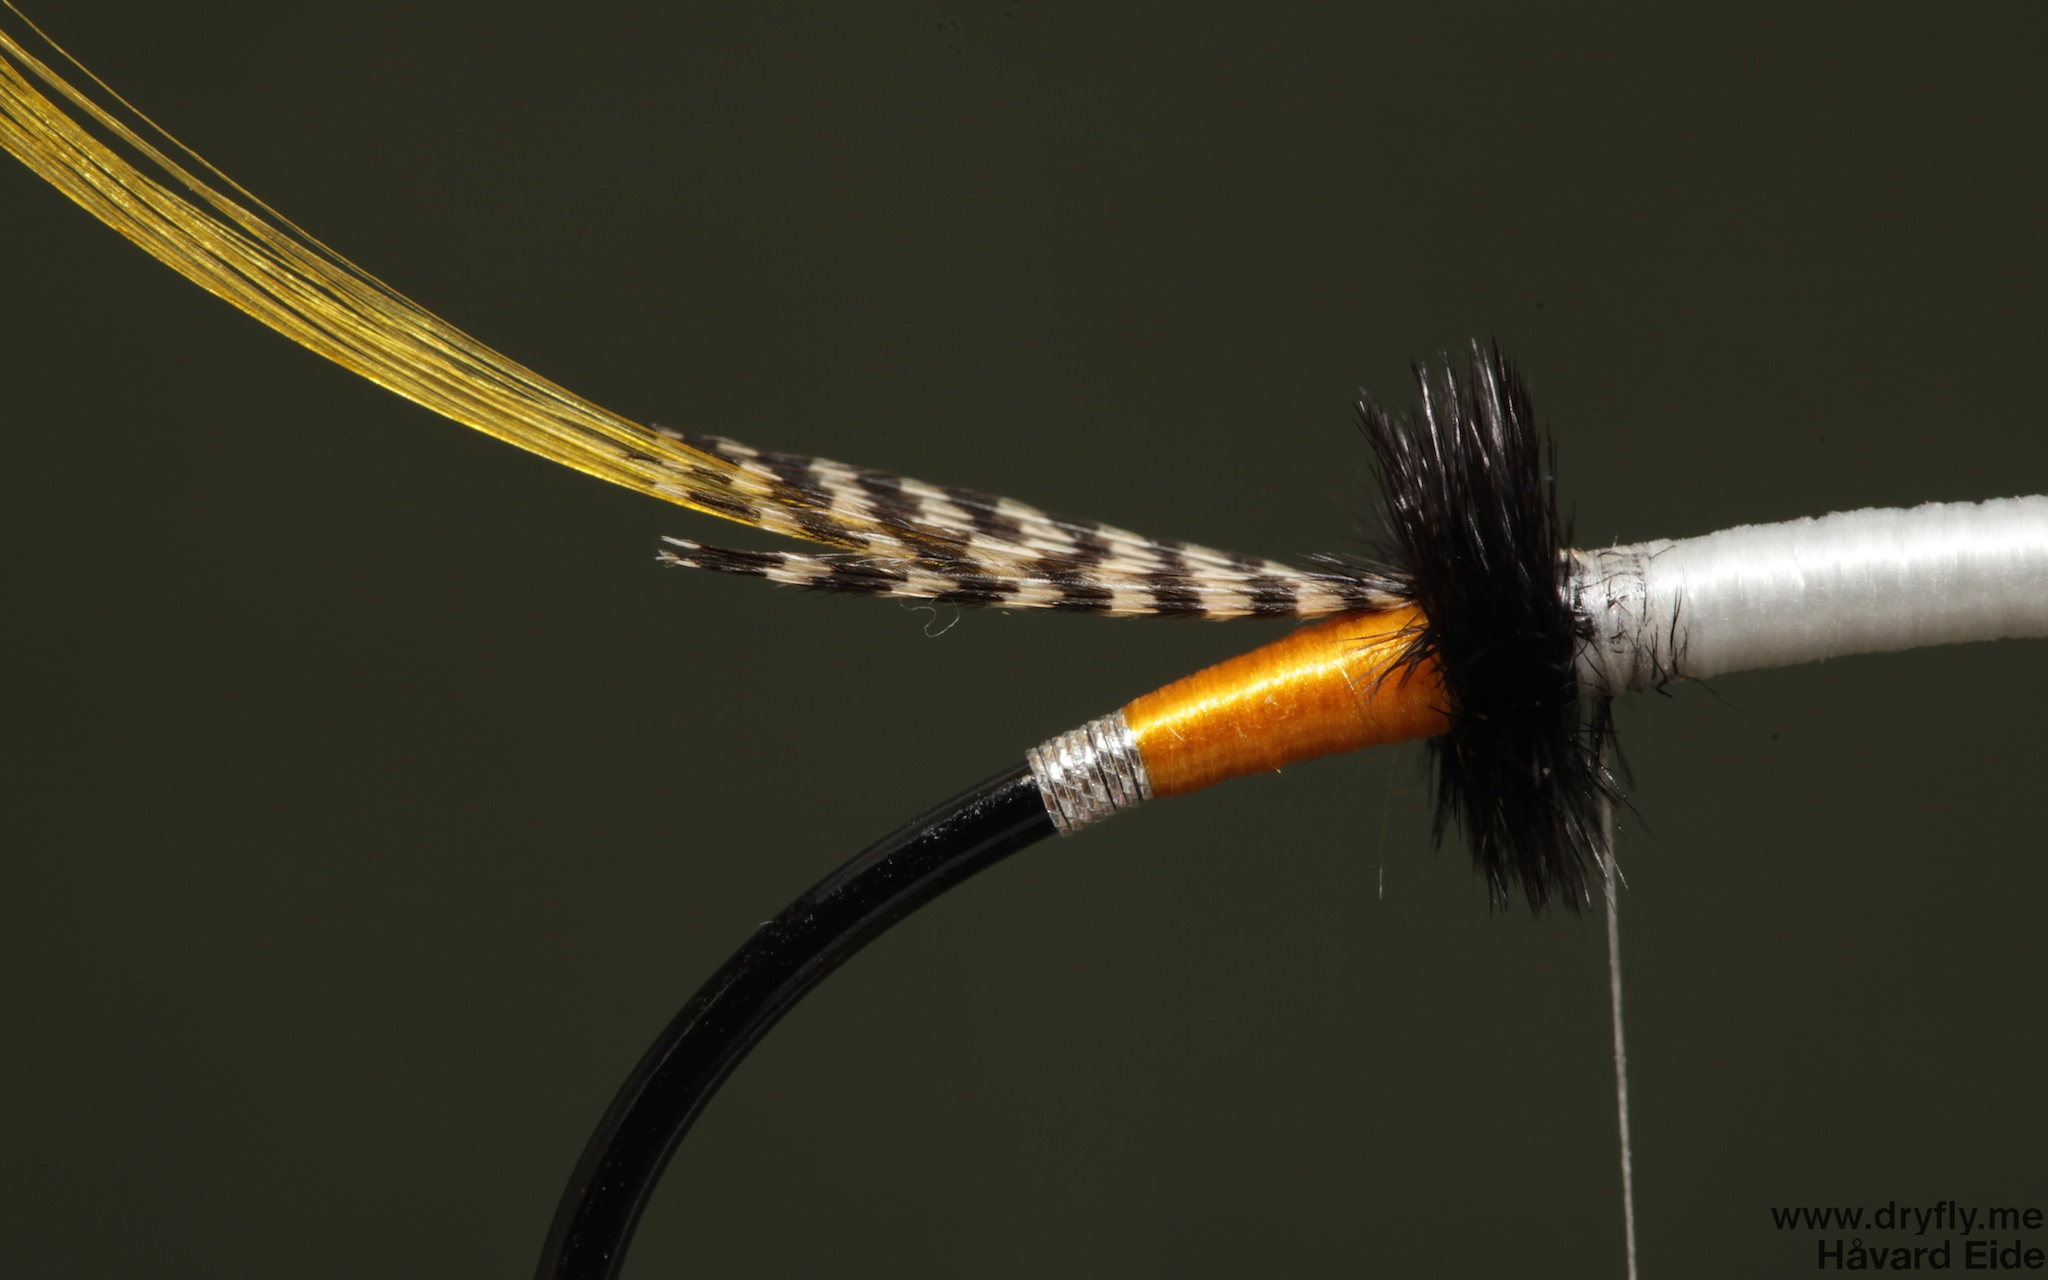
Butt: Black Ostrich
Body: Lagartun French Silk Floss, Seals fur Green Highlander
Rib: Lagartun French Tinsel
Hackle: Green Highlander Cock Saddle
Underwing: GP tippet
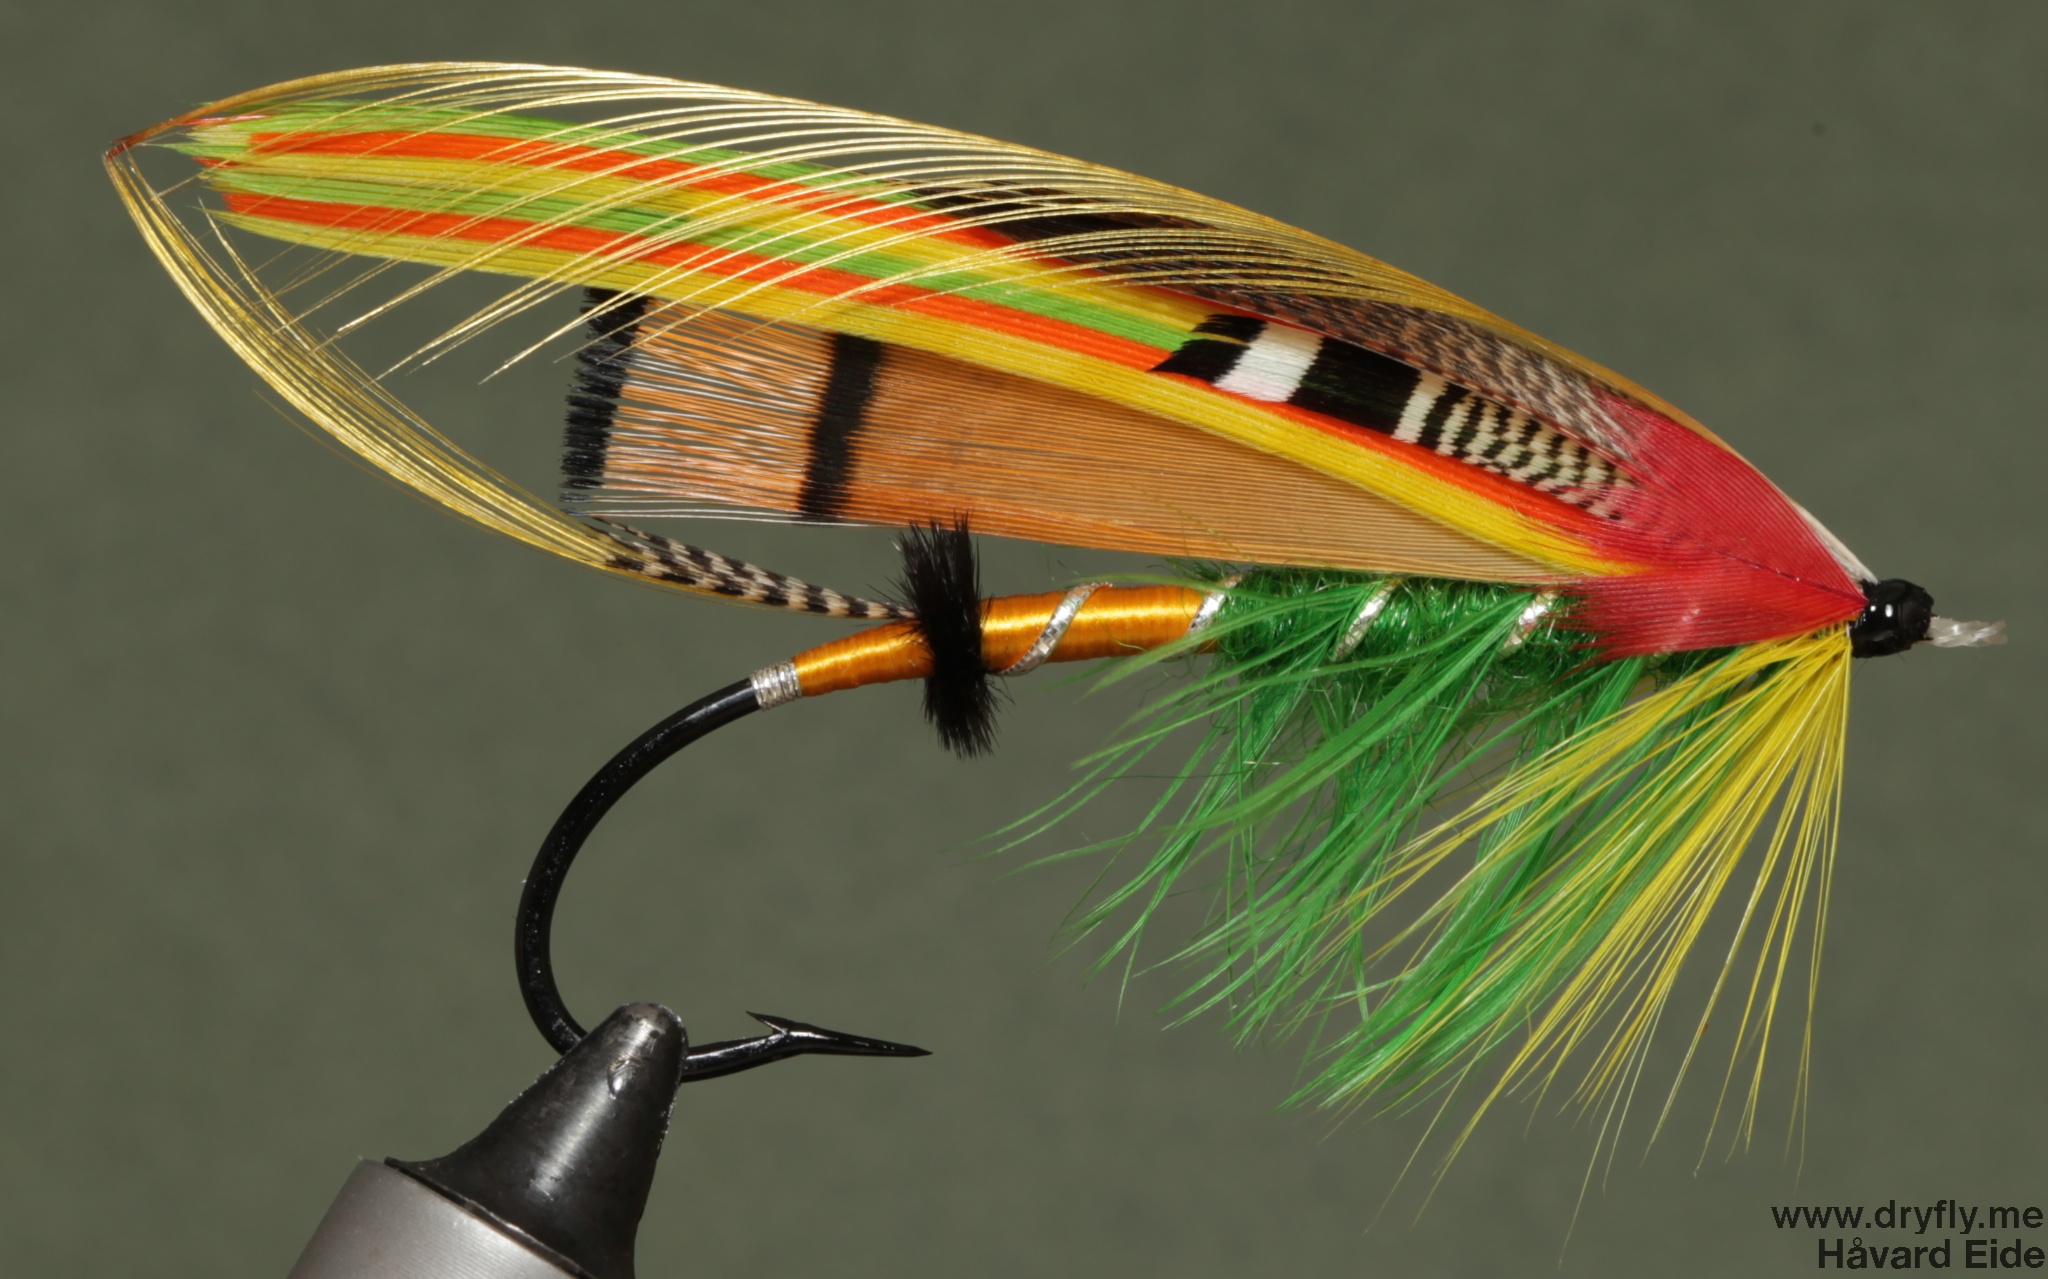
Wing: Dyed Turkey Yellow/Orange/Green, Wood Duck, Mallard Duck
Throat: Rooster Neck Yellow
Cheek: Red Crow Substitute

This one has been a long time in the making: I started last year with some married wings but it went on and off for a while and I didn’t have material that I needed for this pattern. I still don’t have everything I would like to have: the wing should have some GP/Bustard/Mottled turkey, a good JC and horns. But: step by step I’ll add more to this pattern, this time it was all about getting the 18 strands of wing to stay together and tie them in without the fibers going in every direction, and I did! Next time I’ll increase the wing to 21/24 strands and manage to tie that in properly, but I don’t mind doing more variants on this pattern (as long as I get some more silk gut soon….).

There are some adjustments on this (there always is!), but the parts I’m happy with on this fly: the GP that meets up in the back, the GP underwing that aligns (and the fact that I figured out how to do it), the fact that the wing stayed in one place when I tied it in (“Tying the classic salmon fly” helped me out there) and the mallard duck roof.

I’m also quite happy with the start of the fly: the silk was nice and (almost) even, together with the tinsel it was a good starting point:

2014.11.25.dryfly.me.gh_tail

The underbody of white UNI-Floss before I started to add silk and seals fur. This makes for a better profile on the final fly:

2014.11.25.dryfly.me.gh_body

Up until this point the fly is flowing nicely: the hackle could be better and the yellow throat should be thicker:

2014.11.25.dryfly.me.gh_body_done

The colors of the green highlander is what pulled me in the first time:

2014.11.25.dryfly.me.gh_close

Rear-view of the green highlander:

2014.11.25.dryfly.me.gh_rear

The topping is forming a nice veil on top of the fly and packs it in:

2014.11.25.dryfly.me.gh_front


If I were to save one fly I have ever created it must be this! I know that if I come back to this in a couple of years time I will find a lot of things to point out, but this is the process: tie up, learn, repeat. And for me part of that process is to put these patterns out here, together with a macro shot that shows all the little flaws it have, but that is one of the things that drive me to become better!

To give you a idea of how big this fly is:

OLYMPUS DIGITAL CAMERA

First Rod Build

dryfly.me.2014.03.17.rod_whole

Blank: RDP 7’6″ #0
Reel Seat: RDP
Handle: Self-turned
Guides: RDP Single foot
Thread: Kimono Silk Thread #100 Japanese Silk Color: 304 (yellow) & 355 (green)
Color Preserver: Flex Coat
Finish: Flex Coat Lite

This winter I have had a couple of projects going: first of all it has been experimenting with different styles of flies to get a grasp of different techniques. The other one is this: building my first rod. I got a couple of blank kits from RDP Flyrods before christmas, one #2 that I gave away for christmas, and this one: a 7’6″ #0 for myself.

Building this #0 has been a interesting journey: it is like starting tying your first fly all over again – you swear, break the thread, get finish all over the place and the epoxy is pouring out places you didn’t even consider…. But I got it together in the end and for a first attempt I’m happy with how the rod looks, I haven’t tested it yet (the snow has been packed here), so I don’t know how it will behave. I have a #1 DT line that matches good up with my Sage TXL-F #1 that I will put on this. This will be a rod for those small streams that house tiny trout and you have to break out size 7 tippet.

dryfly.me.2014.03.17.rod_backThe handle was turned in-hand without any rack where I could get a stable rotation, so it isn’t as even as I would have wanted it to be. I did, however, make the form of it to fit my hand, and I wanted to test out a different handle than the rest of my rods. The next phase here is to take it out fishing, then see how it behaves and maybe strip it of the rod and turn a new one based on experience. I should also note that the quality of the cork wasn’t top notch, so I will get some better for my next build.

dryfly.me.2014.03.17.rod_footI don’t have many colors for wrapping the rod, but I think the yellow/green combination came out good on the red/brown blank. You can see that the finish is not half-bad on the thread, but I managed to get some on the blank that shouldn’t have been there (often you don’t notice stuff like this until you break out the macro lense)

dryfly.me.2014.03.17.rod_endsI have some practicing on getting the thread all the way to the end (this part I had to re-do 3 times because the thread came off)

Here a close-up without the finish applied:

dryfly.me.2014.03.17.rod_thread_without_finishNot too bad, I think, but for my next build I will focus more on getting the wraps to sit better

dryfly.me.2014.03.17.rod_preserverThe color preserver & finish that I used on the thread: the thread didn’t loose any  color and the lite flex-coat made for really good coatings.

dryfly.me.2014.03.17.rod_finish

My next project now is from The Anglers Roost where I have ordered a 12ft #3/4 rod that I will build as a trout spey with double handle. Will post more about that later.