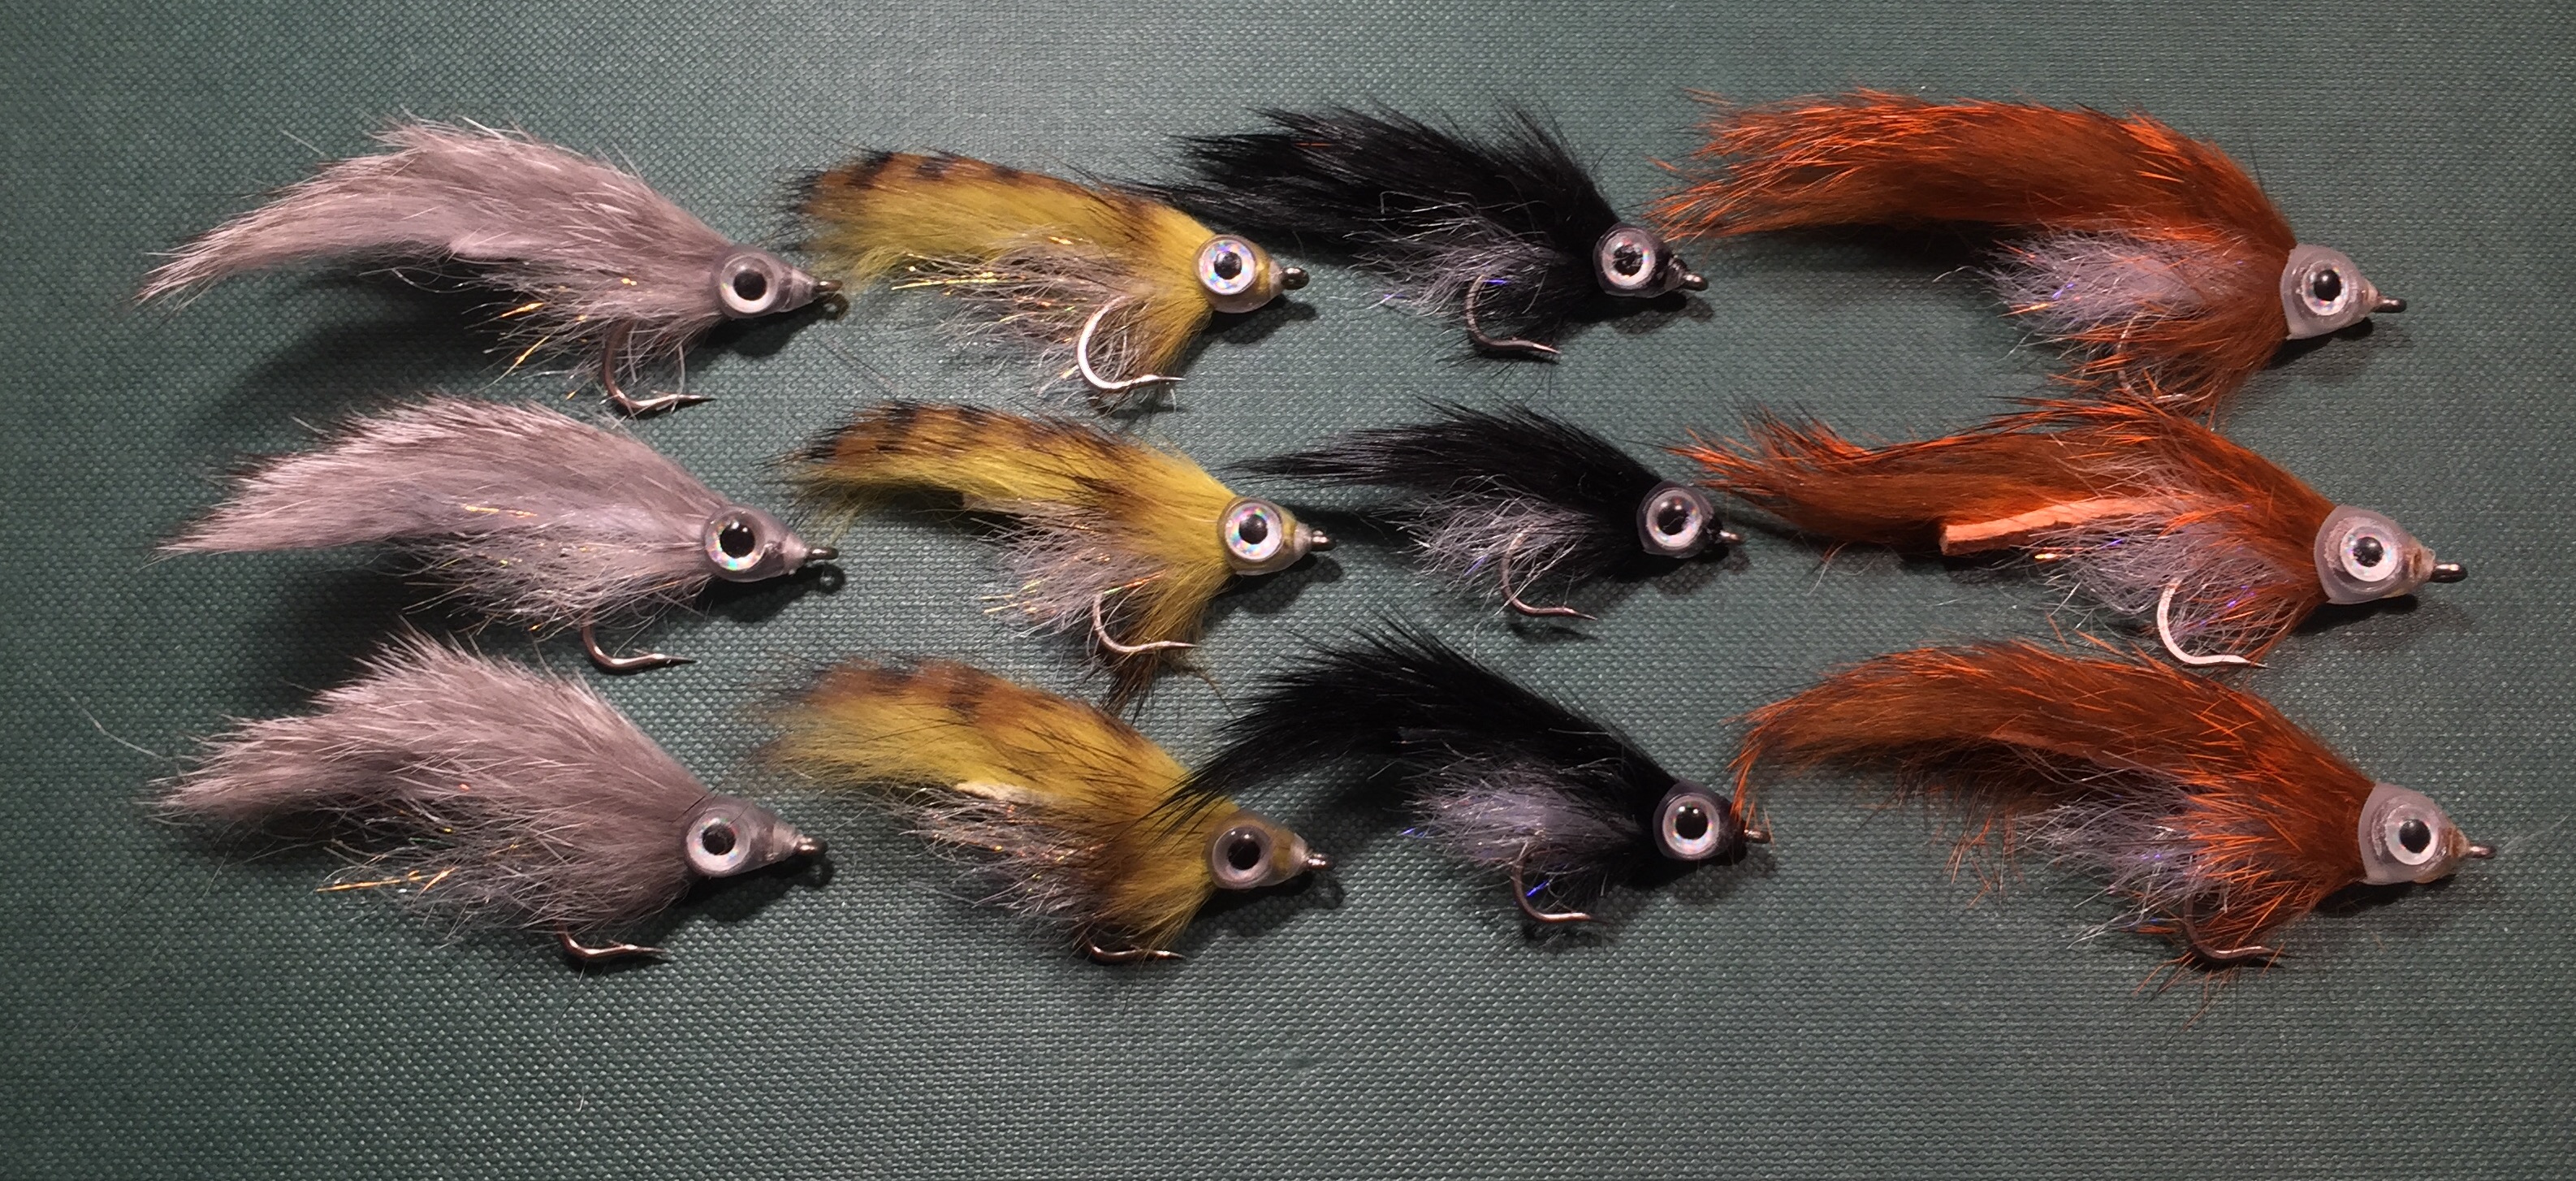
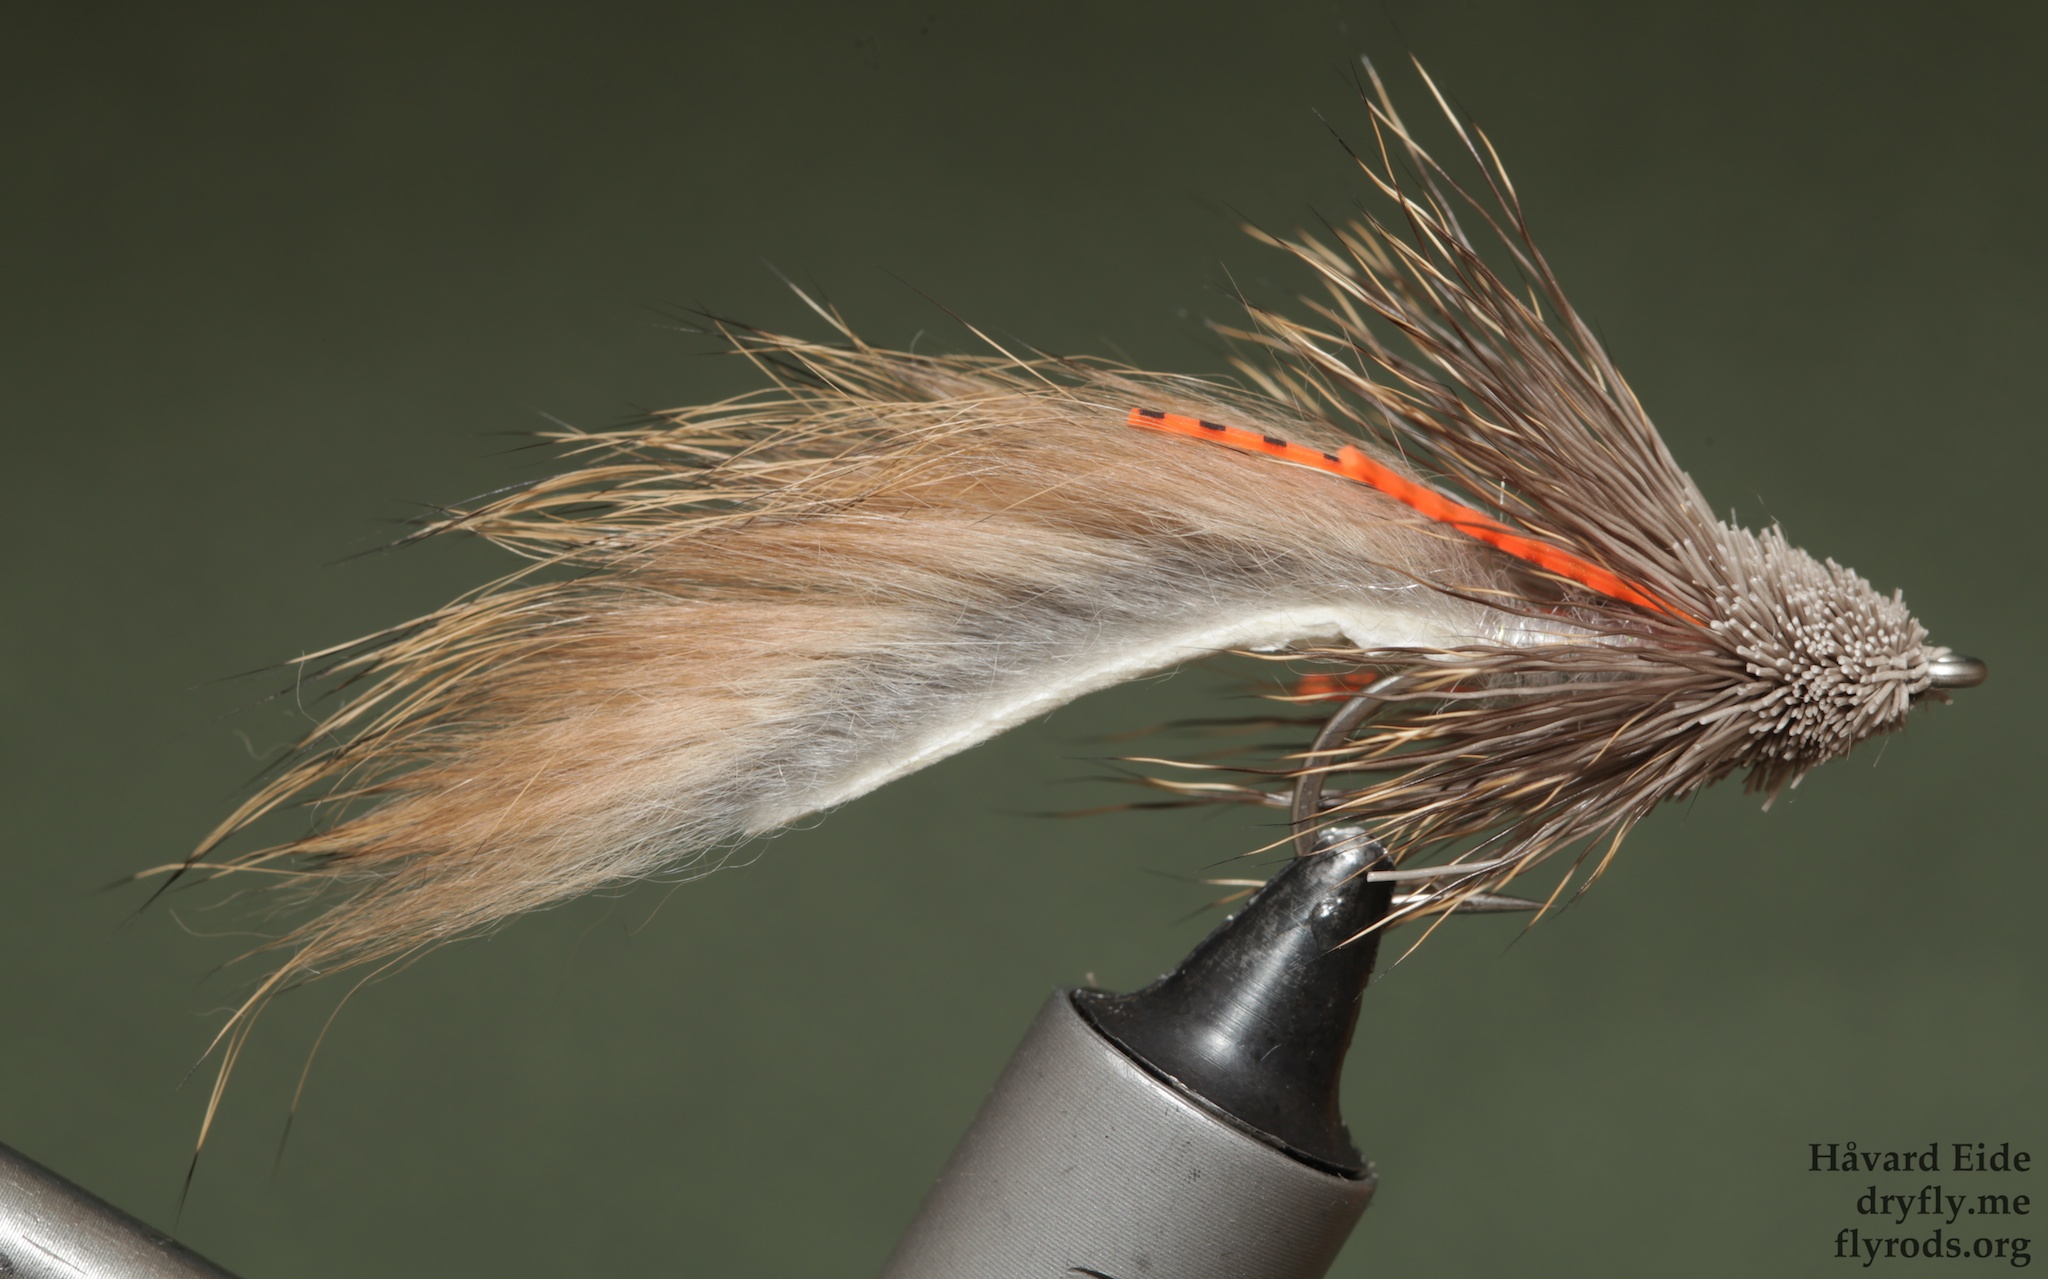
Zonkers on Partridge Sea Prince #2 & #4, a quick tie that will work well both after browns and sea-run trout.
Spent some time over the weekend to tie up some seatrout patterns. The shrimp patterns are new for me, I just got a whiting spey salmon neck the other day, so I’m looking forward to testing that out.
And: follow this space for some interesting news in the next week or so……
Pattegrisen:
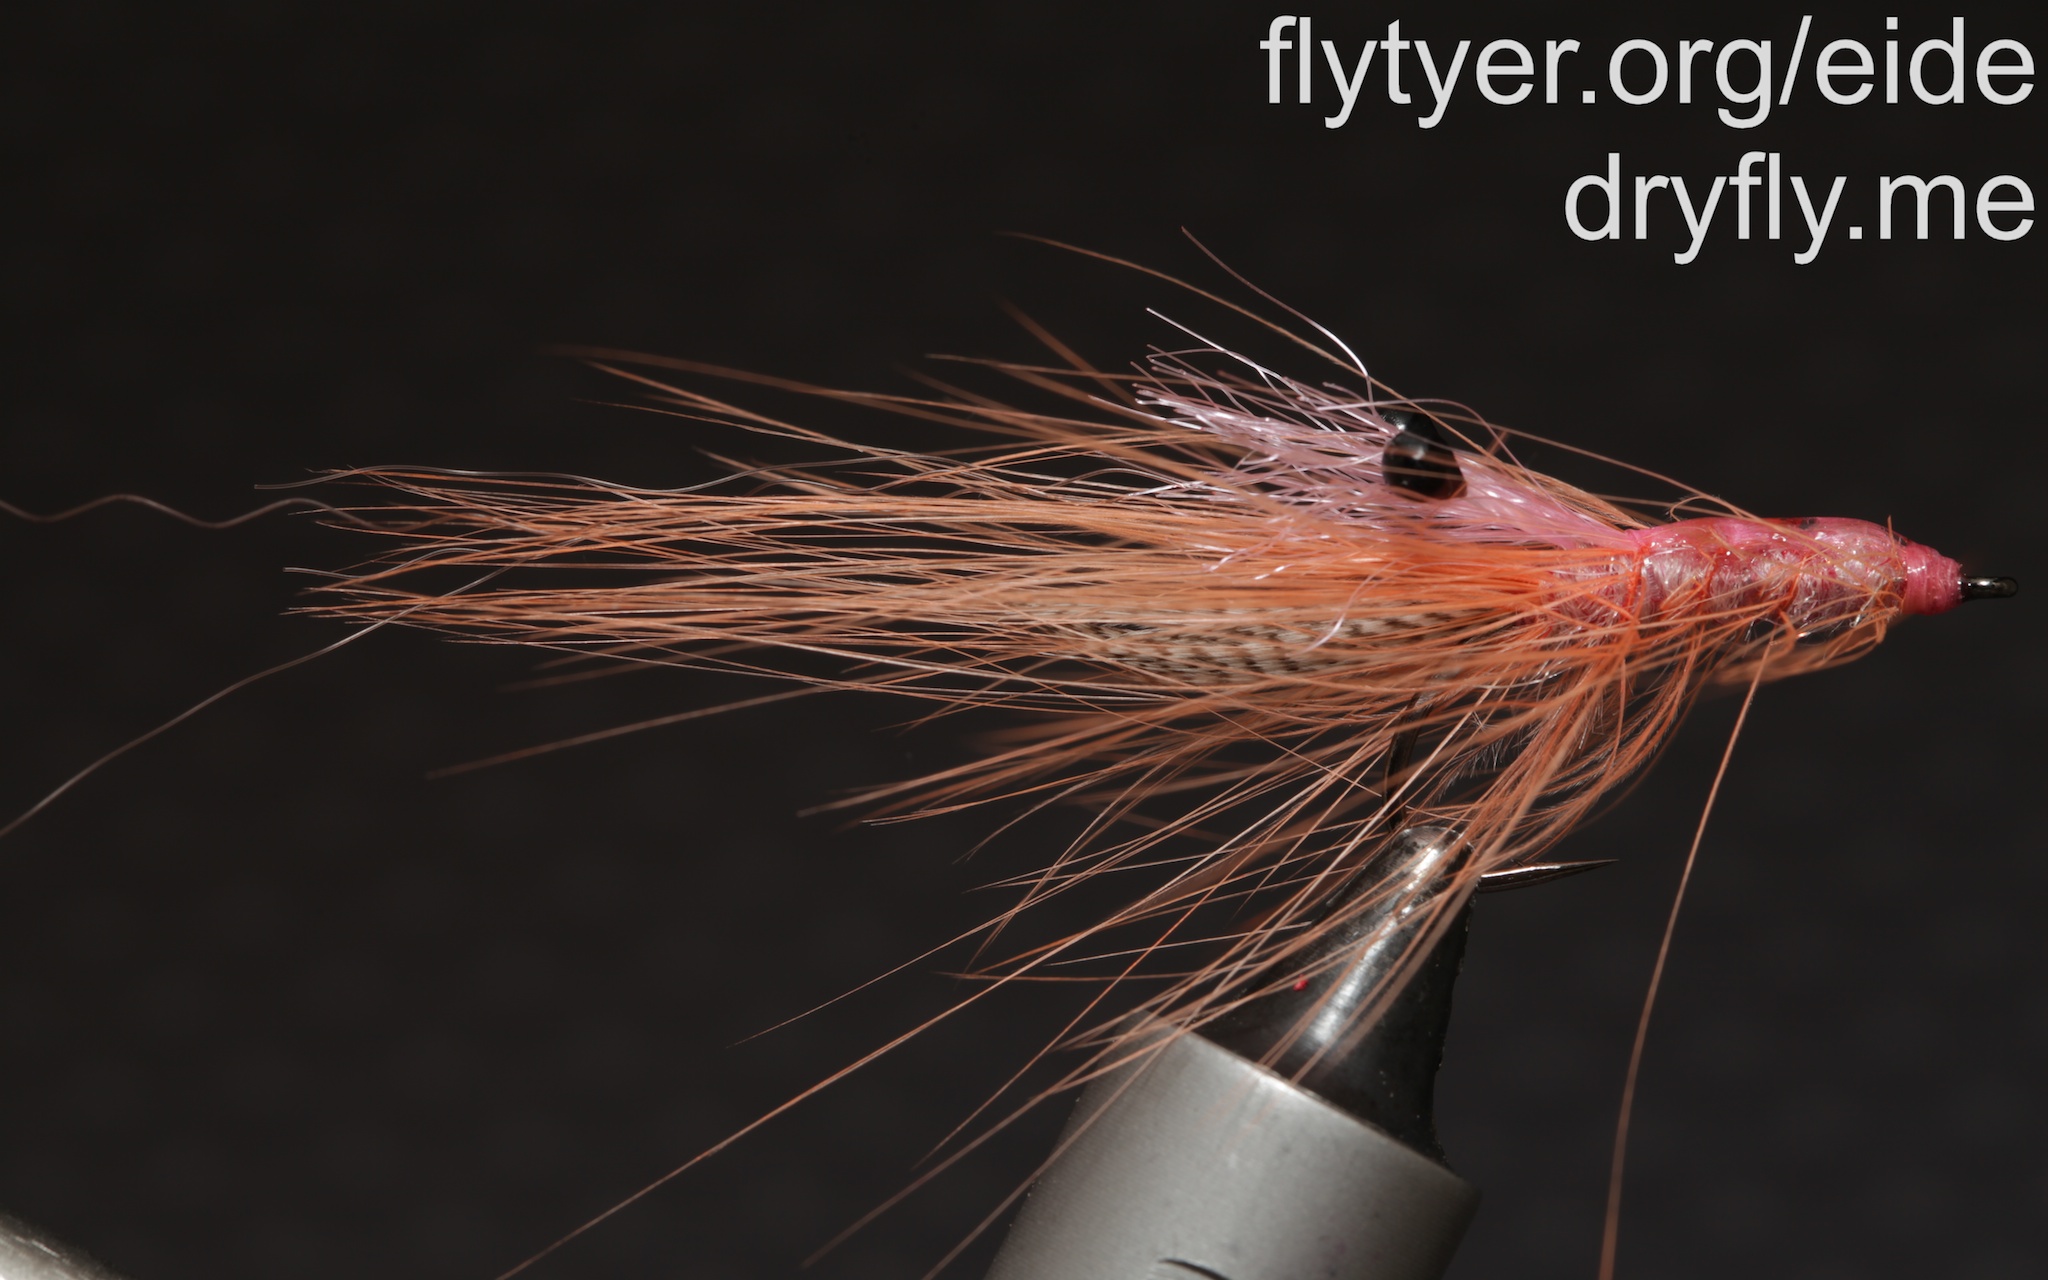
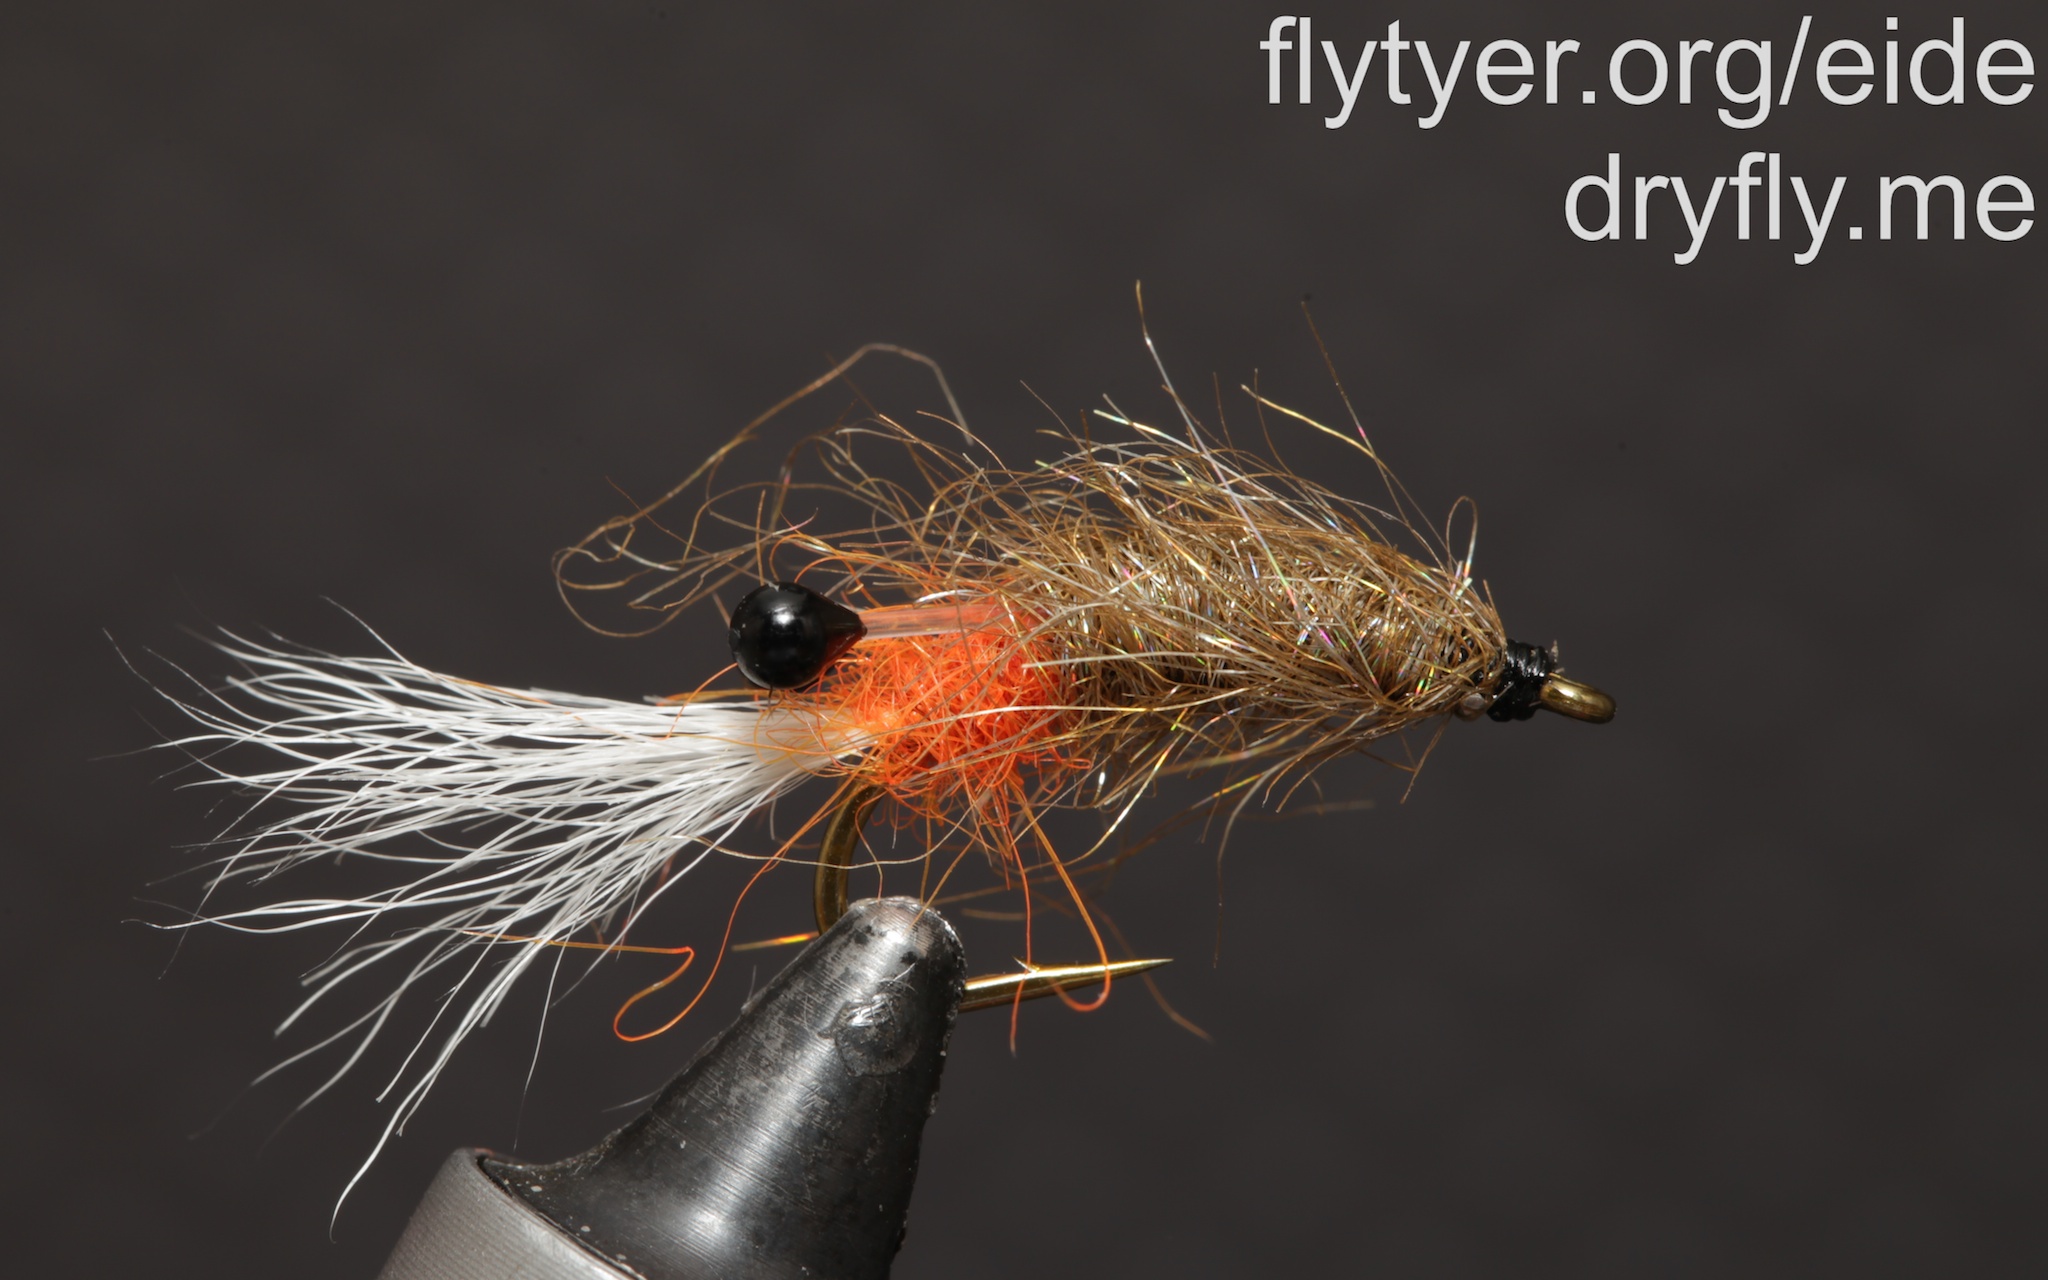
Shrimp:

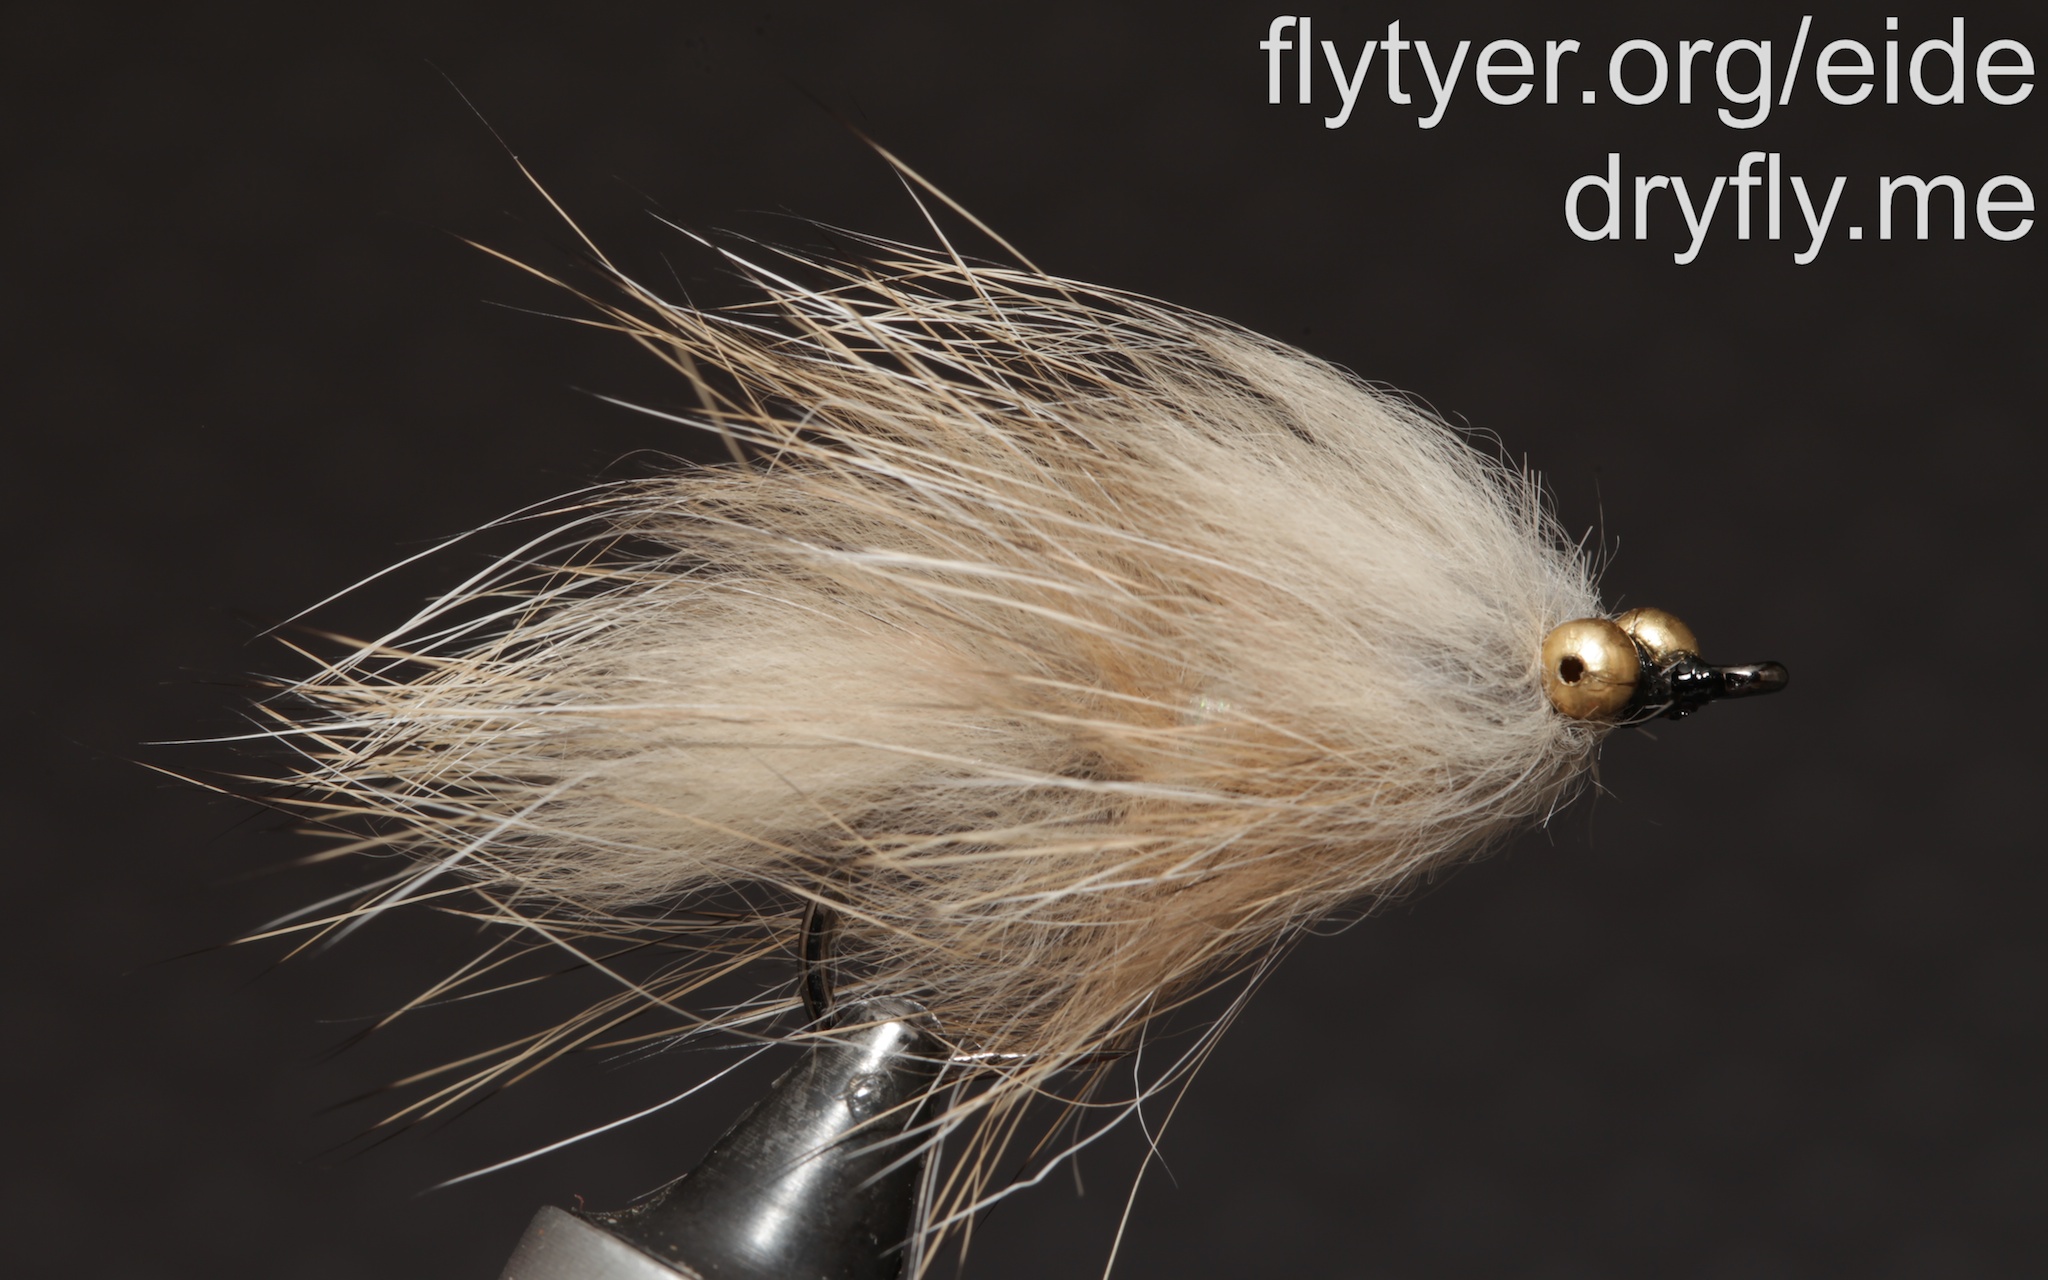
Vaskebjørn:
Rusty Magnus:
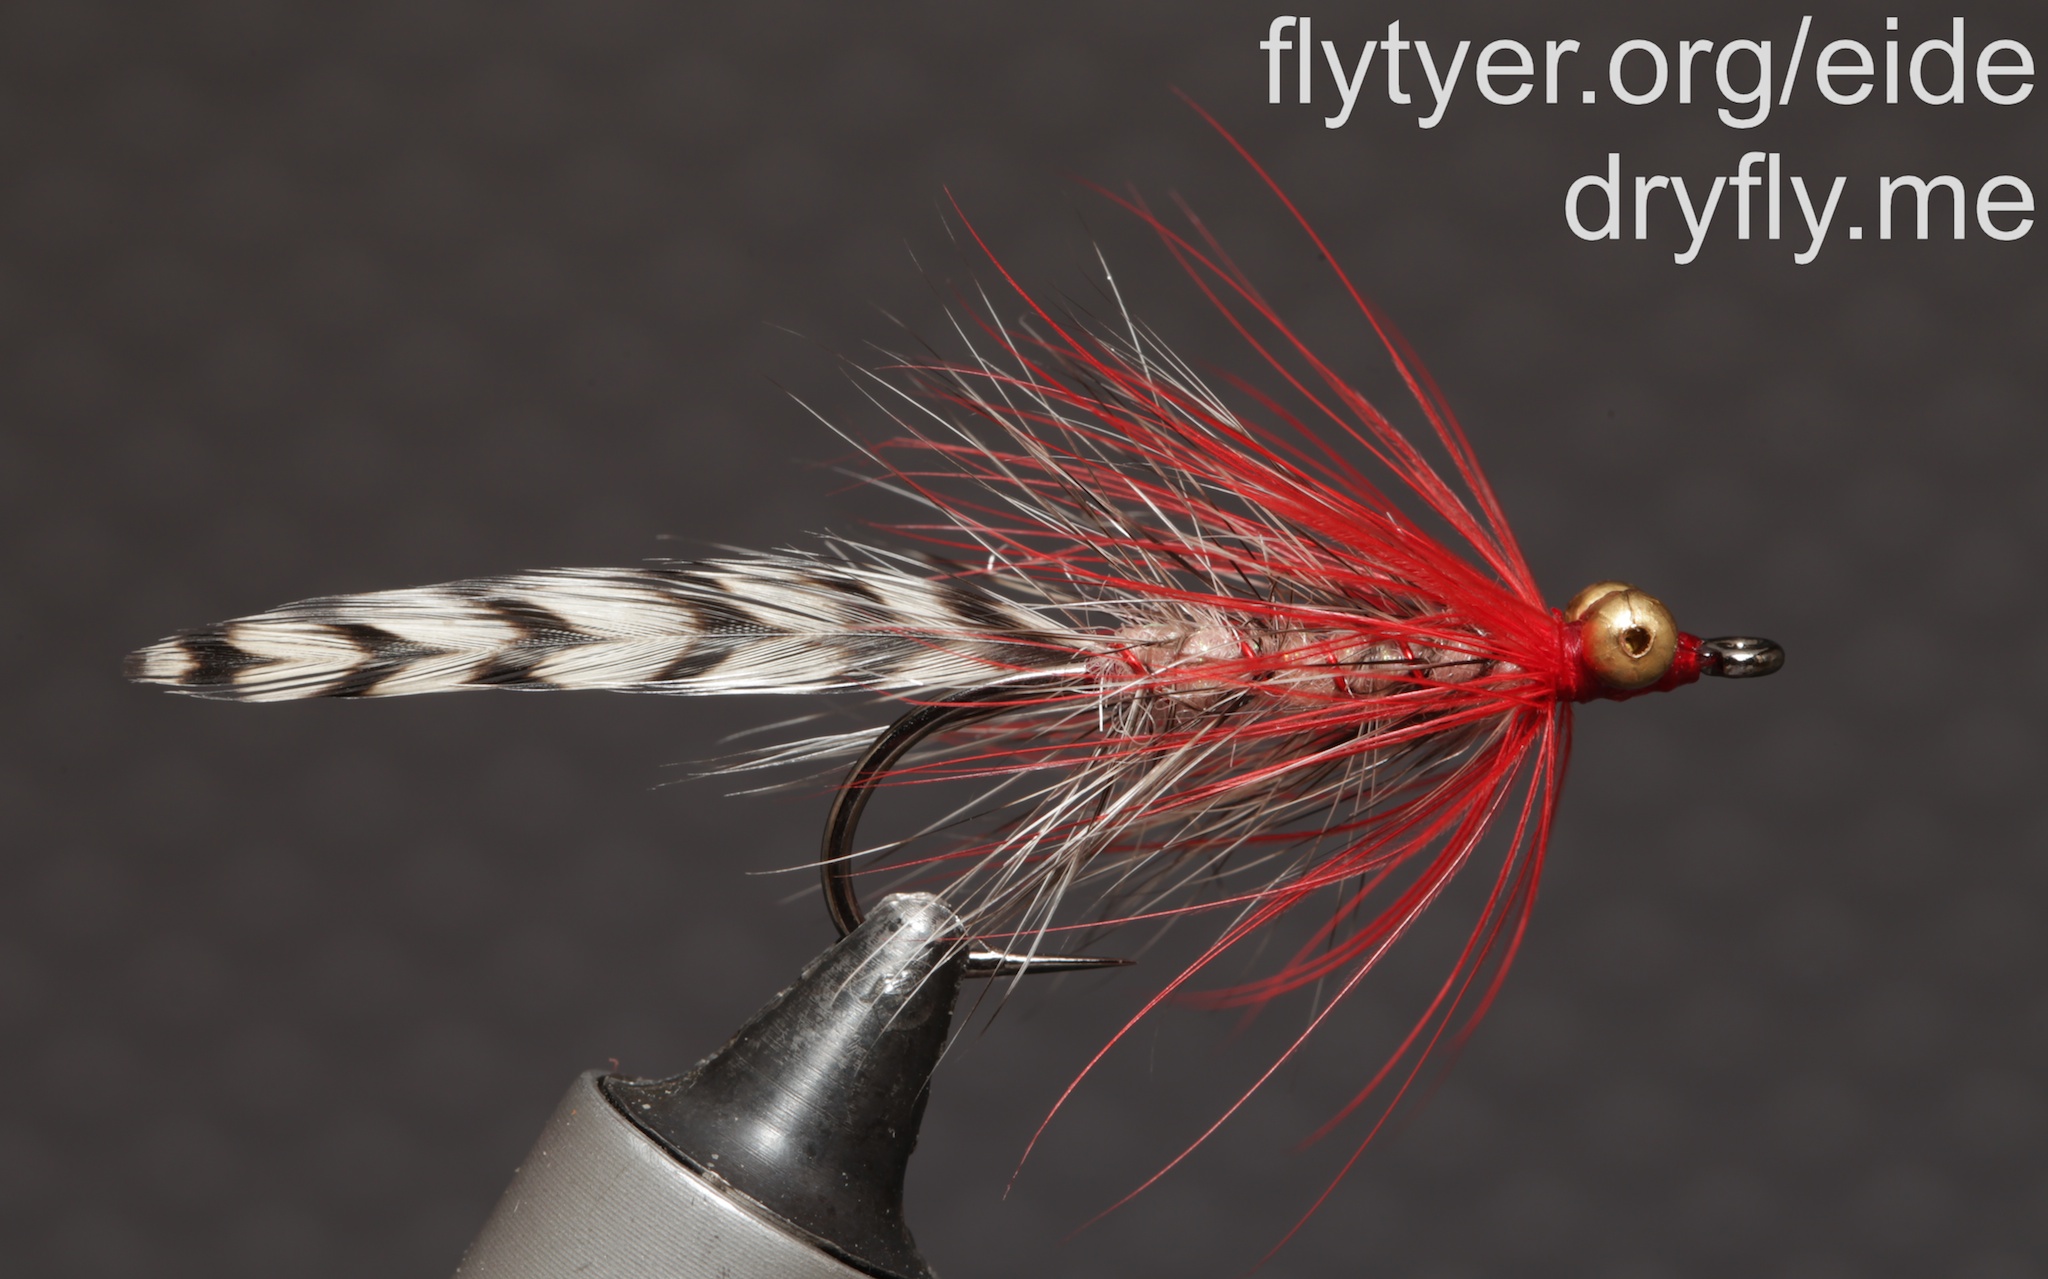
Polar Magnus:
Holo Loppa:
Rabbit Kutling:
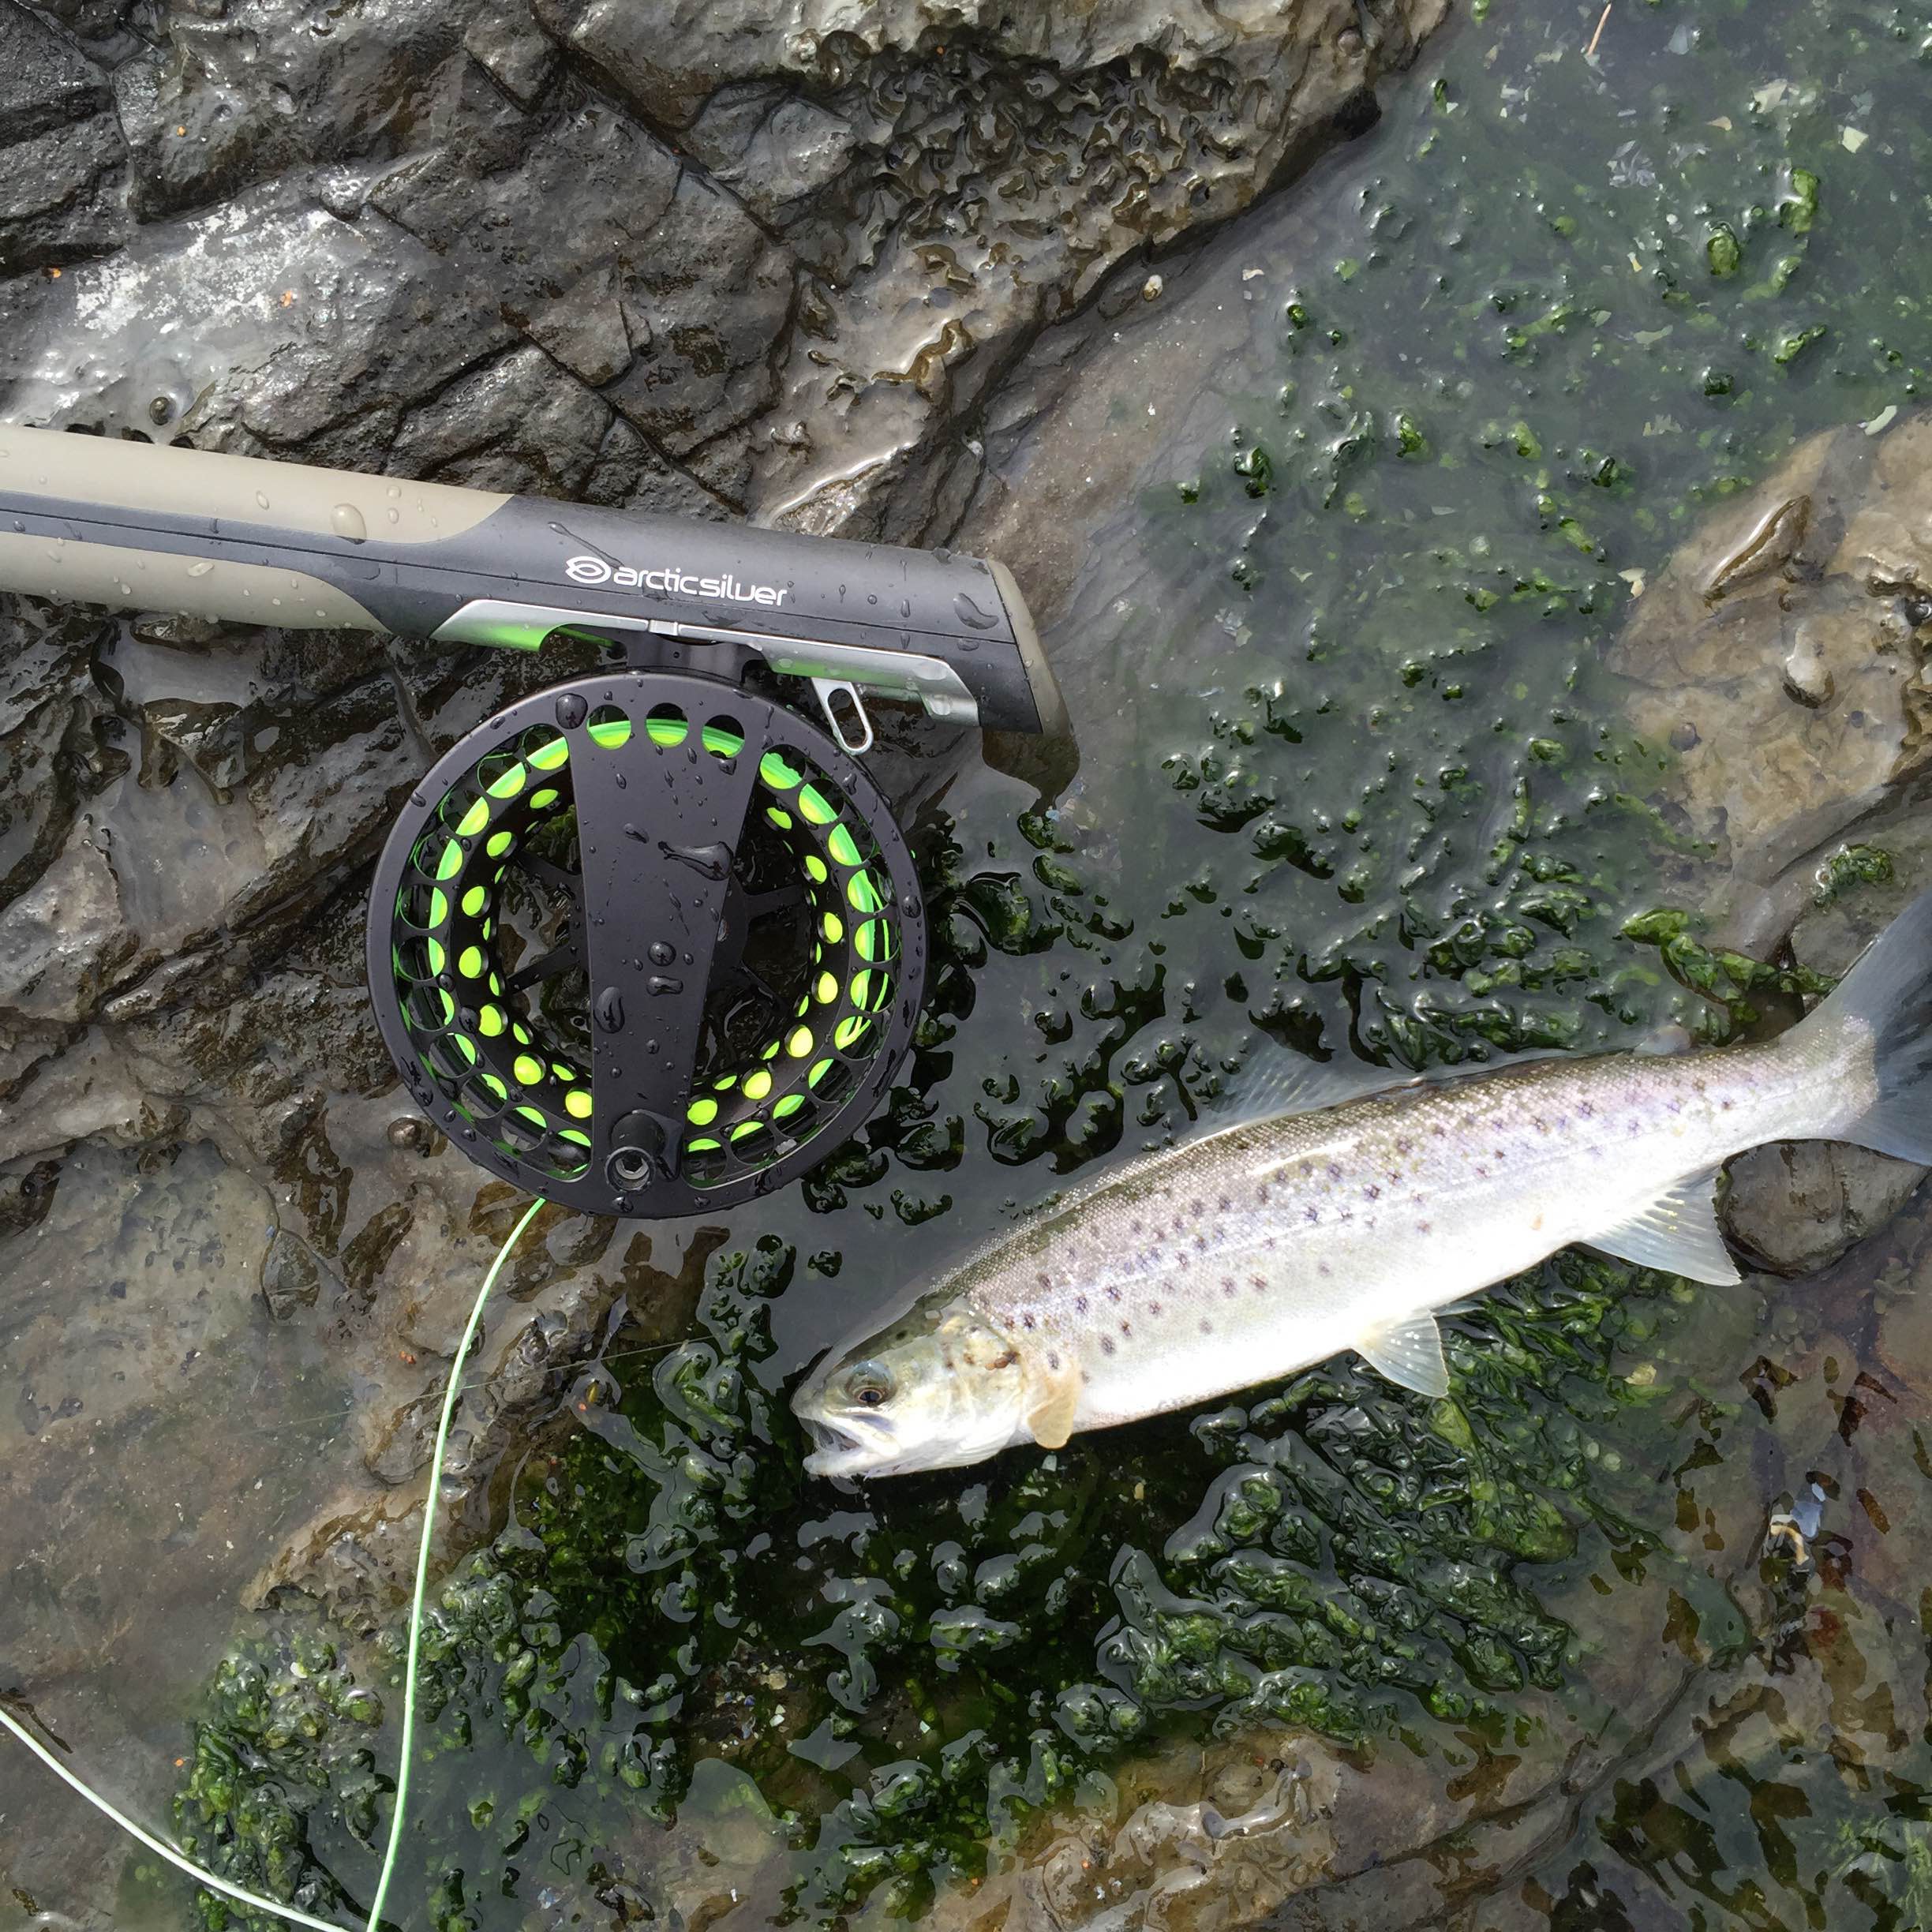
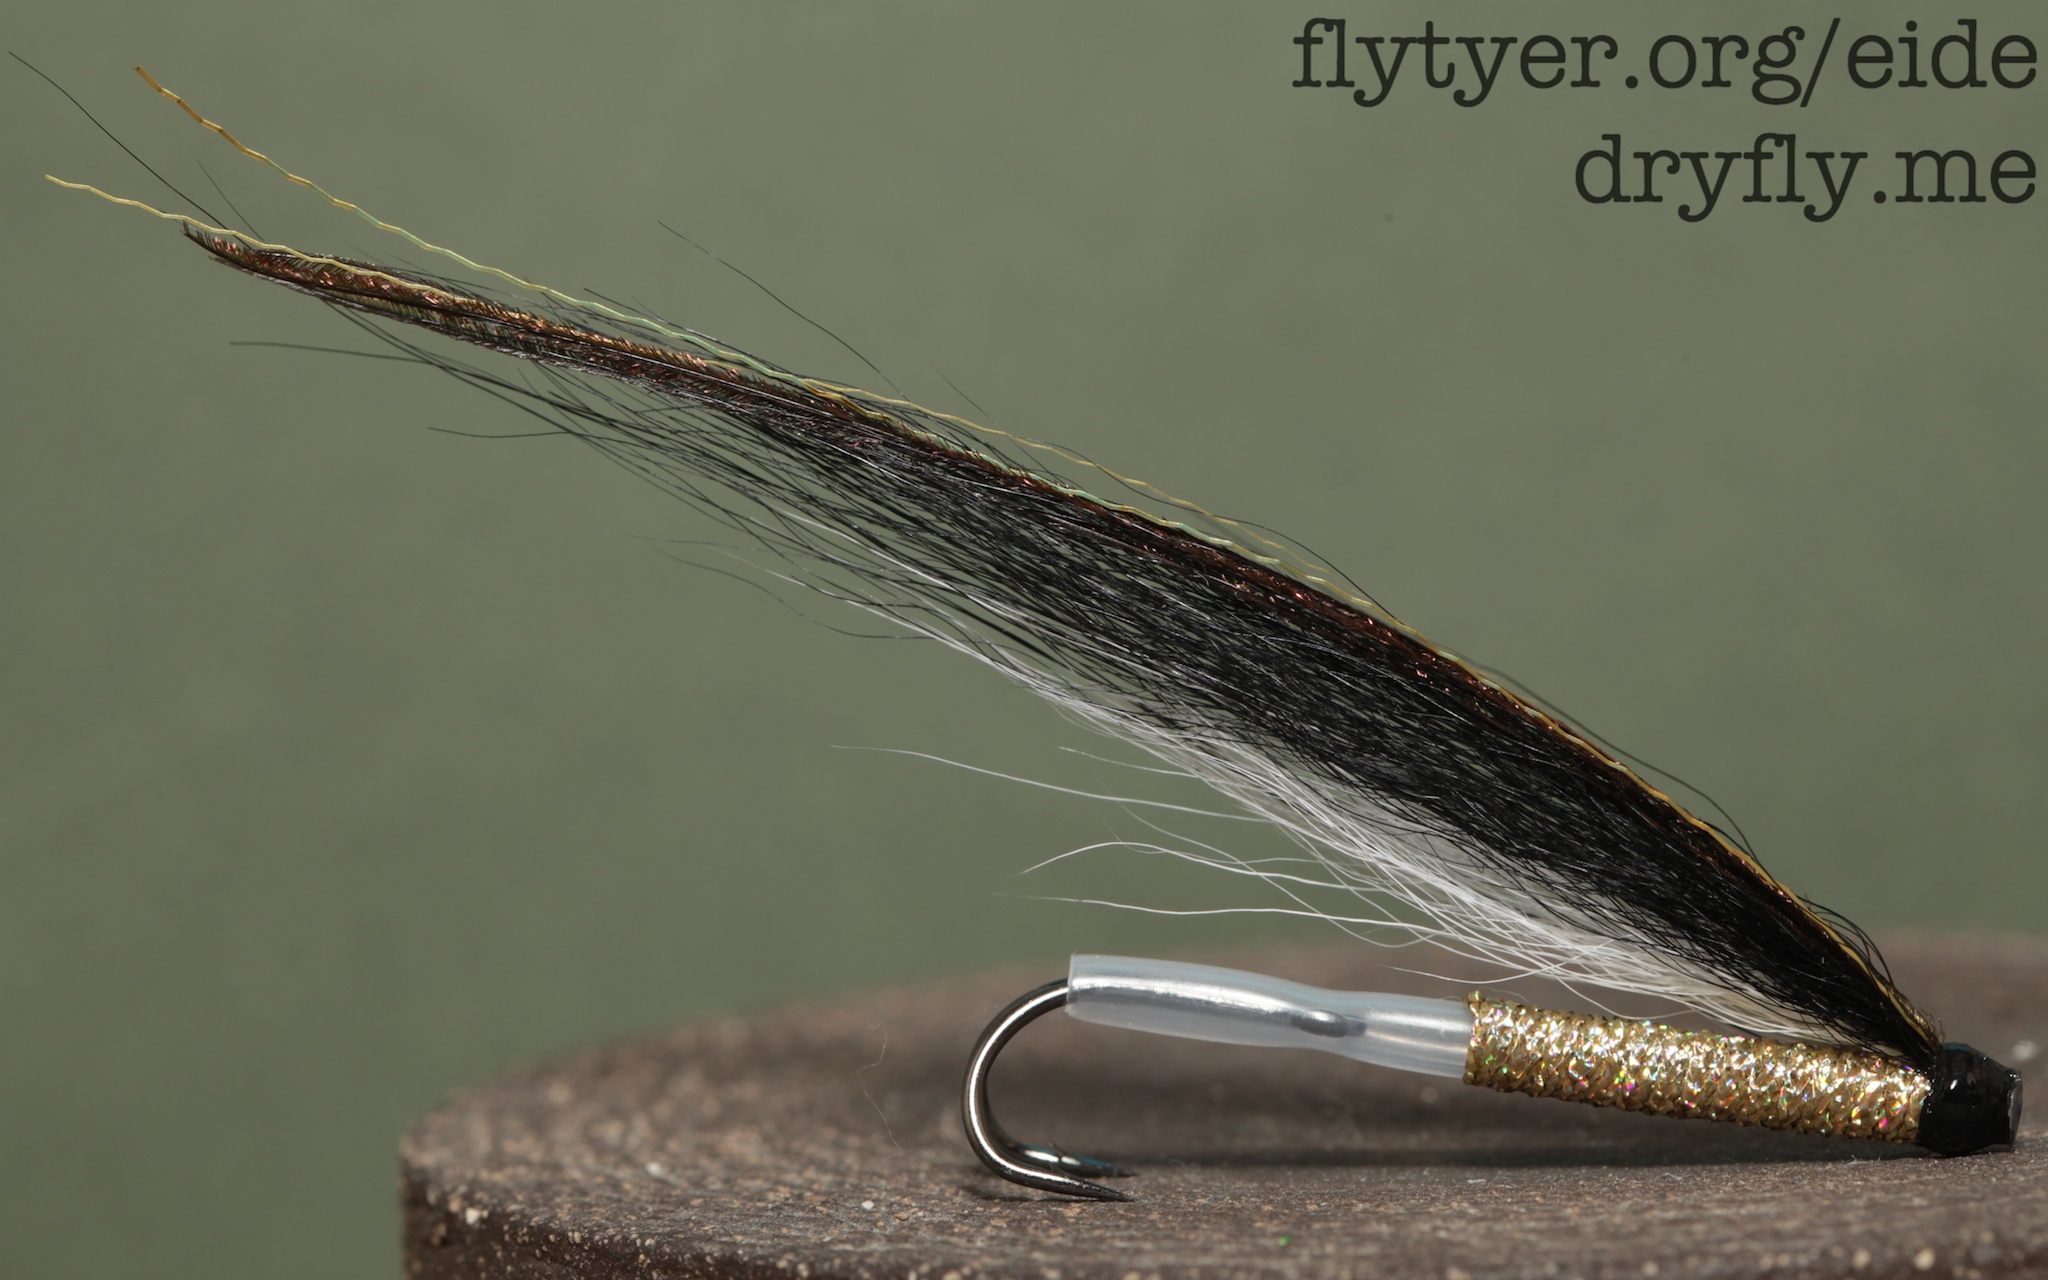
The summer is close to over, and because of a injury I haven’t had many possibilities to go fishing. Add to that: I managed to break a ring on my Arctic Silver 10ft #7 earlier this summer…. But: yesterday the spare part came and today I went out for a quick trip, just to get some time by the sea.
When I came out to my spot I saw lots of small fish jumping clear of the water, showing clear signs of being chased by something! I tied up some sunray shadows earlier, some variants with gold and silver bodies, so when I saw the small fish I tied on one of those and started pulling in as quickly as I could. On the third throw I had a follower all the way in – 1m from shore I saw it, but it turned and I got that bubble of water…
For a while it was quiet, but I kept at the spot and 10min later I was pulling in quickly again, and this time it hit in the surface – the sunray was maybe 10cm under the surface, so I got a big splash out of it, then it came back and turned quickly just below the surface right next to the fly, leaving that bubble of water showing where it went!
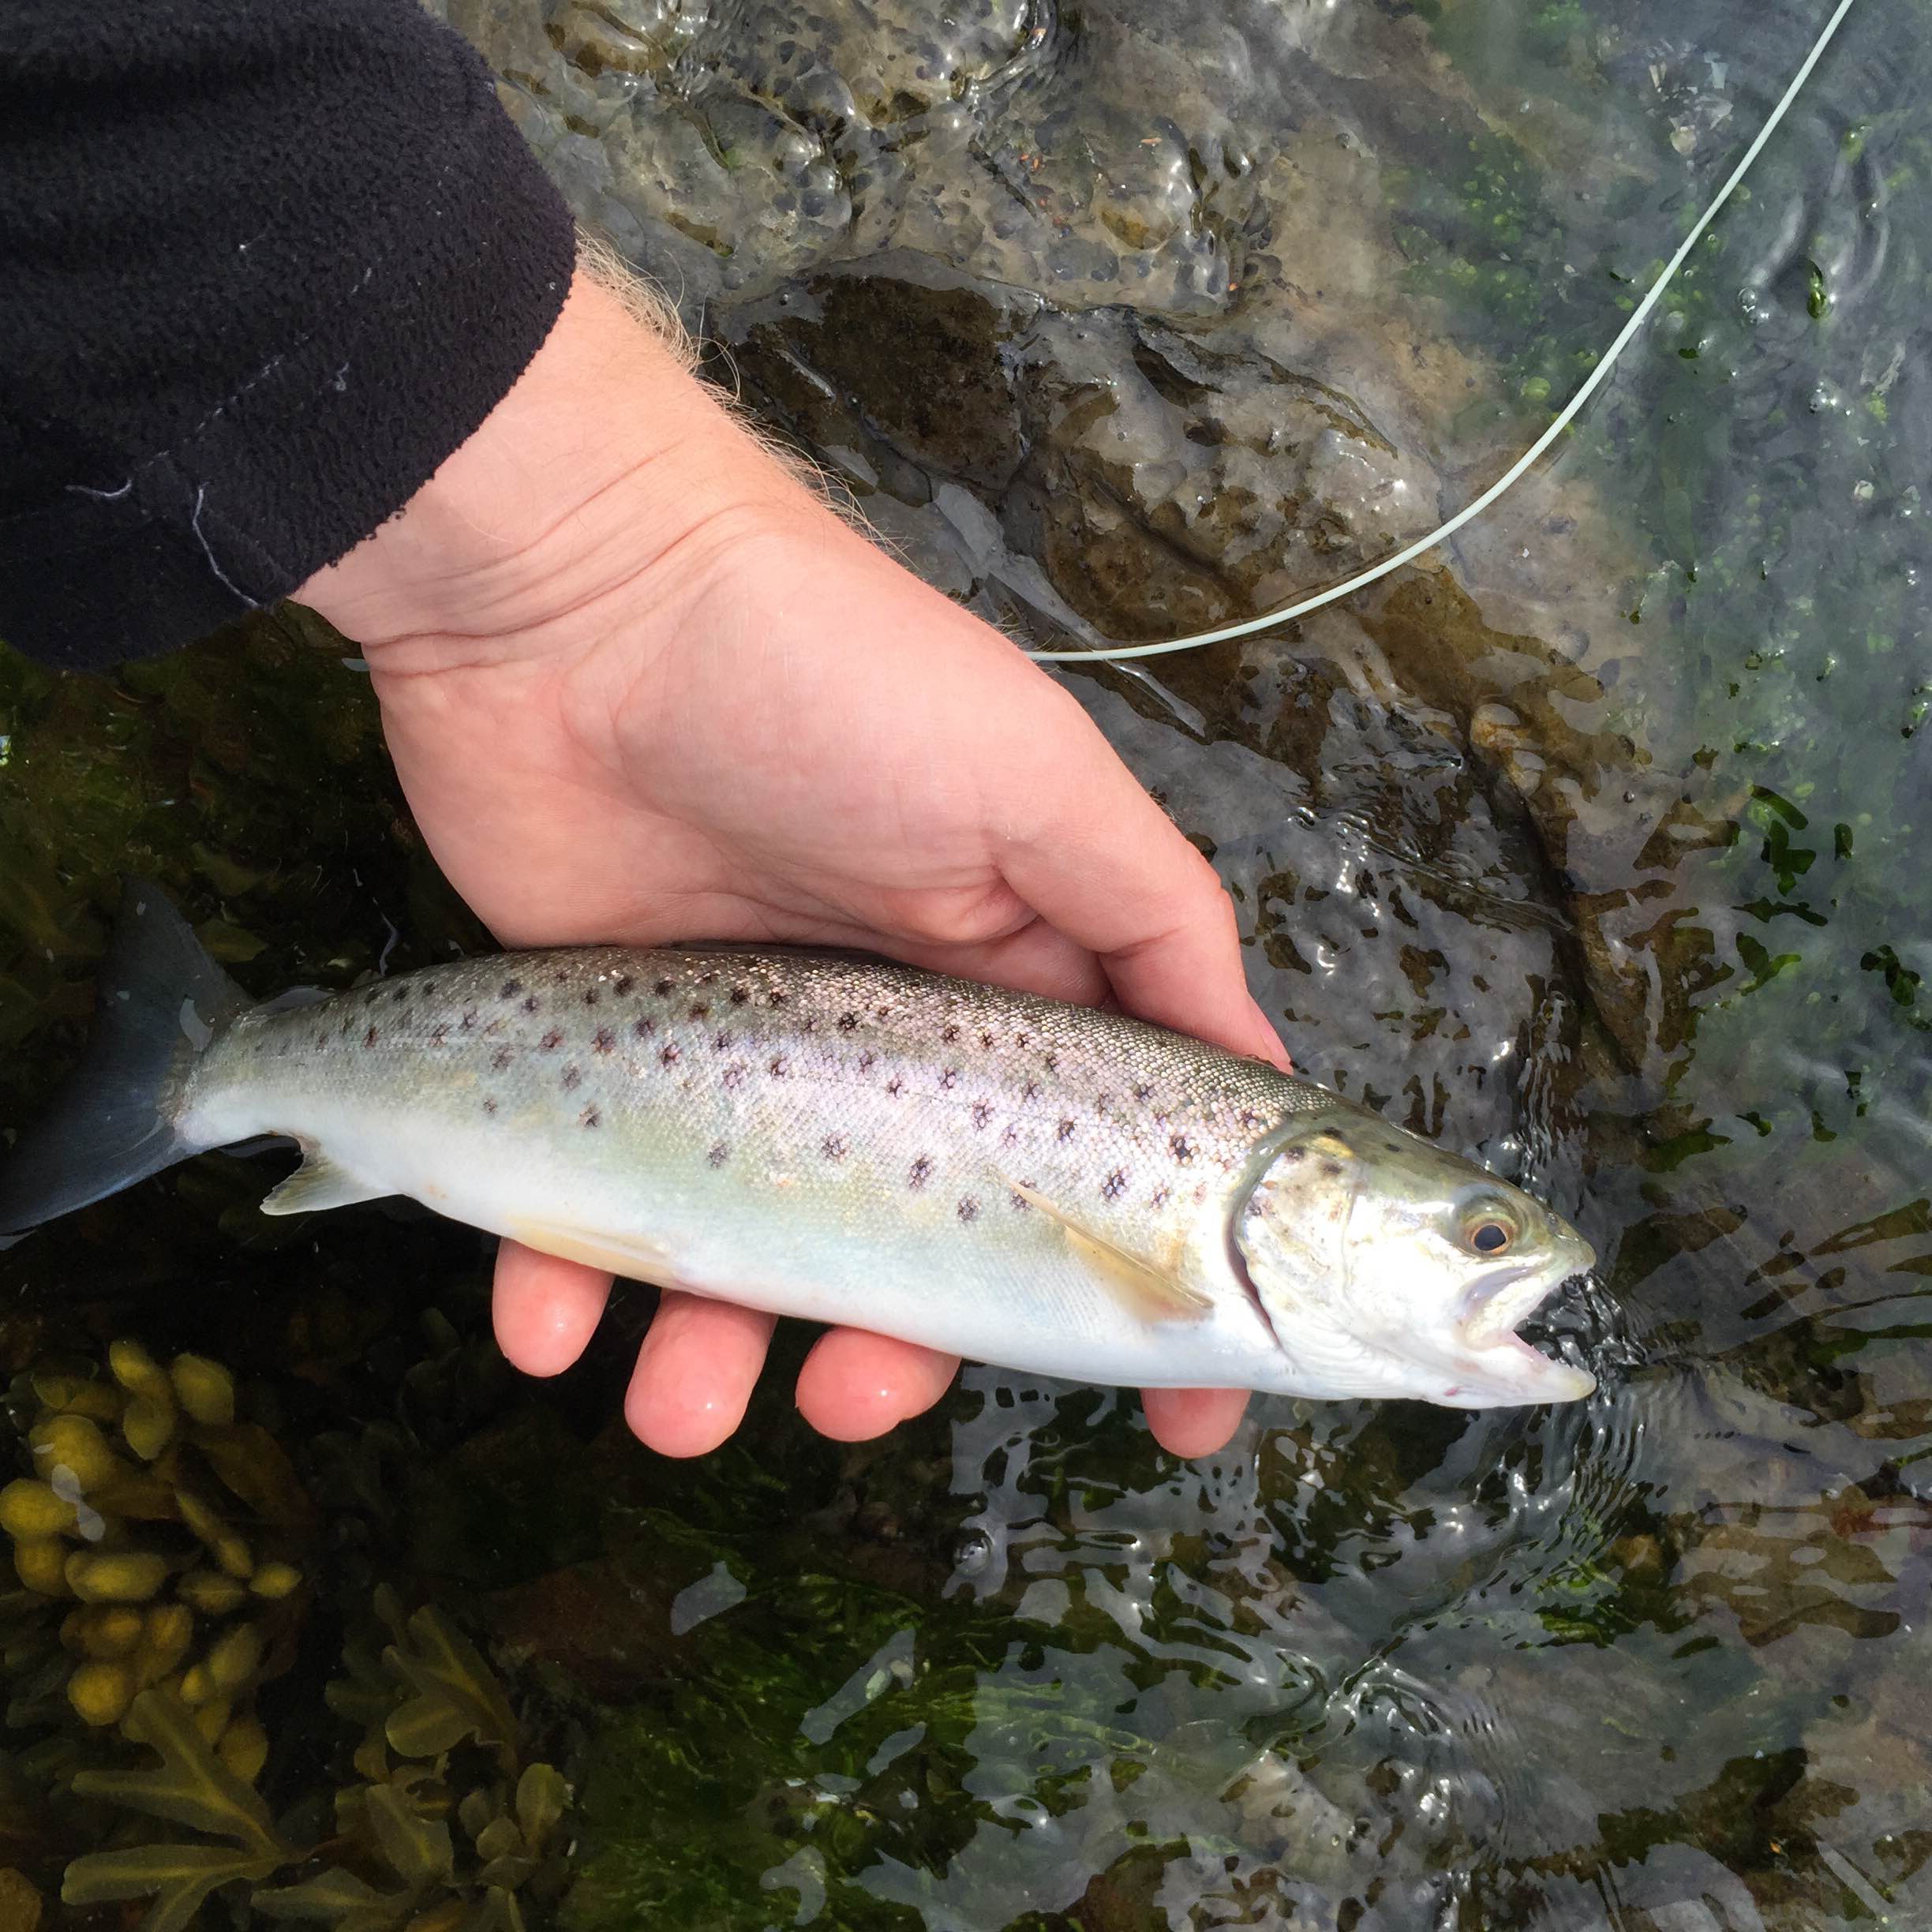
It died down a bit around then, I tried on some different flies, had some lunch and relaxed. The sunray is a great pattern for both river and lake, and I put it back on again after a while – dragged it over the same area as before, and not until I pulled in as quick I could I got another hit, this time a smaller one, but I landed it. A very small seatrout that didn’t put much bend in my 10ft #7 rod, but it was there, and it swims on:
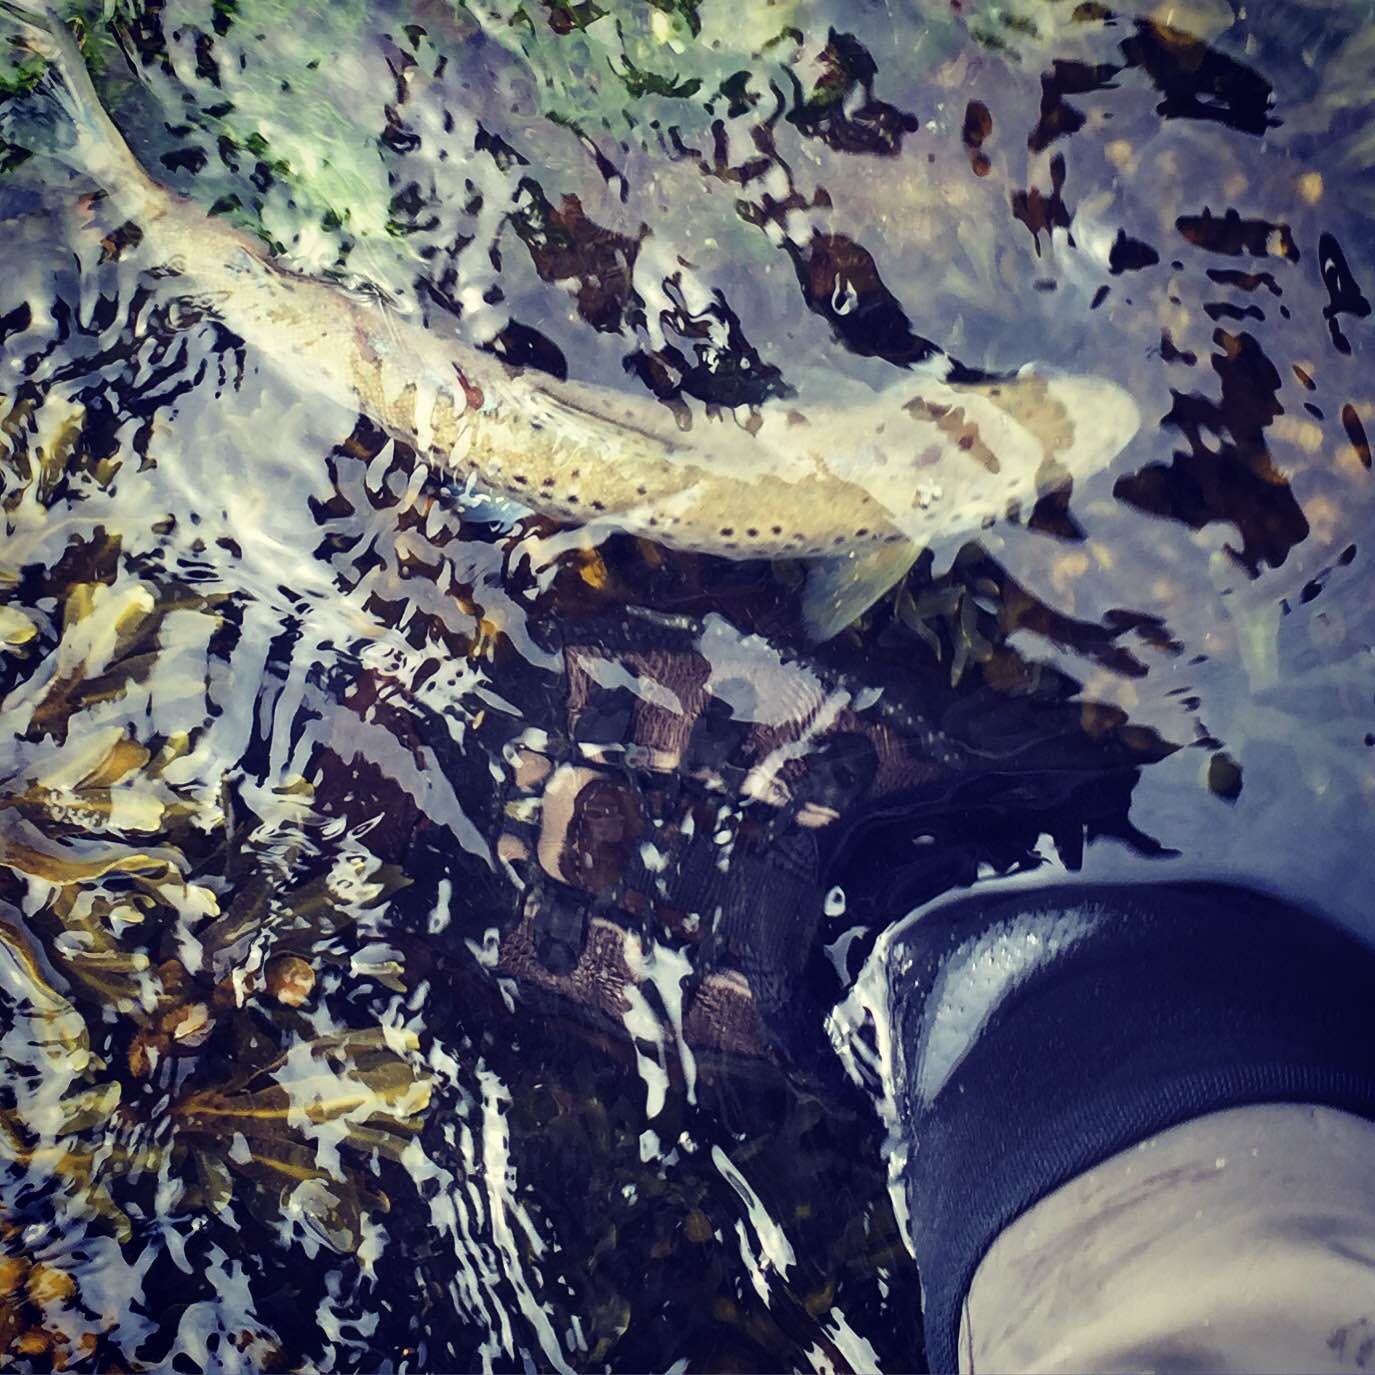 A good day by the sea, now I’m waiting for the trip up north in a couple of weeks!
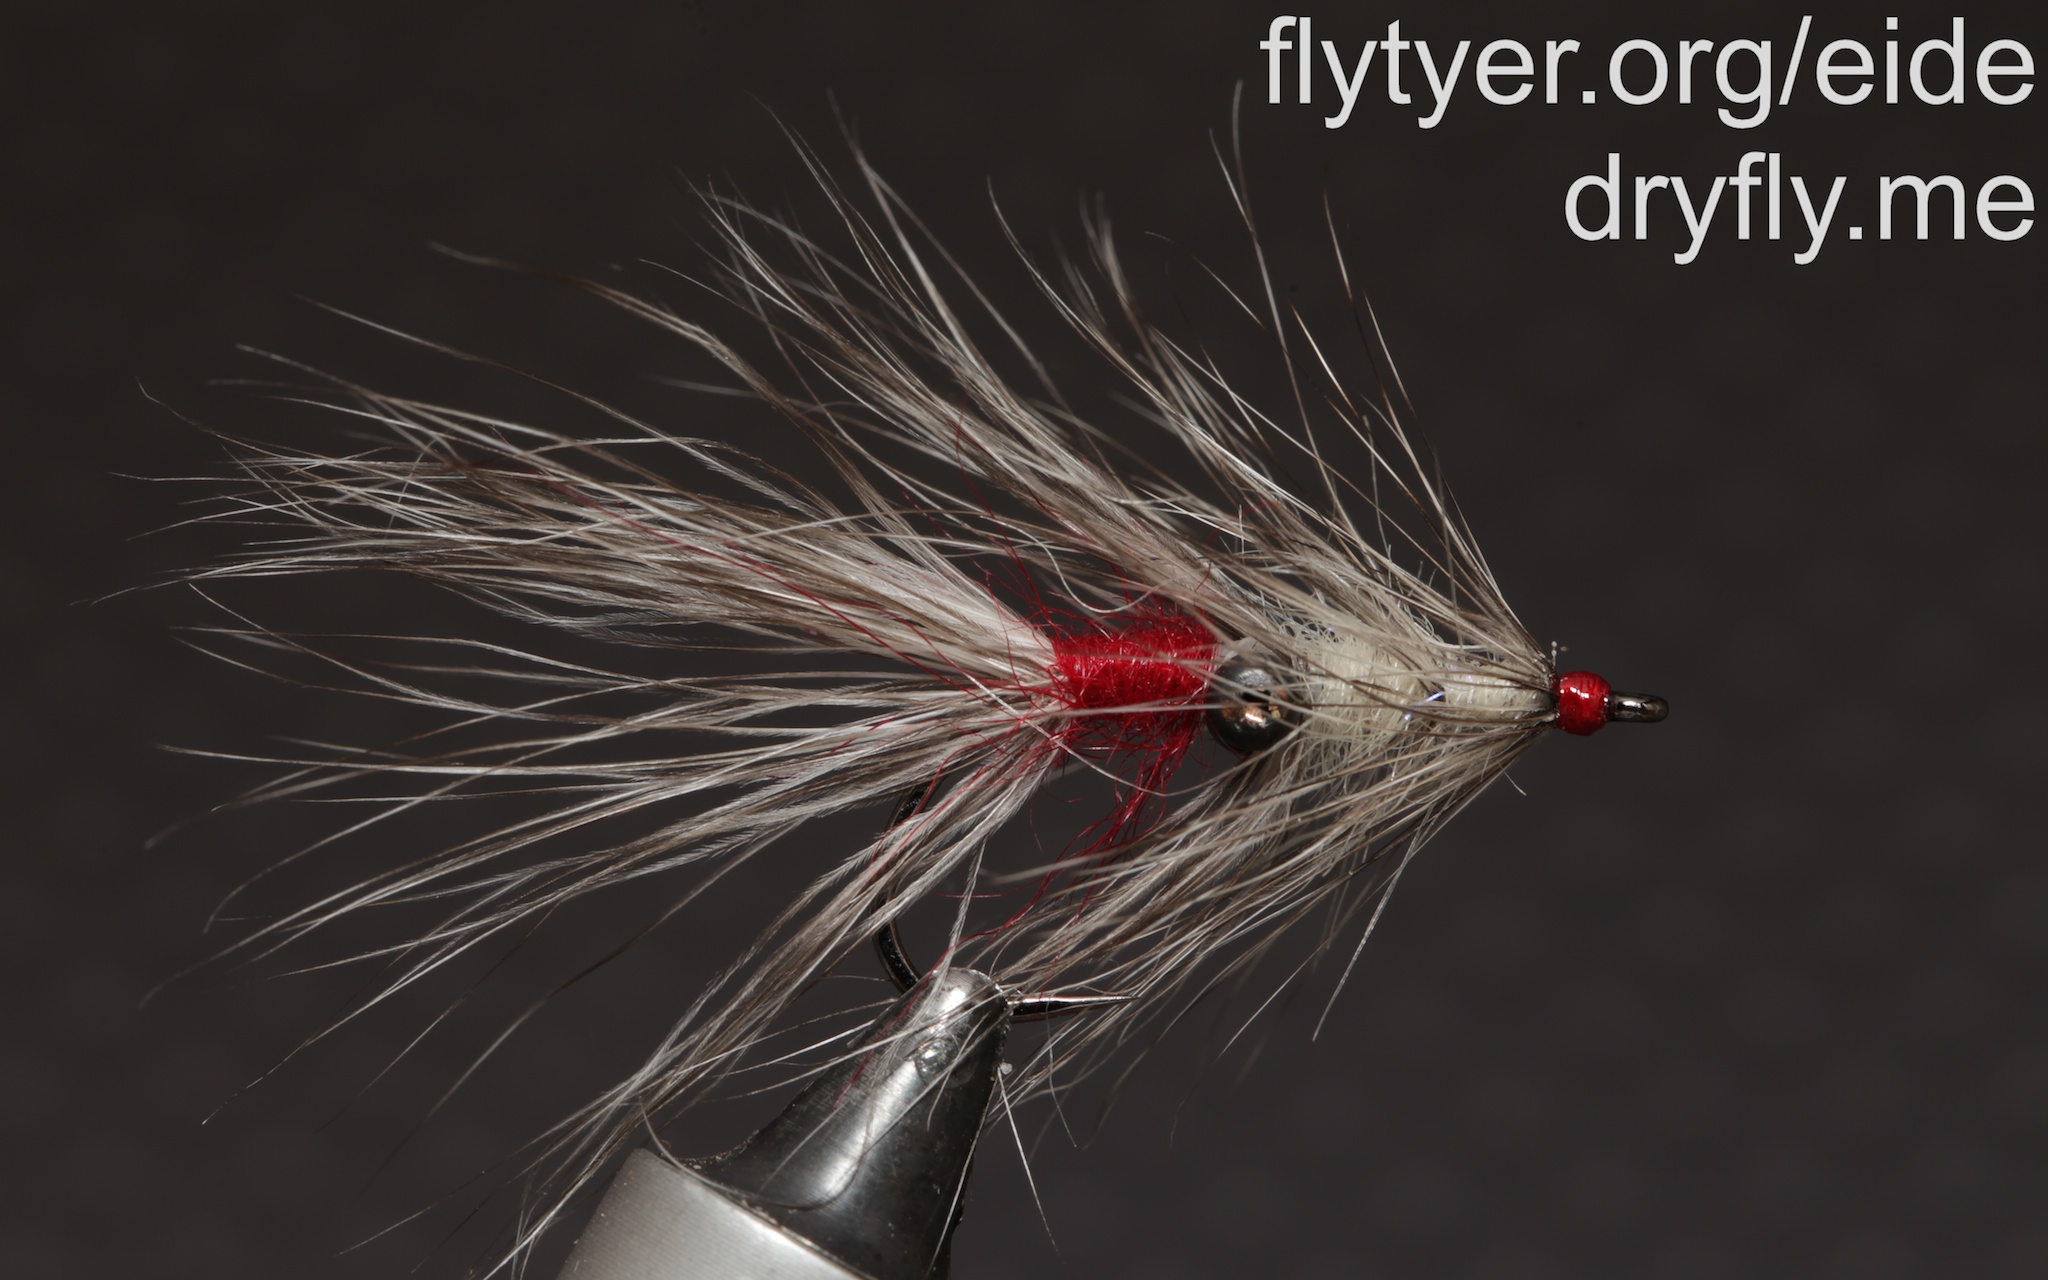
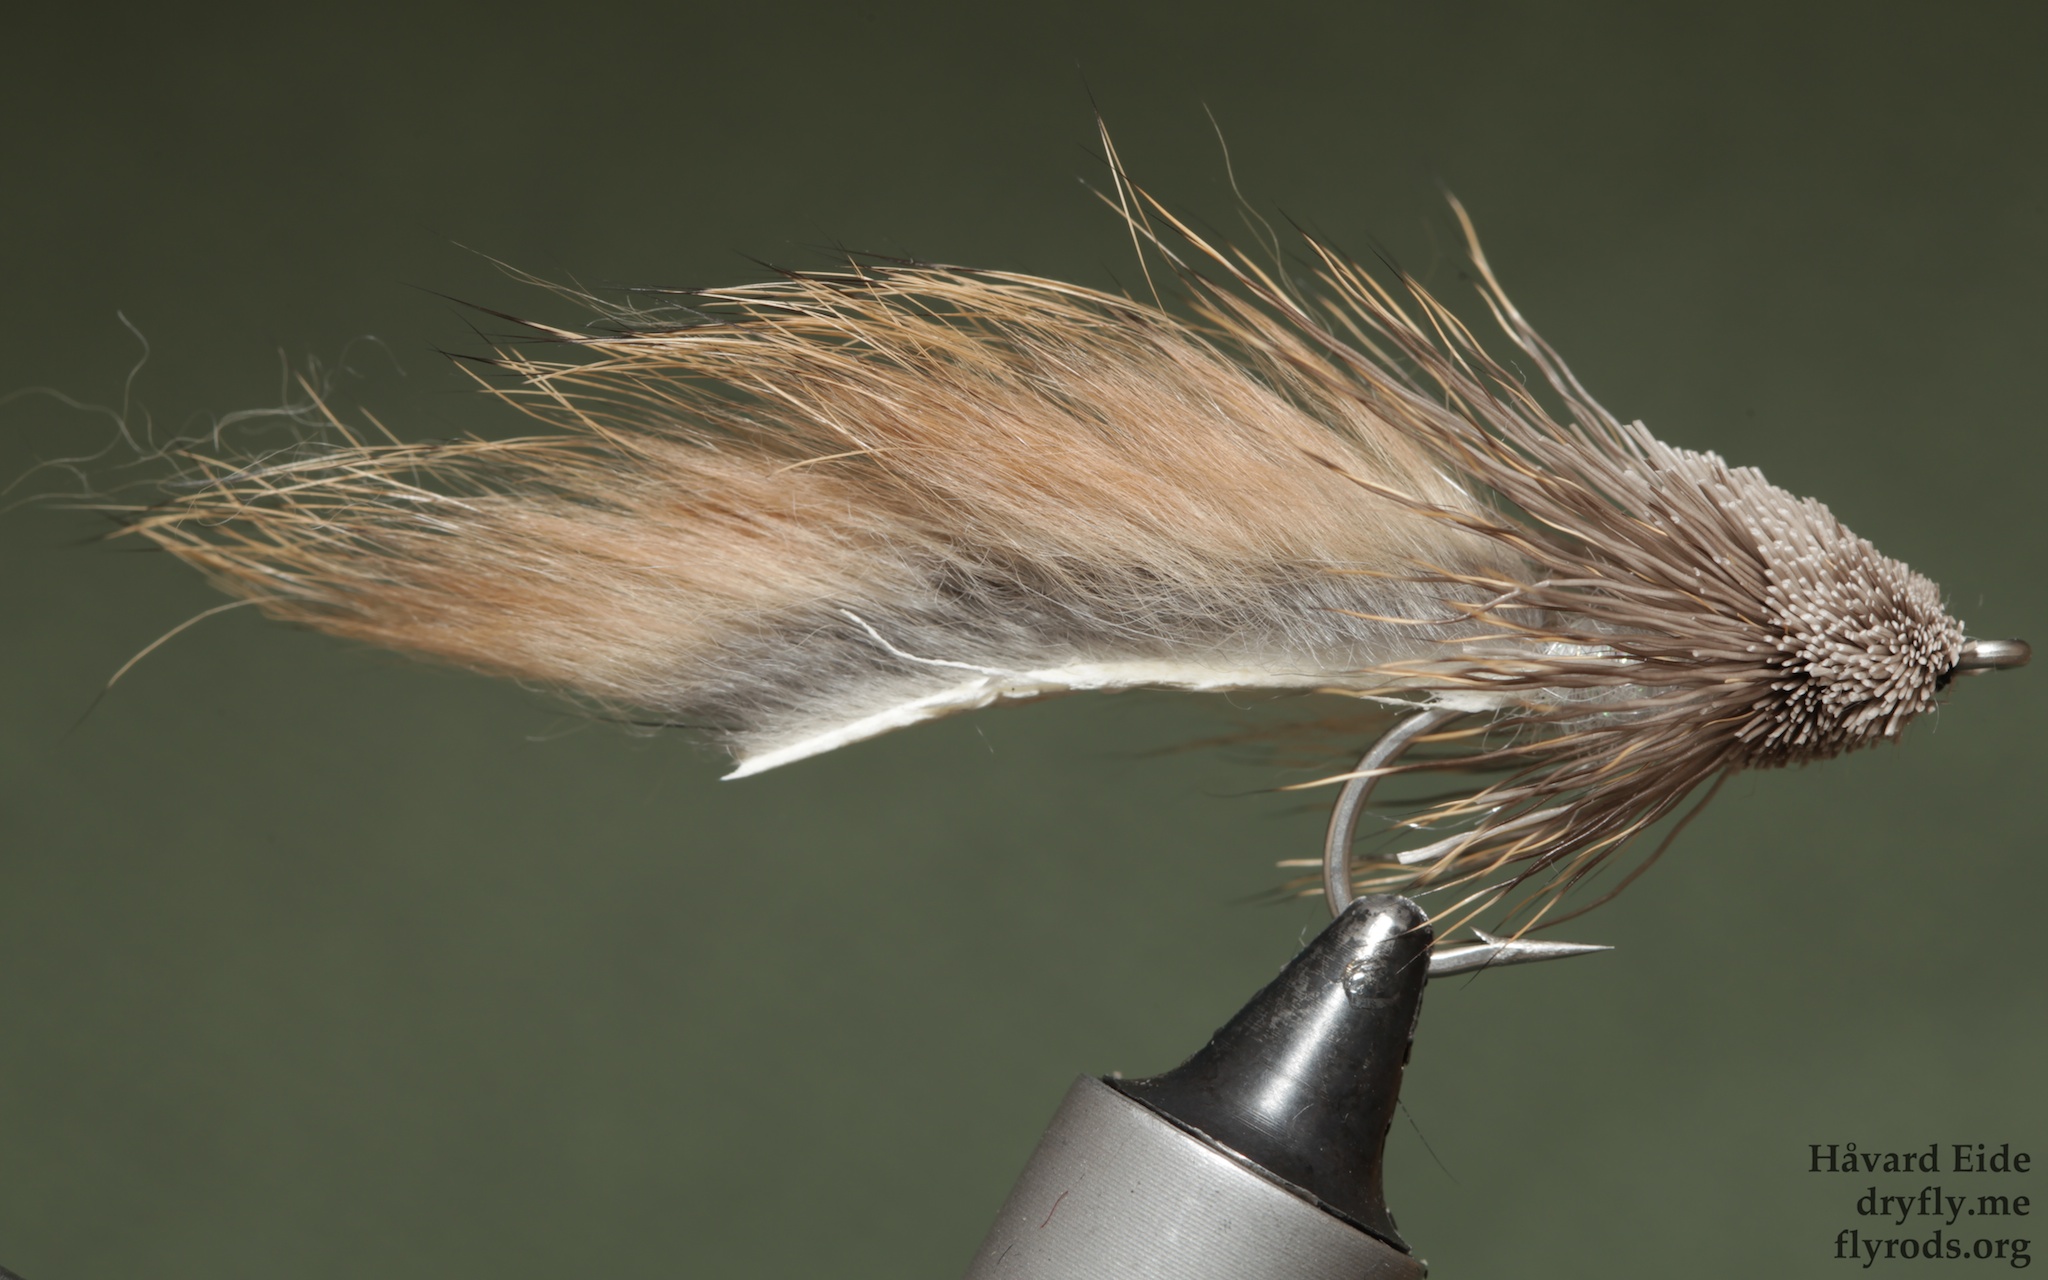 Hook: TMC811S #4
Thread: UNI 6/0 Black
Tail: Rabbit Zonker
Body: A.Jensen Saltwater Dub ll White
Head: Roe
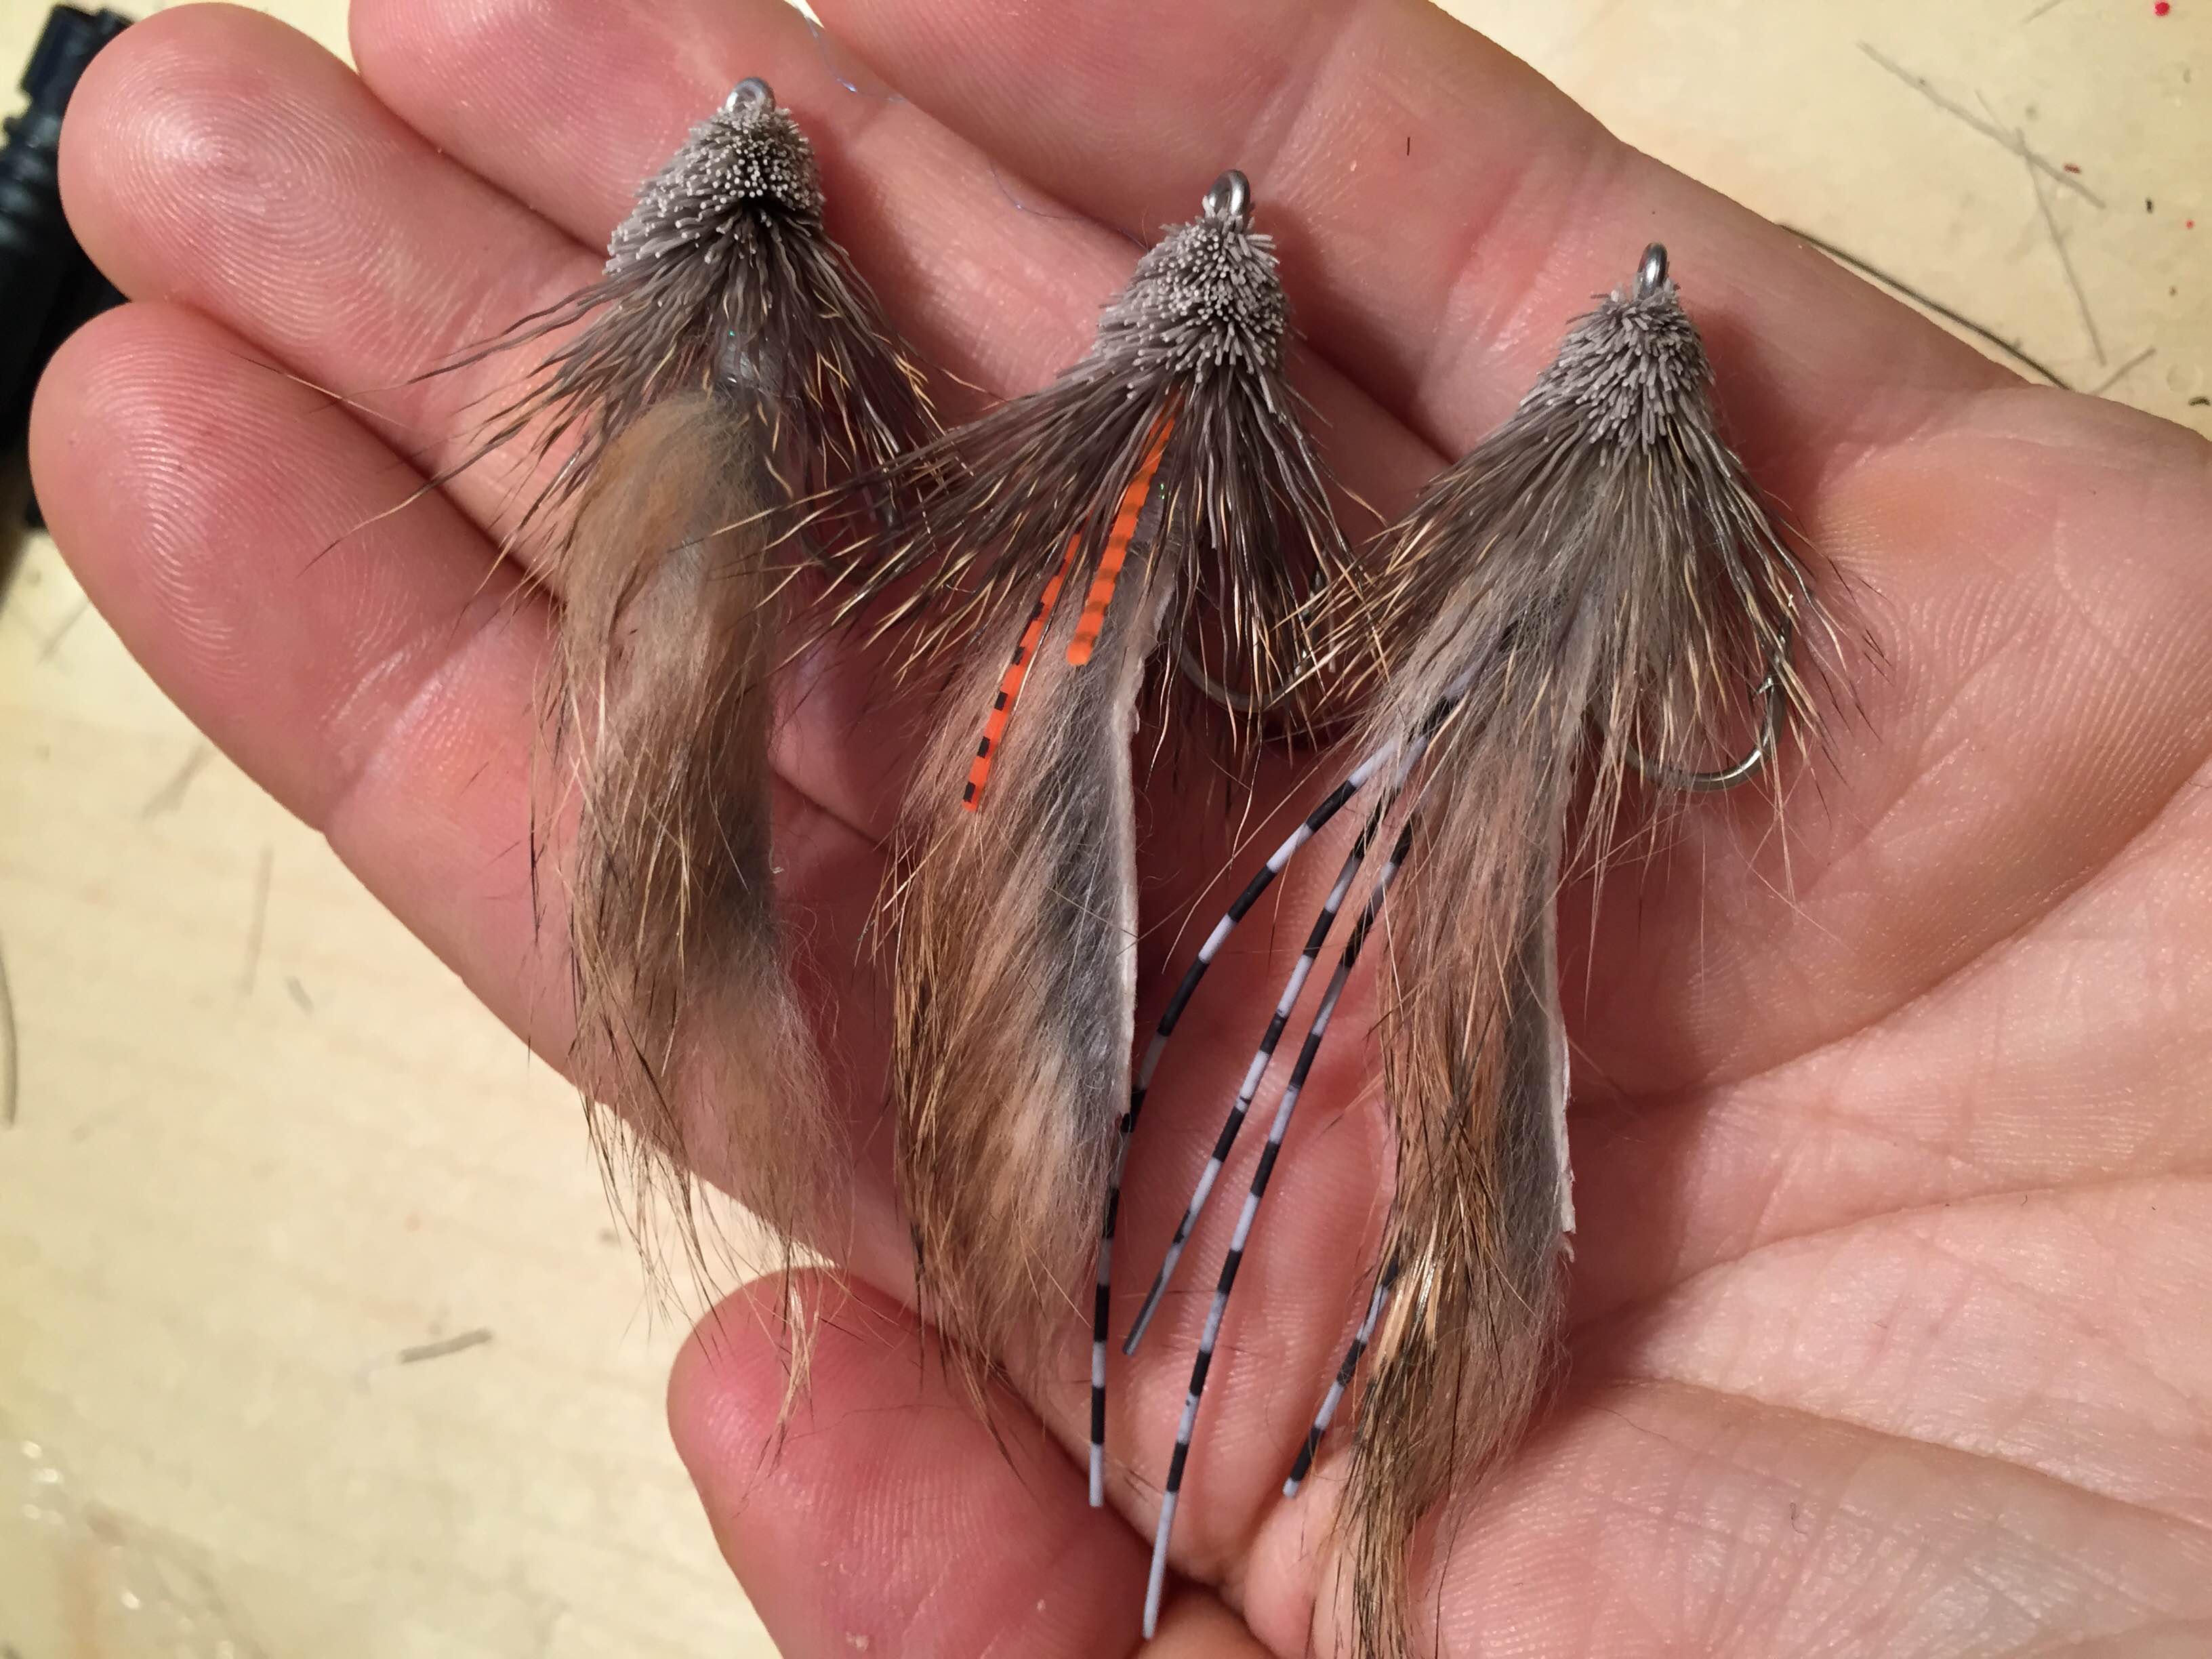
Earlier this winter I got a Roe skin, and before that some Rabbit skins, and since it is seatrout season start around these parts of the world I thought I would tie up some muddler/zonker variants to bring with me.
This is the first time I’ve tied up anything muddler-like for seatrout, but if you have the basics of spinning hair this is not very hard to do. I chose the TMC811S since with its short shank and very durable design (I really like this hook!), I also tied in some rubber legs on some variants to see how they will behave and look in the water.
 Some shorter rubber legs:
 They are not small, but neither are they super-big, so my #6 will have no problem swinging these over easter.
 I had to go down to the city and get some smaller versions of this hook and tie up some on the 811S #8. This have some added lead to bring it down.

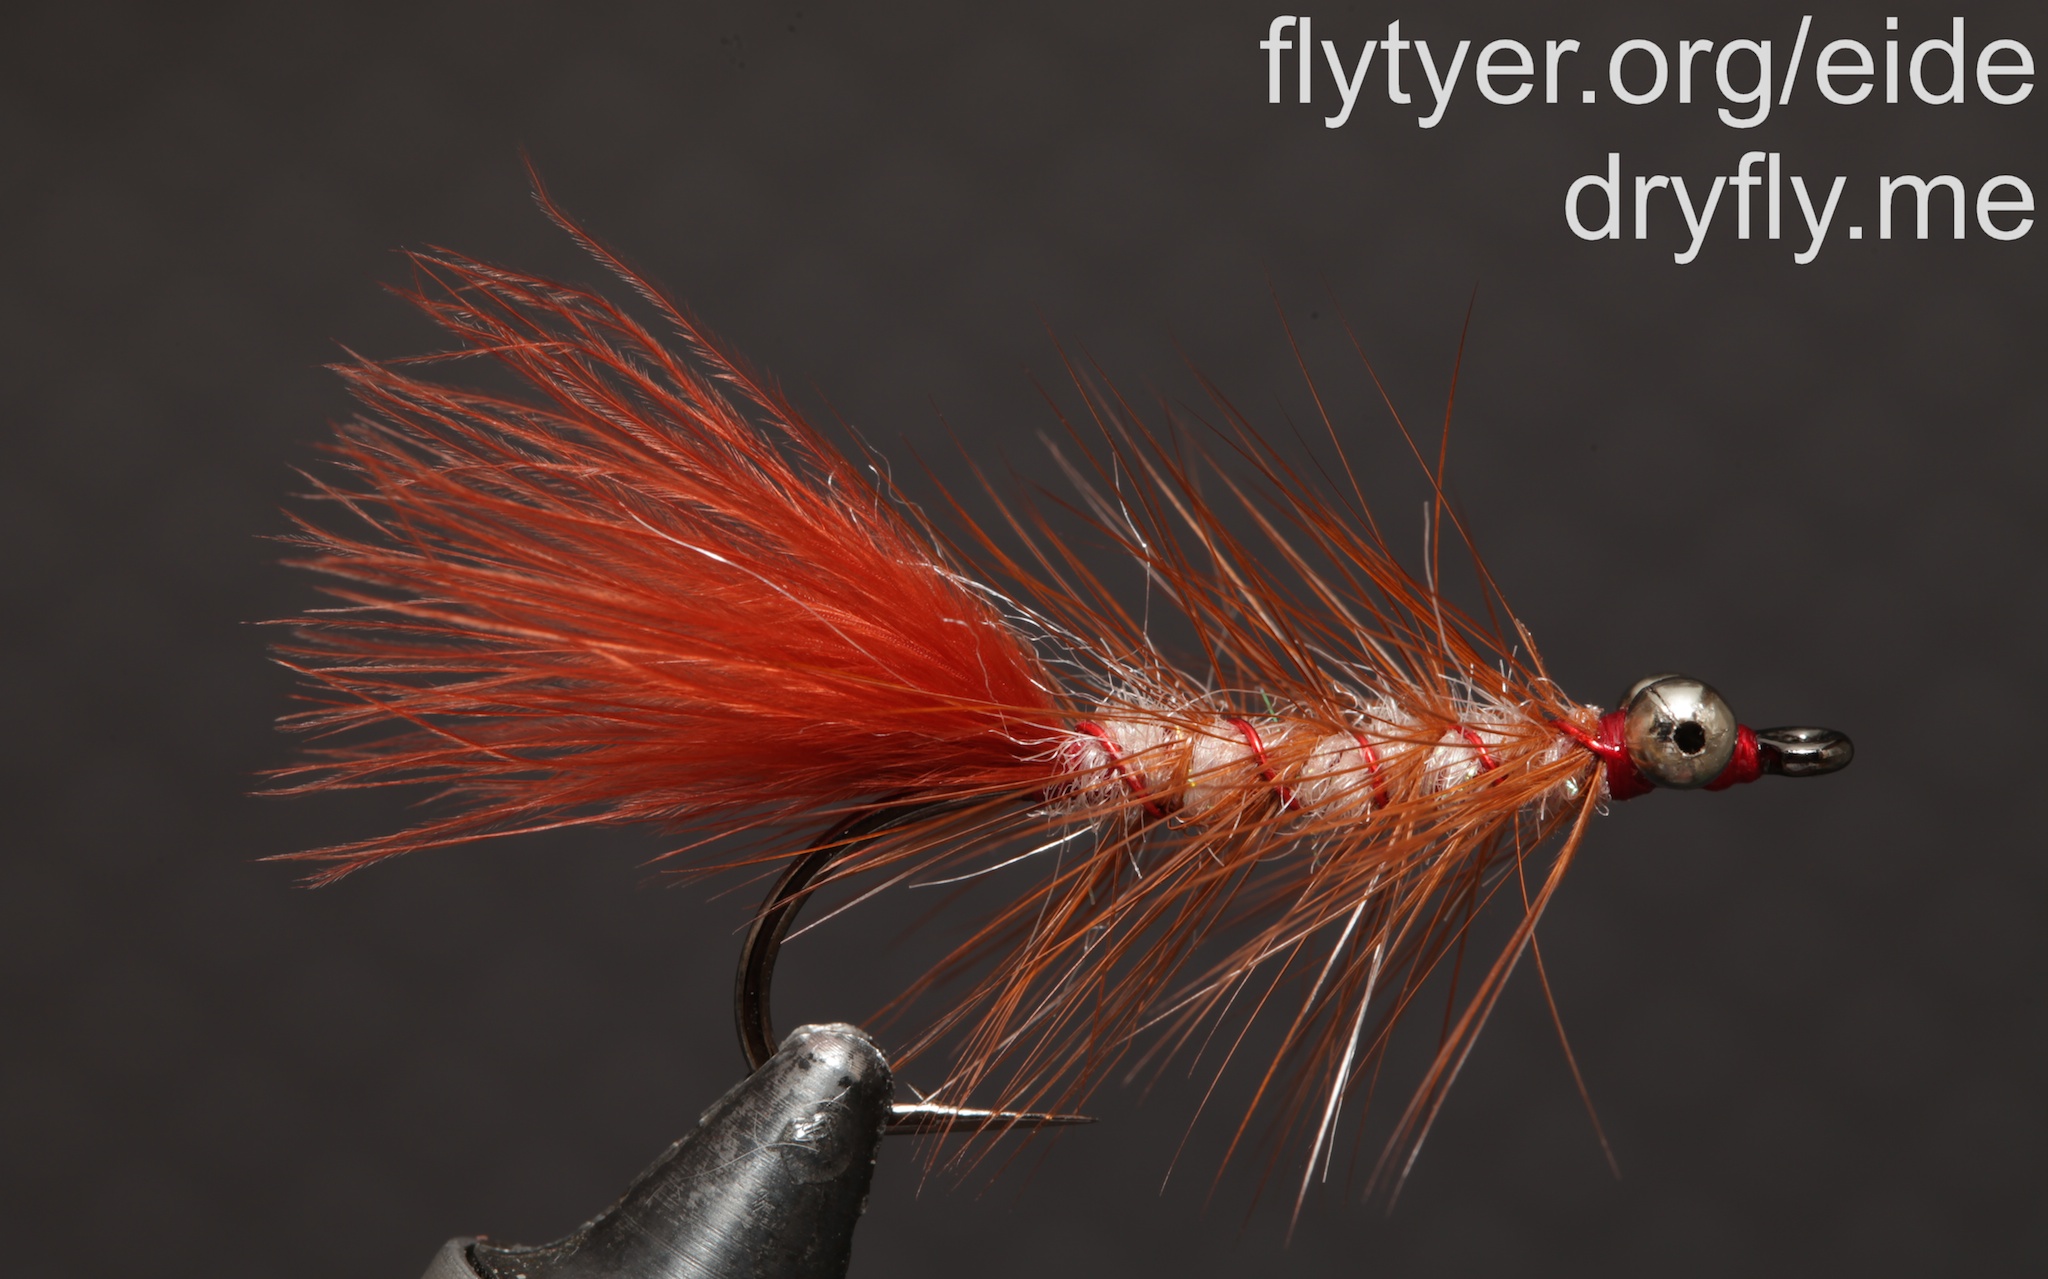
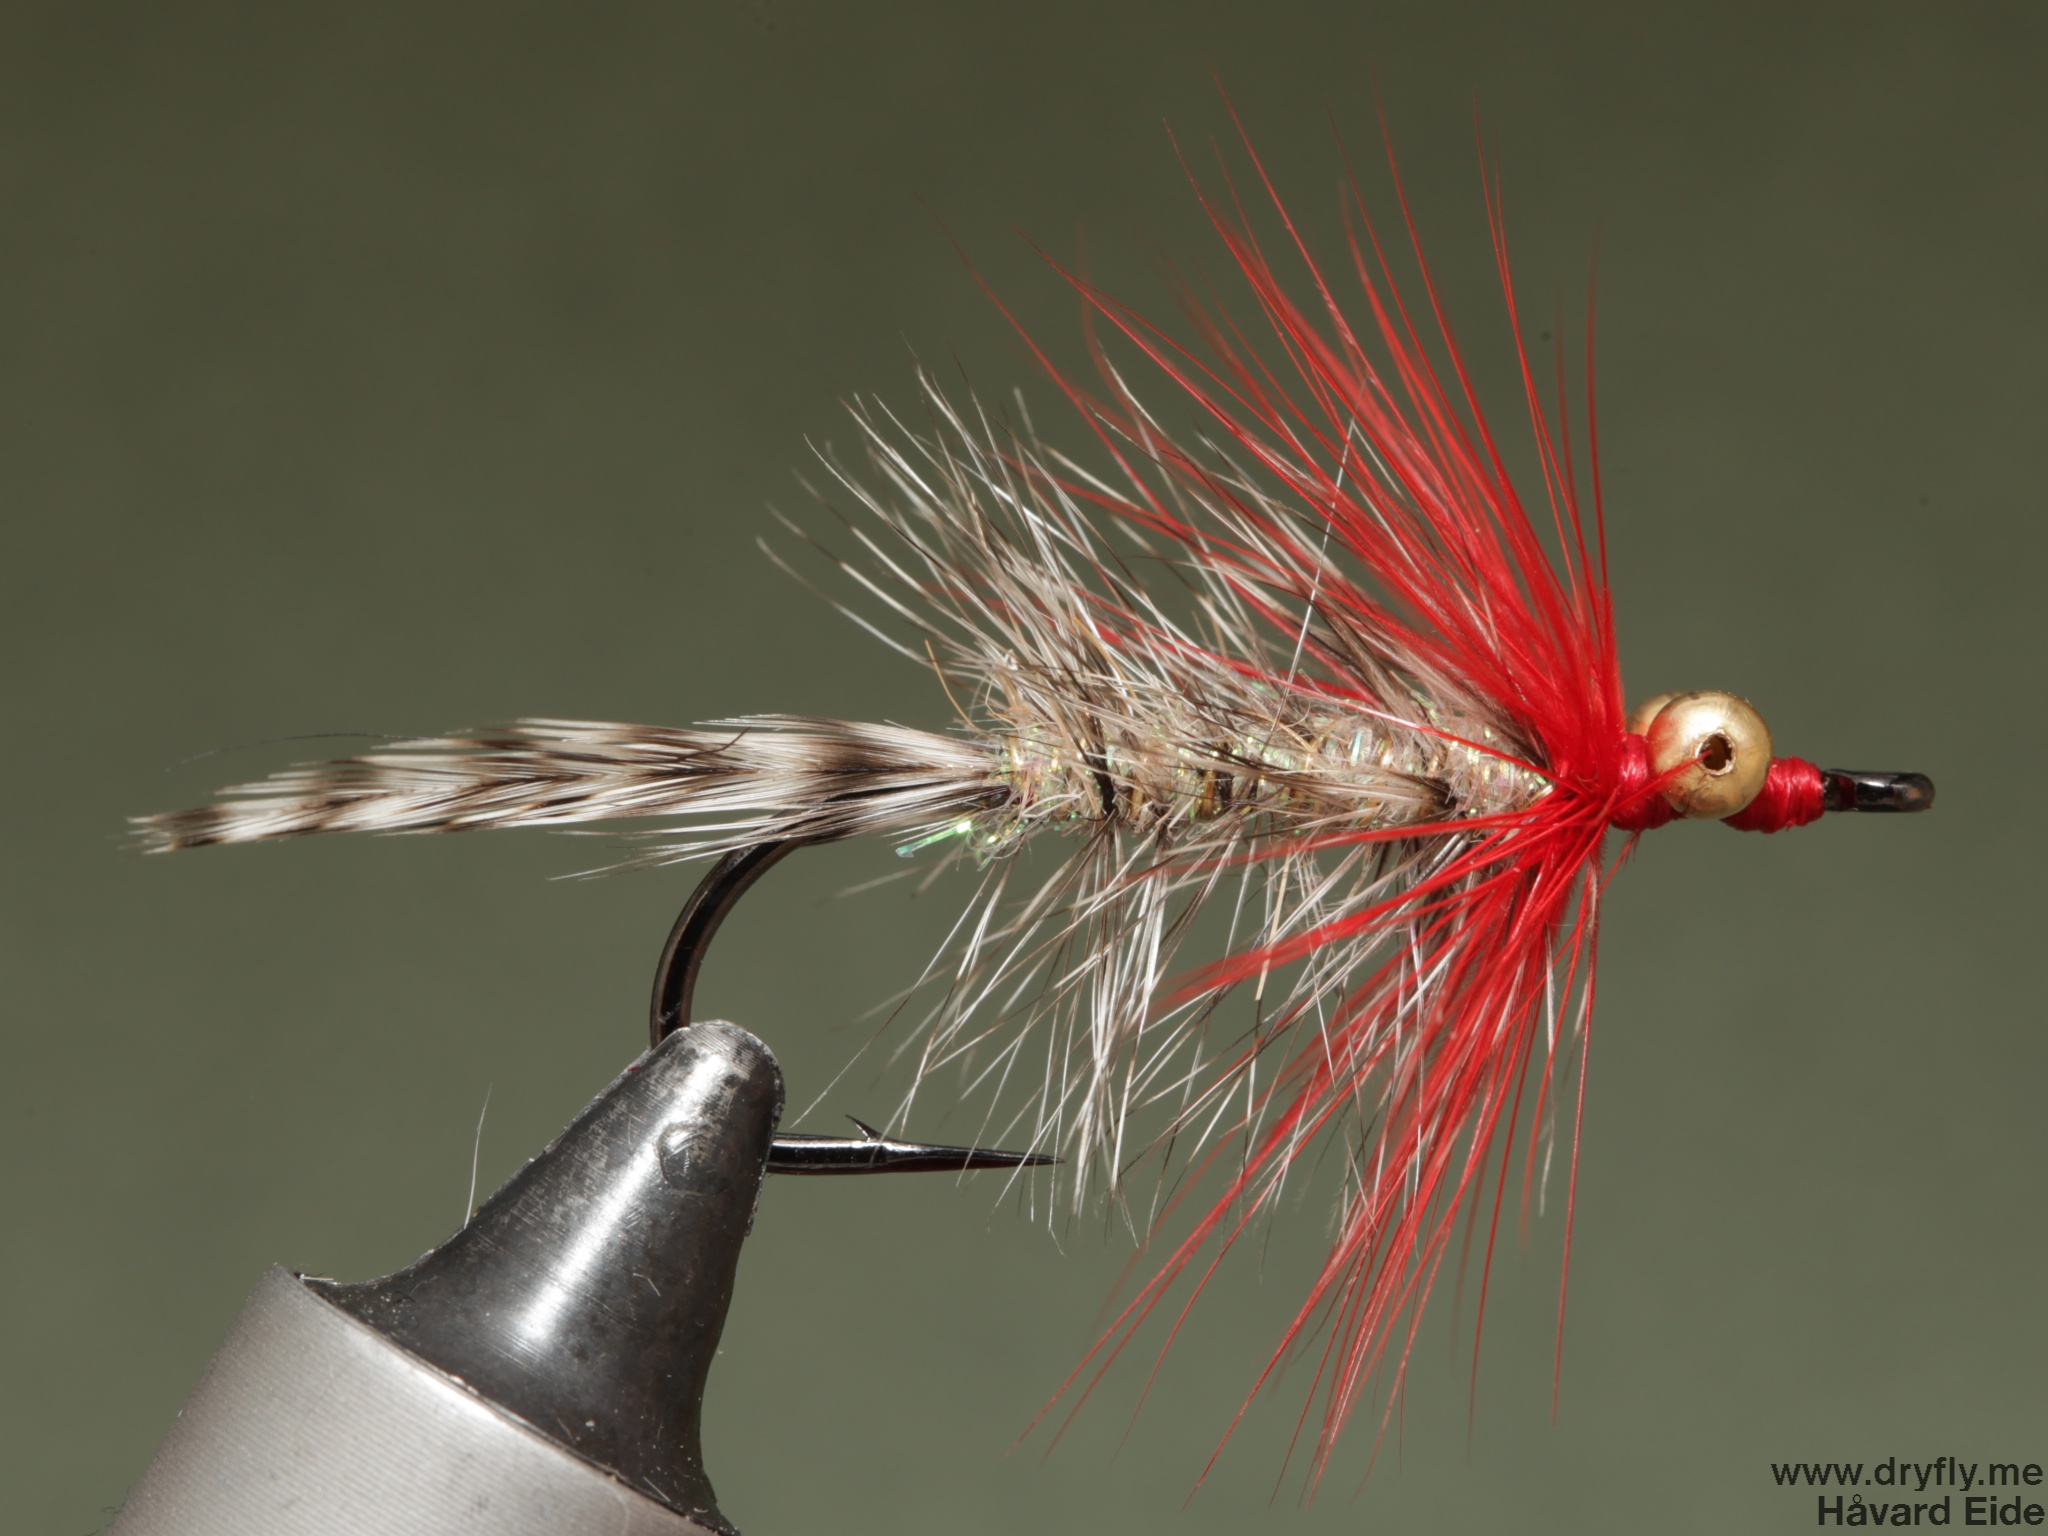
I have done some Polar Magnus lately and I thought it would be good to do a SBS on this great seatrout fly. This is a pattern that can be changed with different colors and hackle and this is how I tie them to ensure maximum durability during fishing.
Hook: TMC 777SP #8
Thread: UNI 6/0
Tail: Whiting Hackle tips
Body: Hareline Ice Dub
Body Hackle: Whiting
Rib: Copper Wire
Front Hackle: Foxtail Hen Red
Eyes: Bead Chain Gold Medium
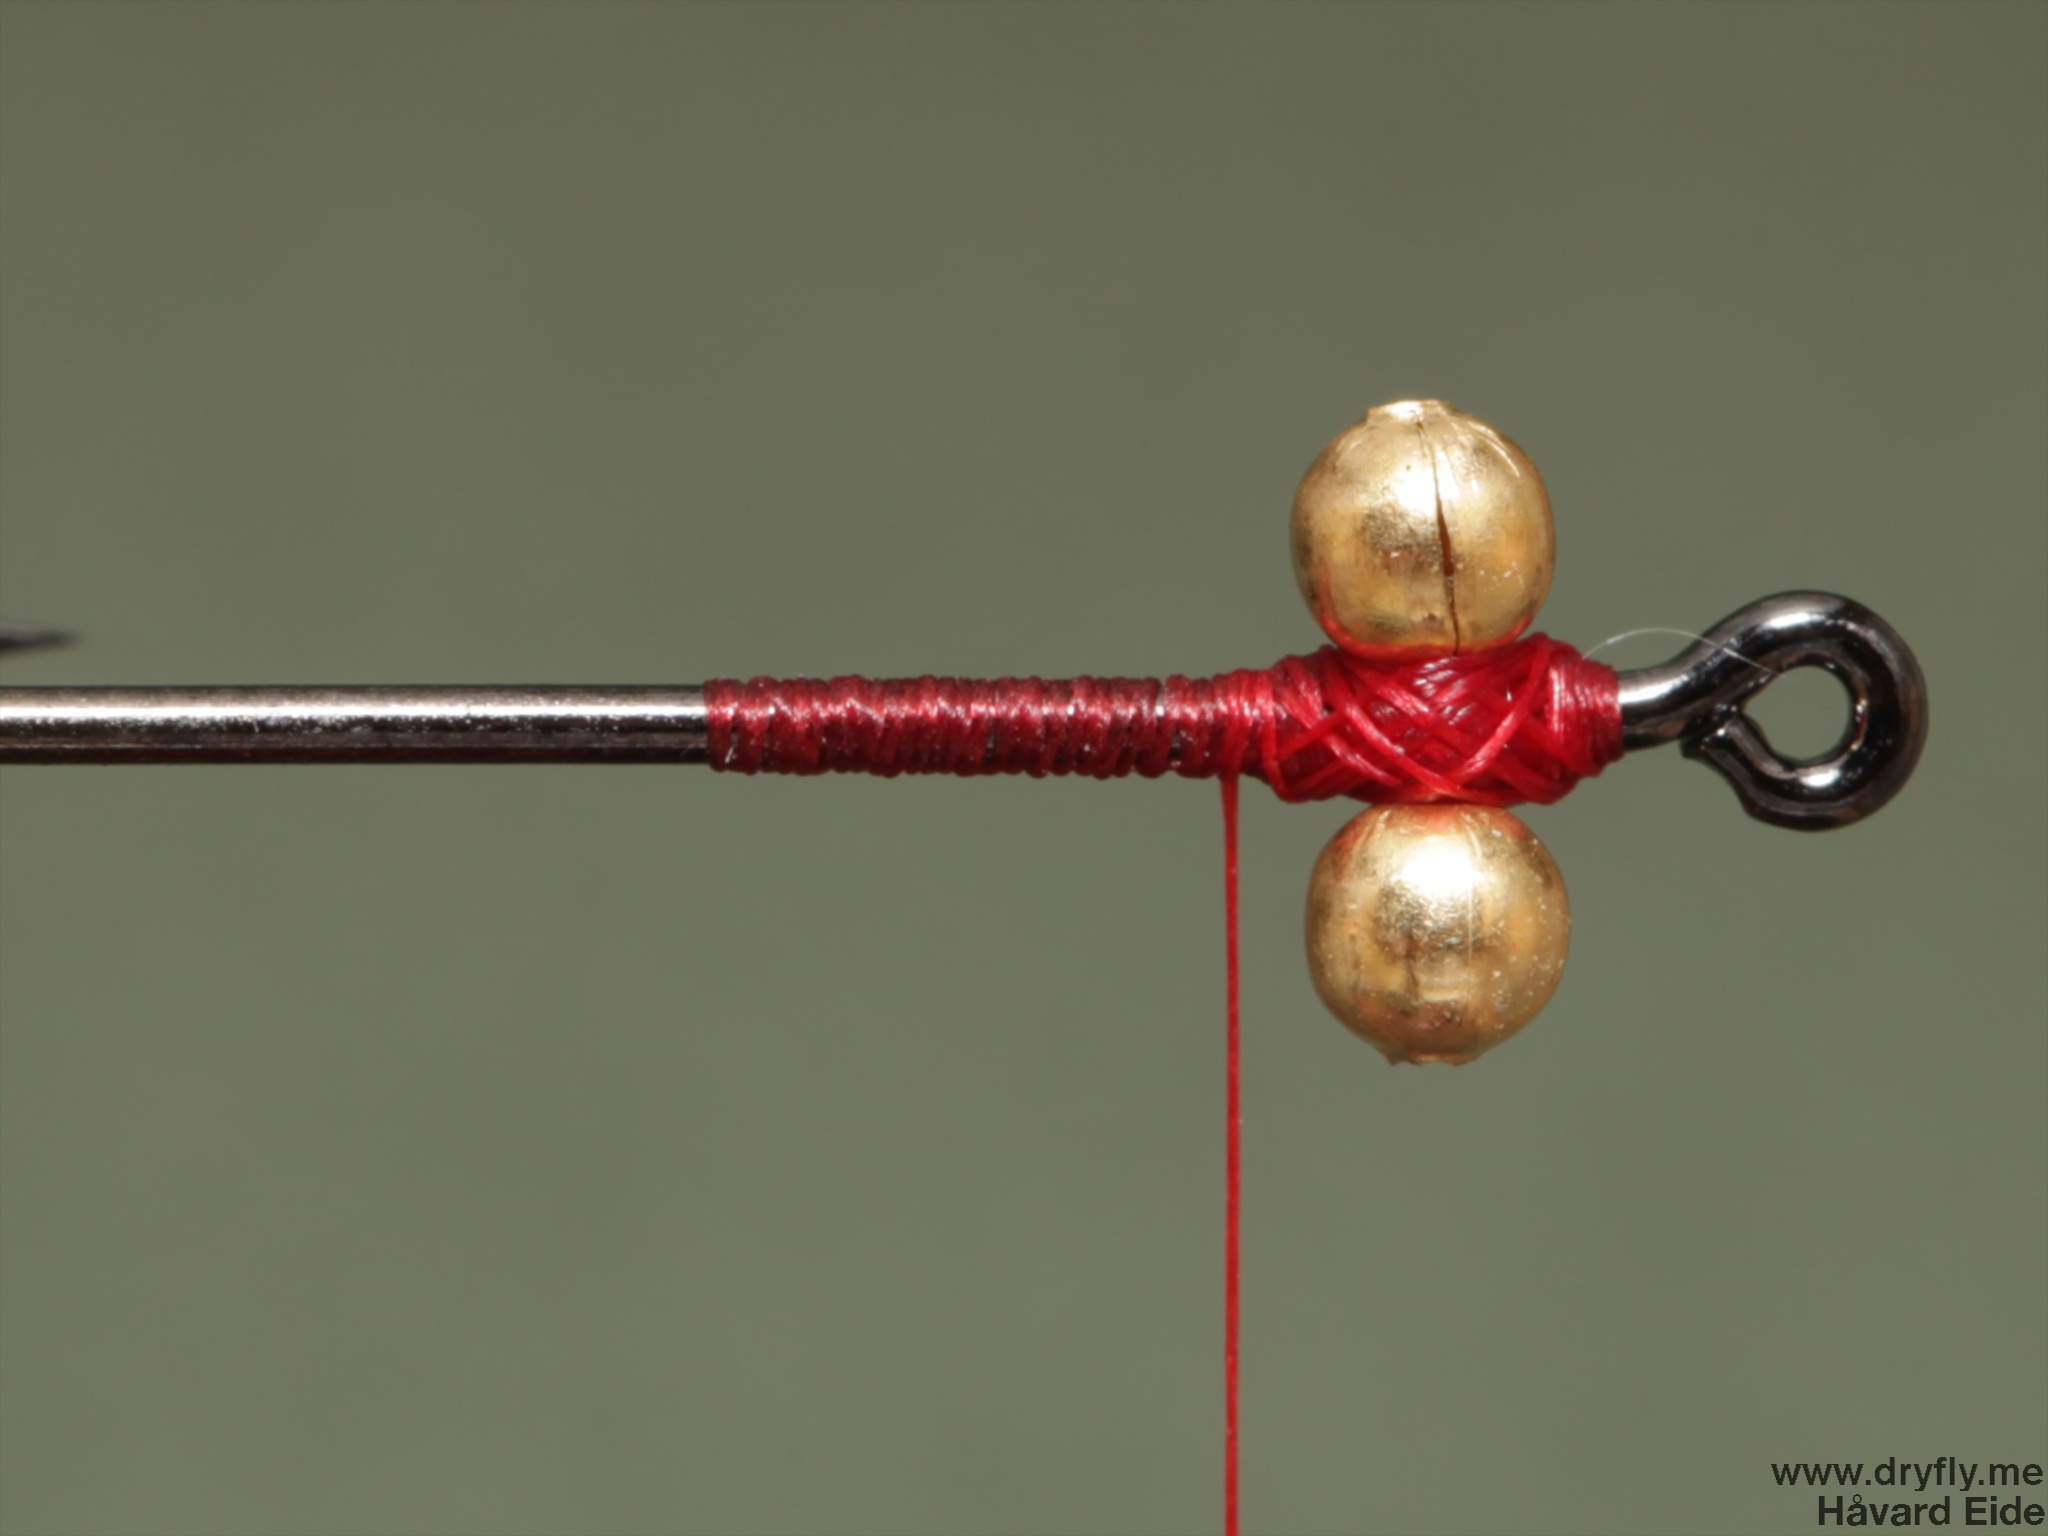
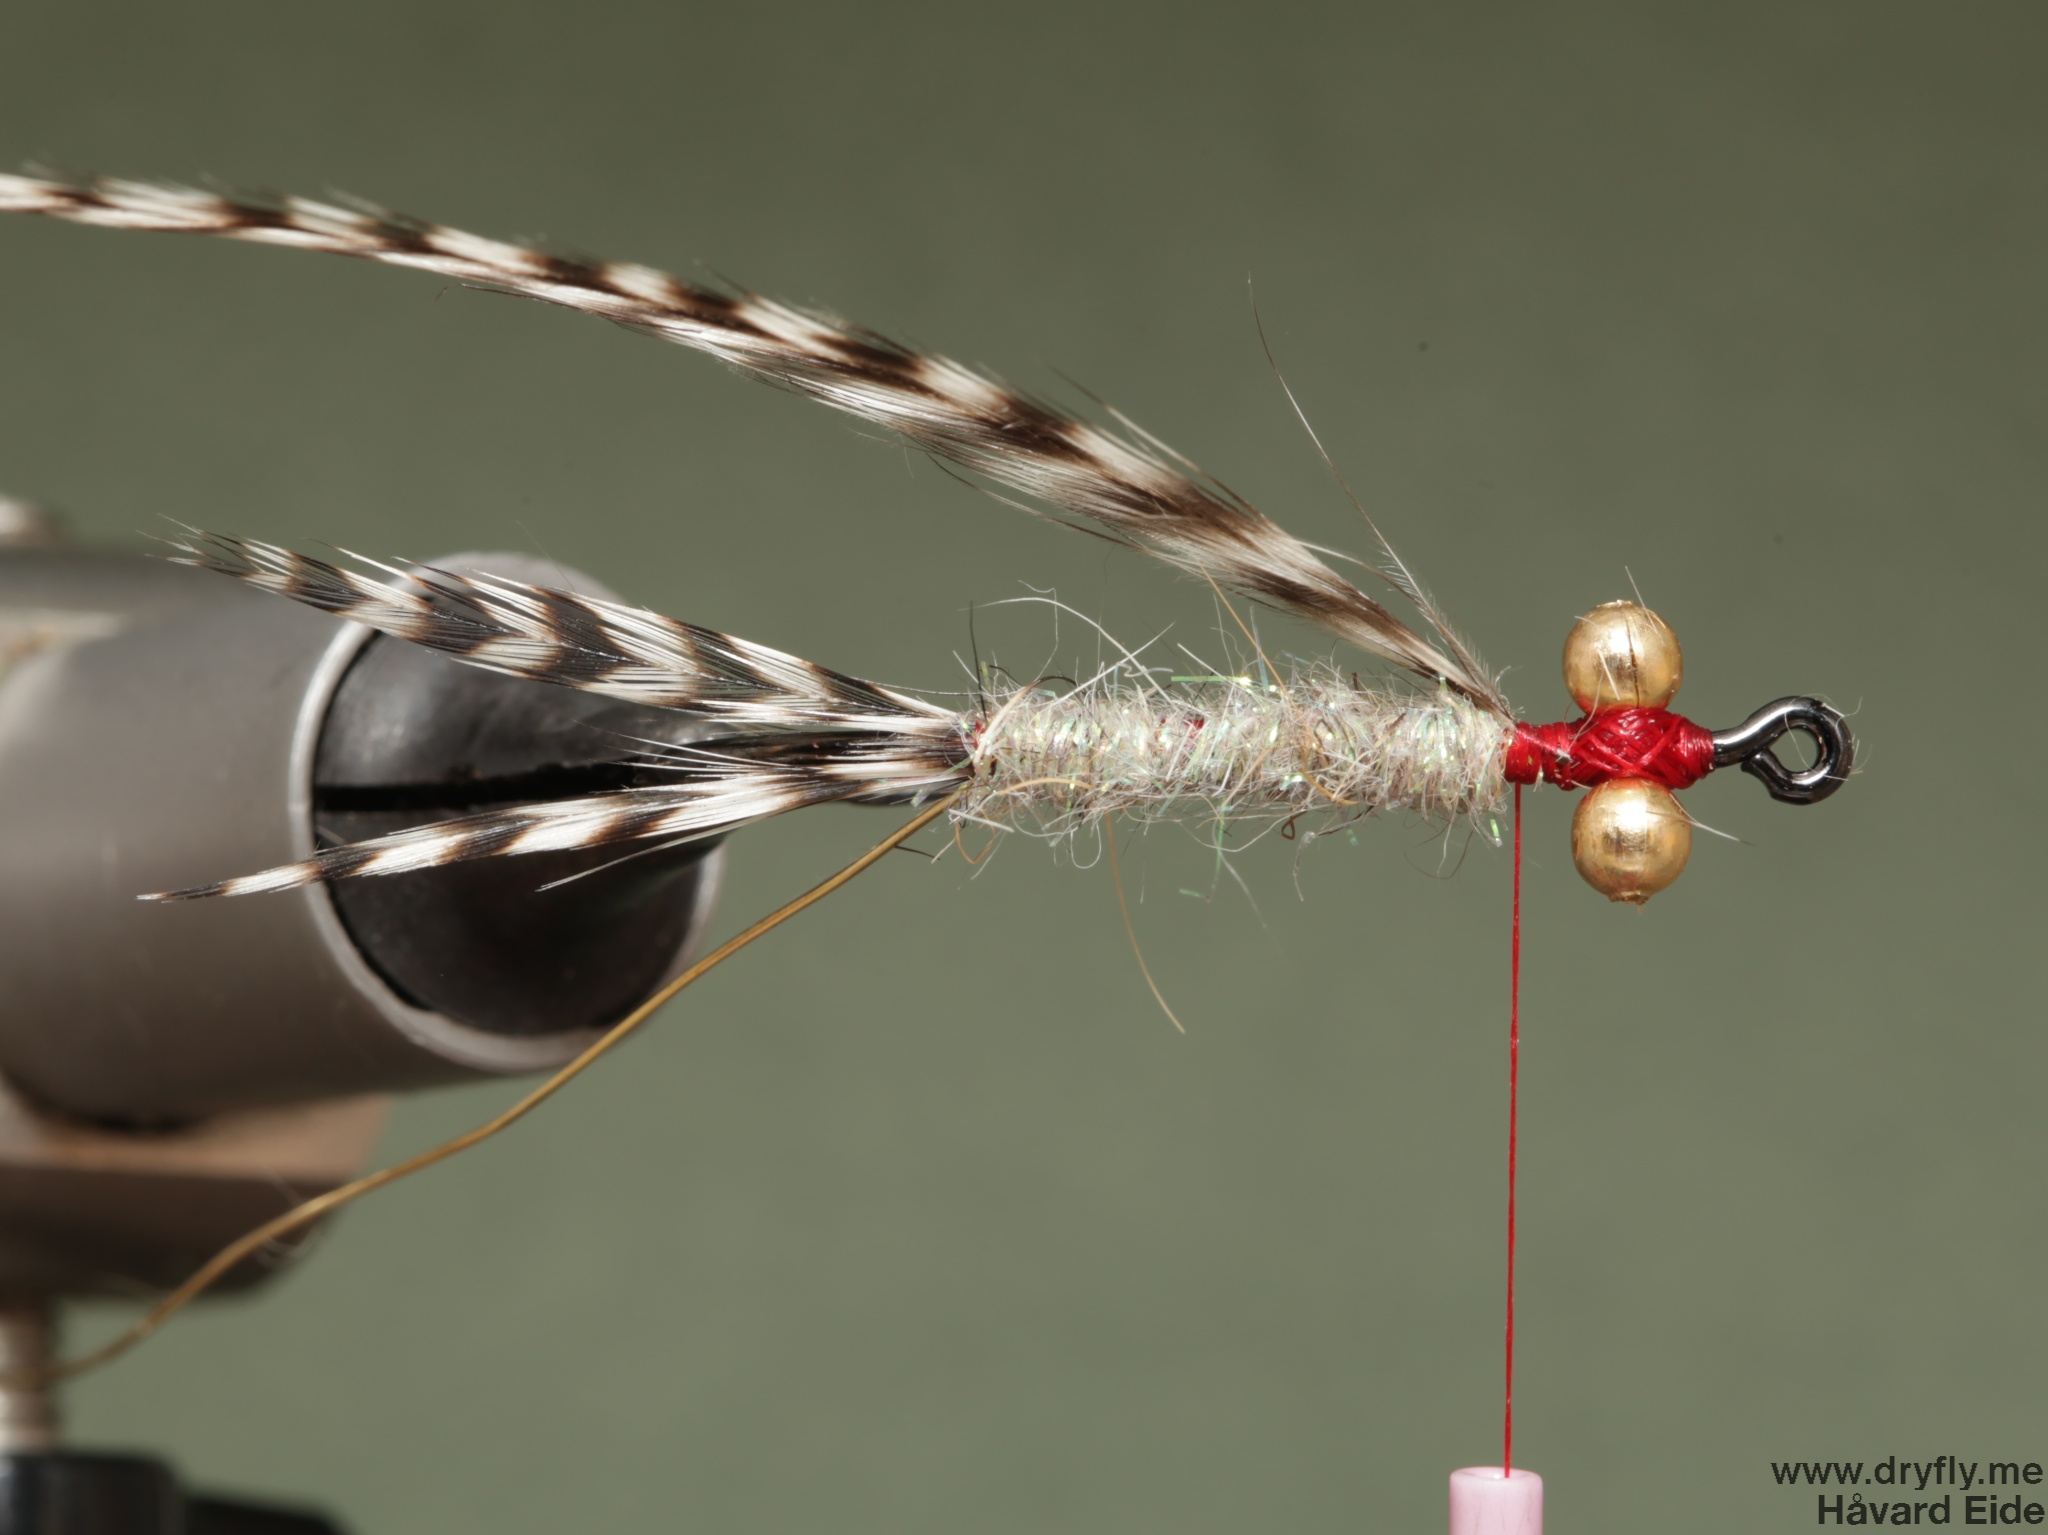
1. start with thread from the hook eye and add a layer back and then towards the eye again. Add a pair of bead chain eyes, here I have used a medium gold version, but can be substituted with different sizes and colors. You can also add the eyes on the underside of the hook
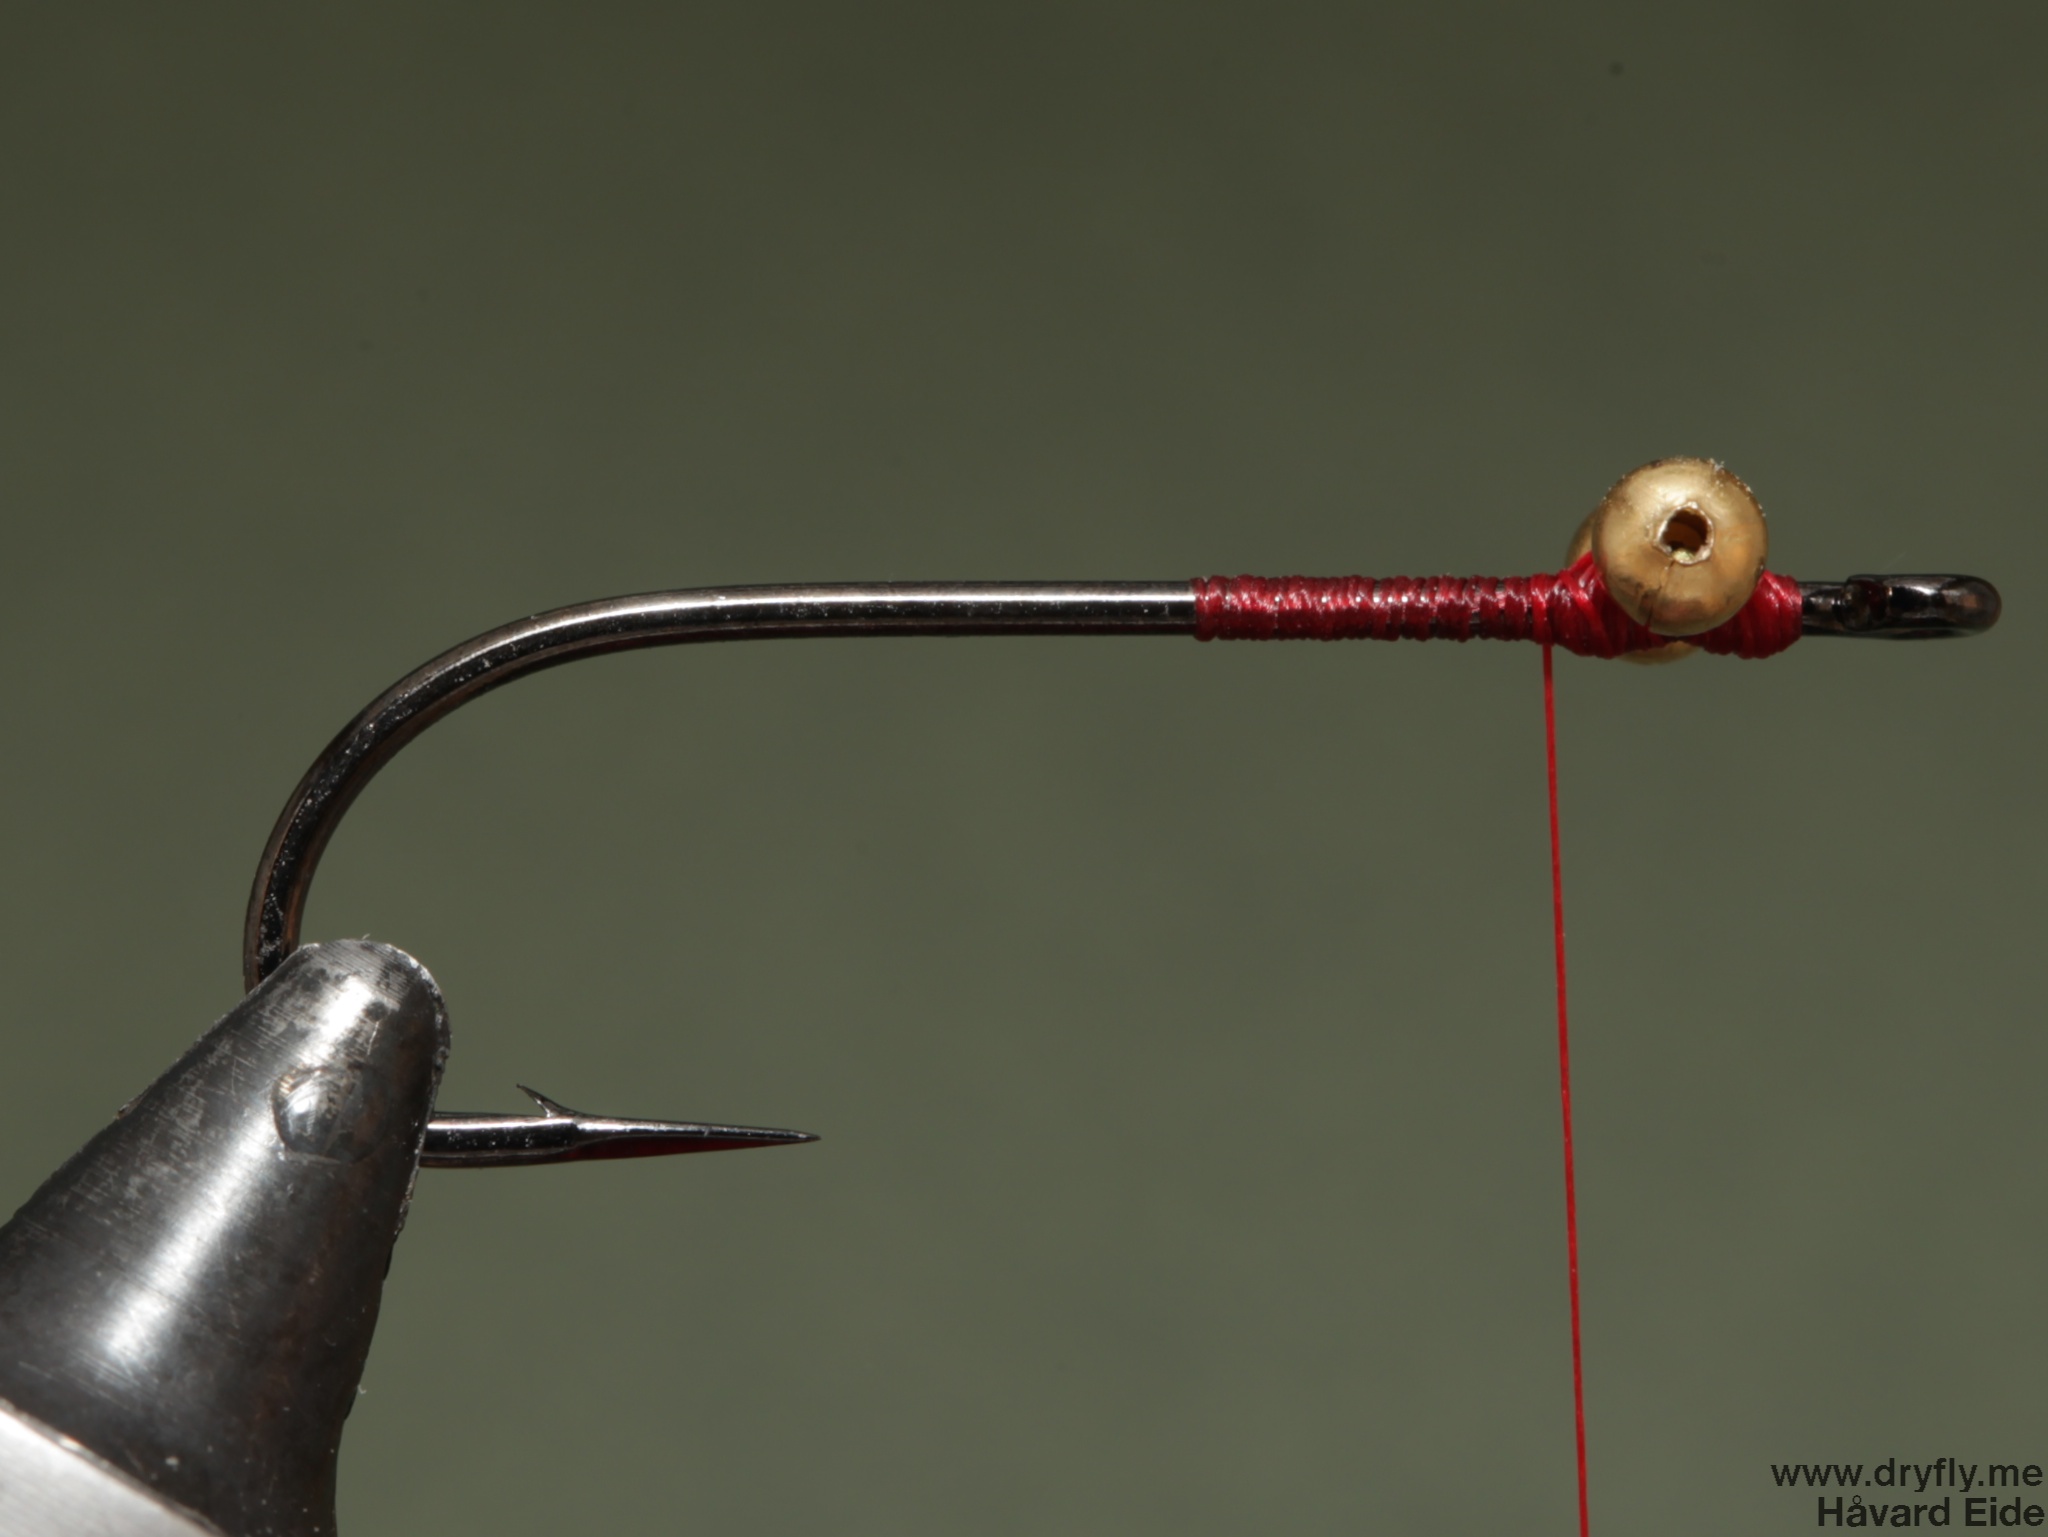
2. When tying in the eyes: wrap in a figure-eight around the hook to securely tie in the eyes, if not they can start to slip. Also make sure you apply a good amount of pressure on the thread here to secure the eyes, you can also add some superglue to the wraps when you are done to secure the eyes even more.
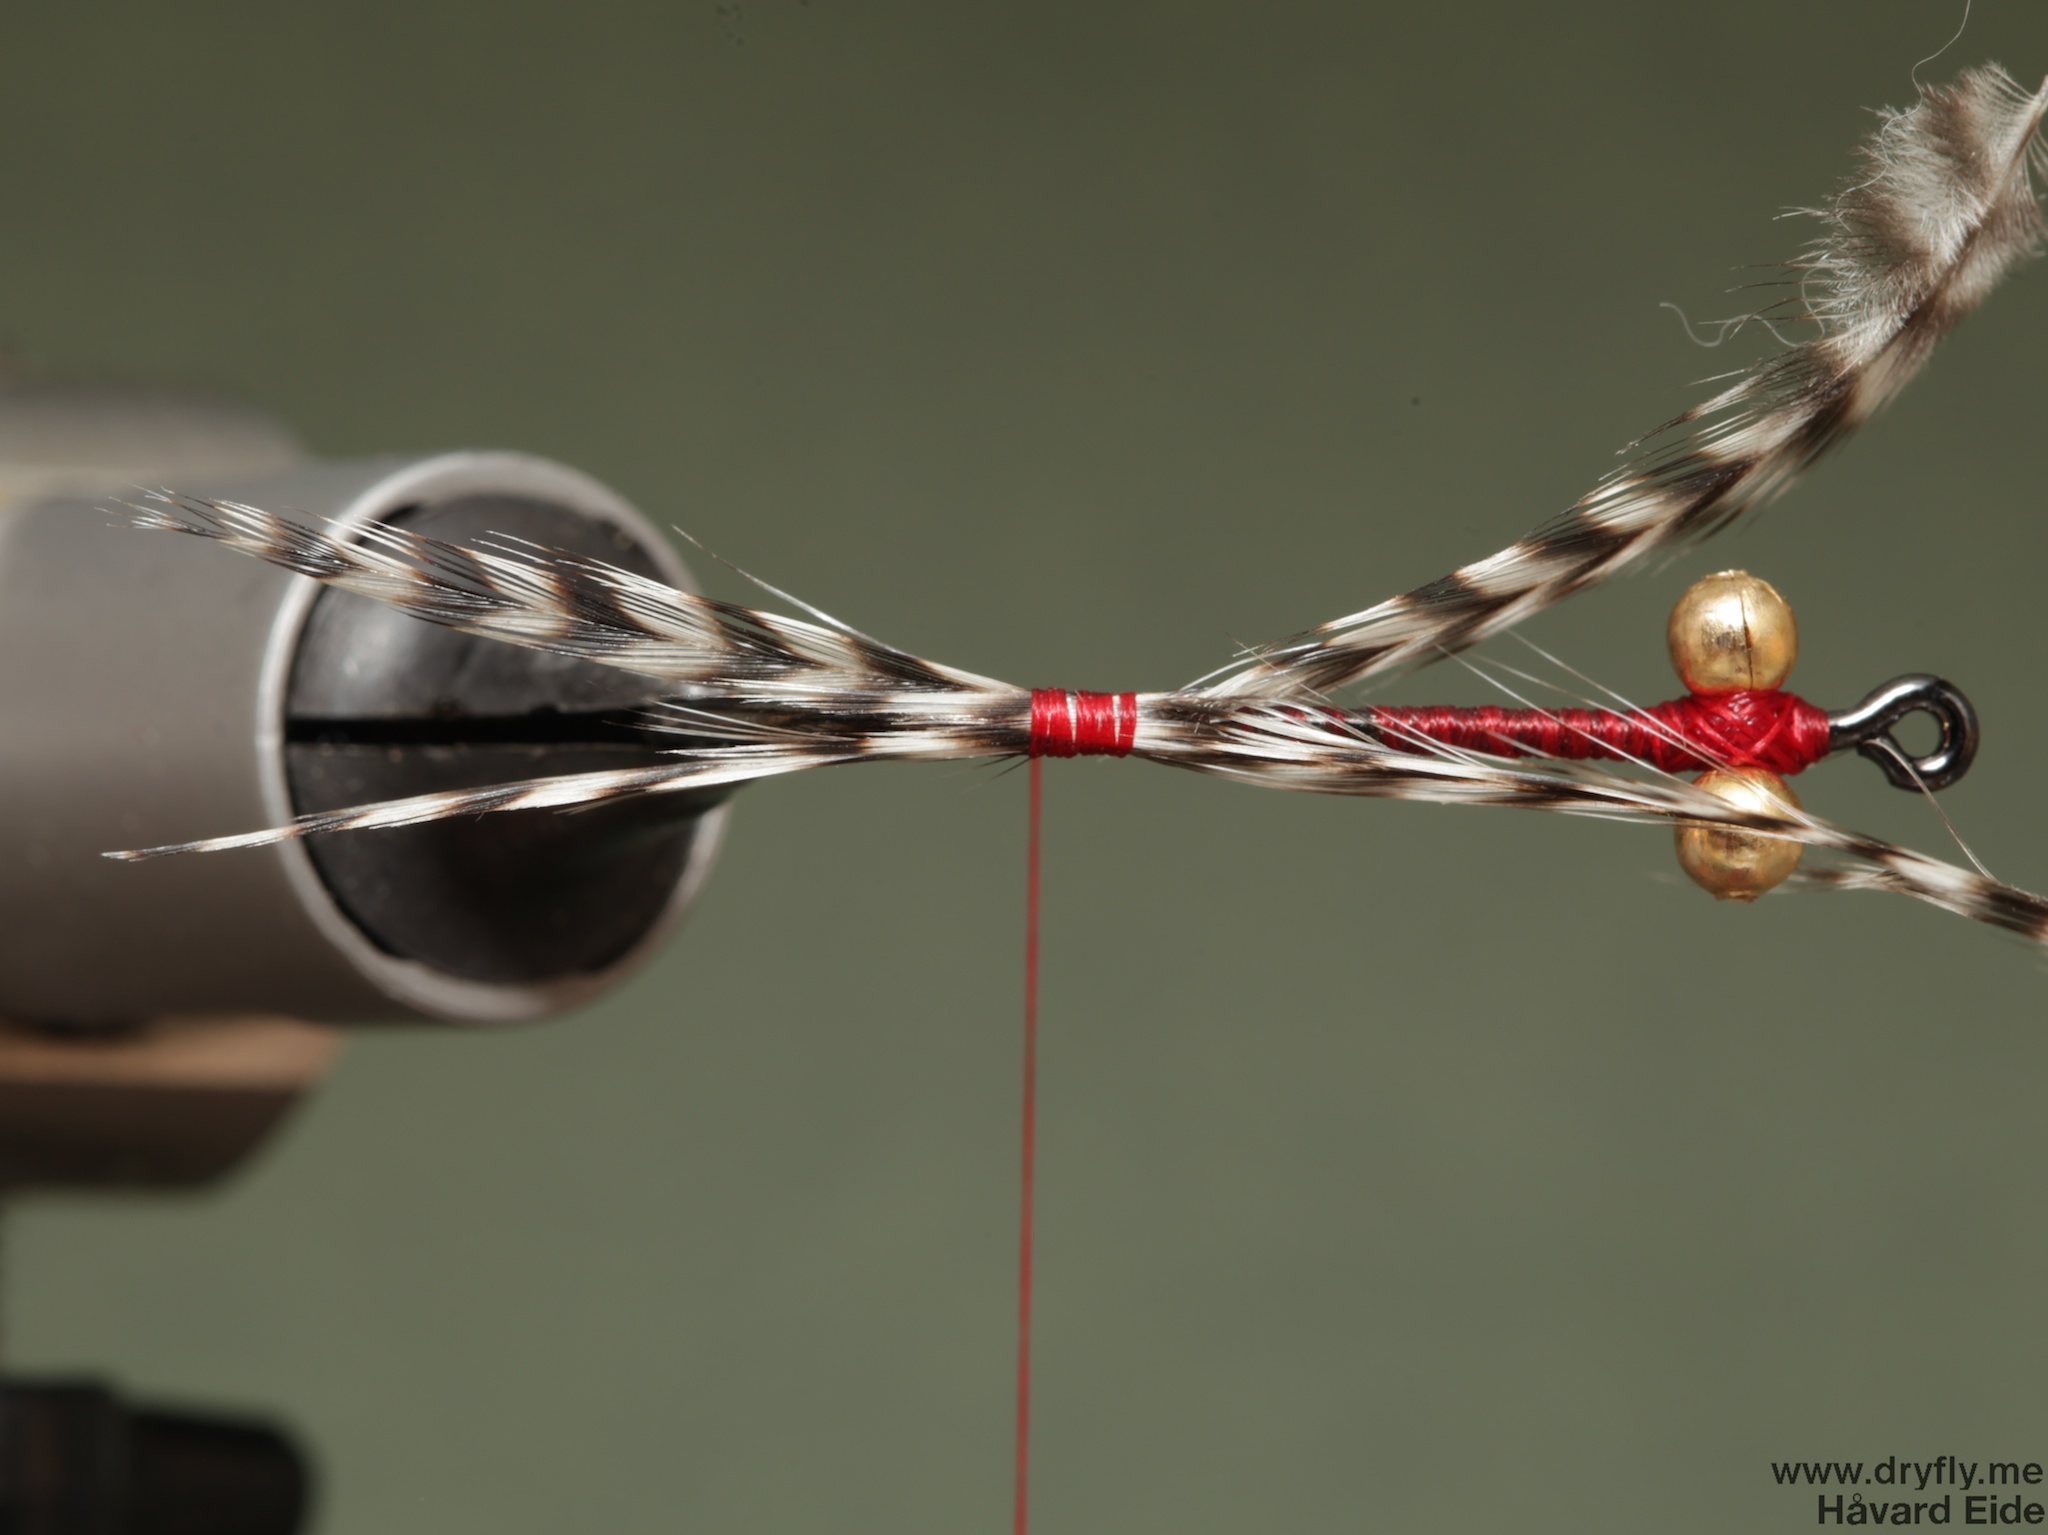
3. Find two hackle tips and tie them in around the hook point (or where the hook bend starts), tie them in on the side of the hook
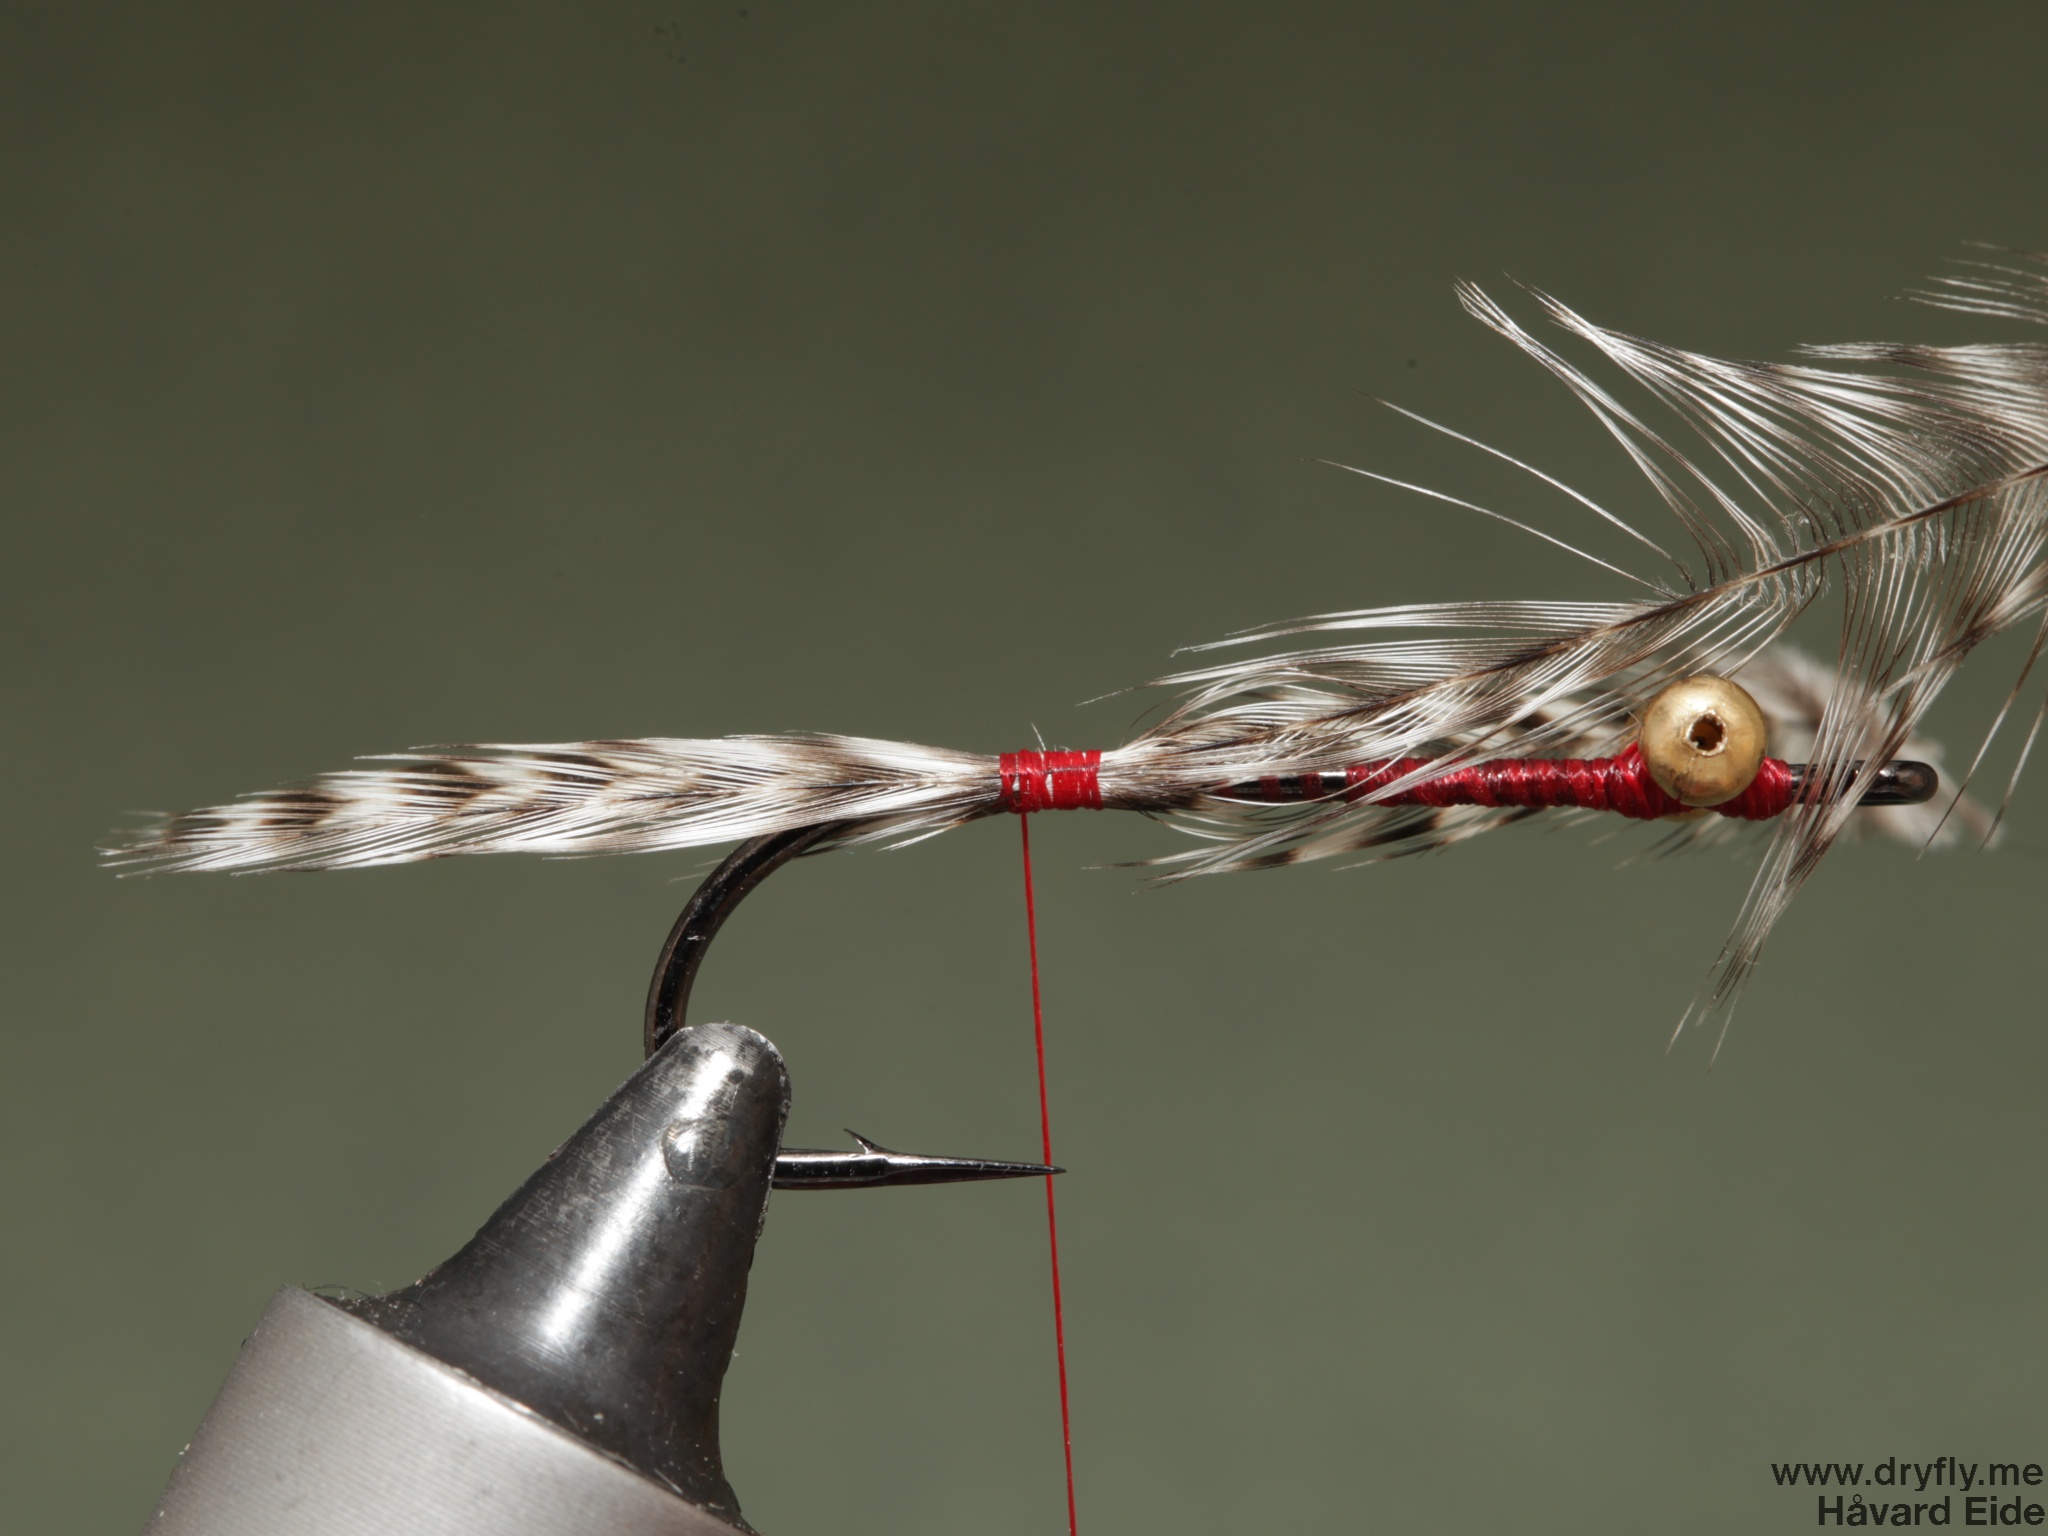
4. The hackle tips should form a V going back
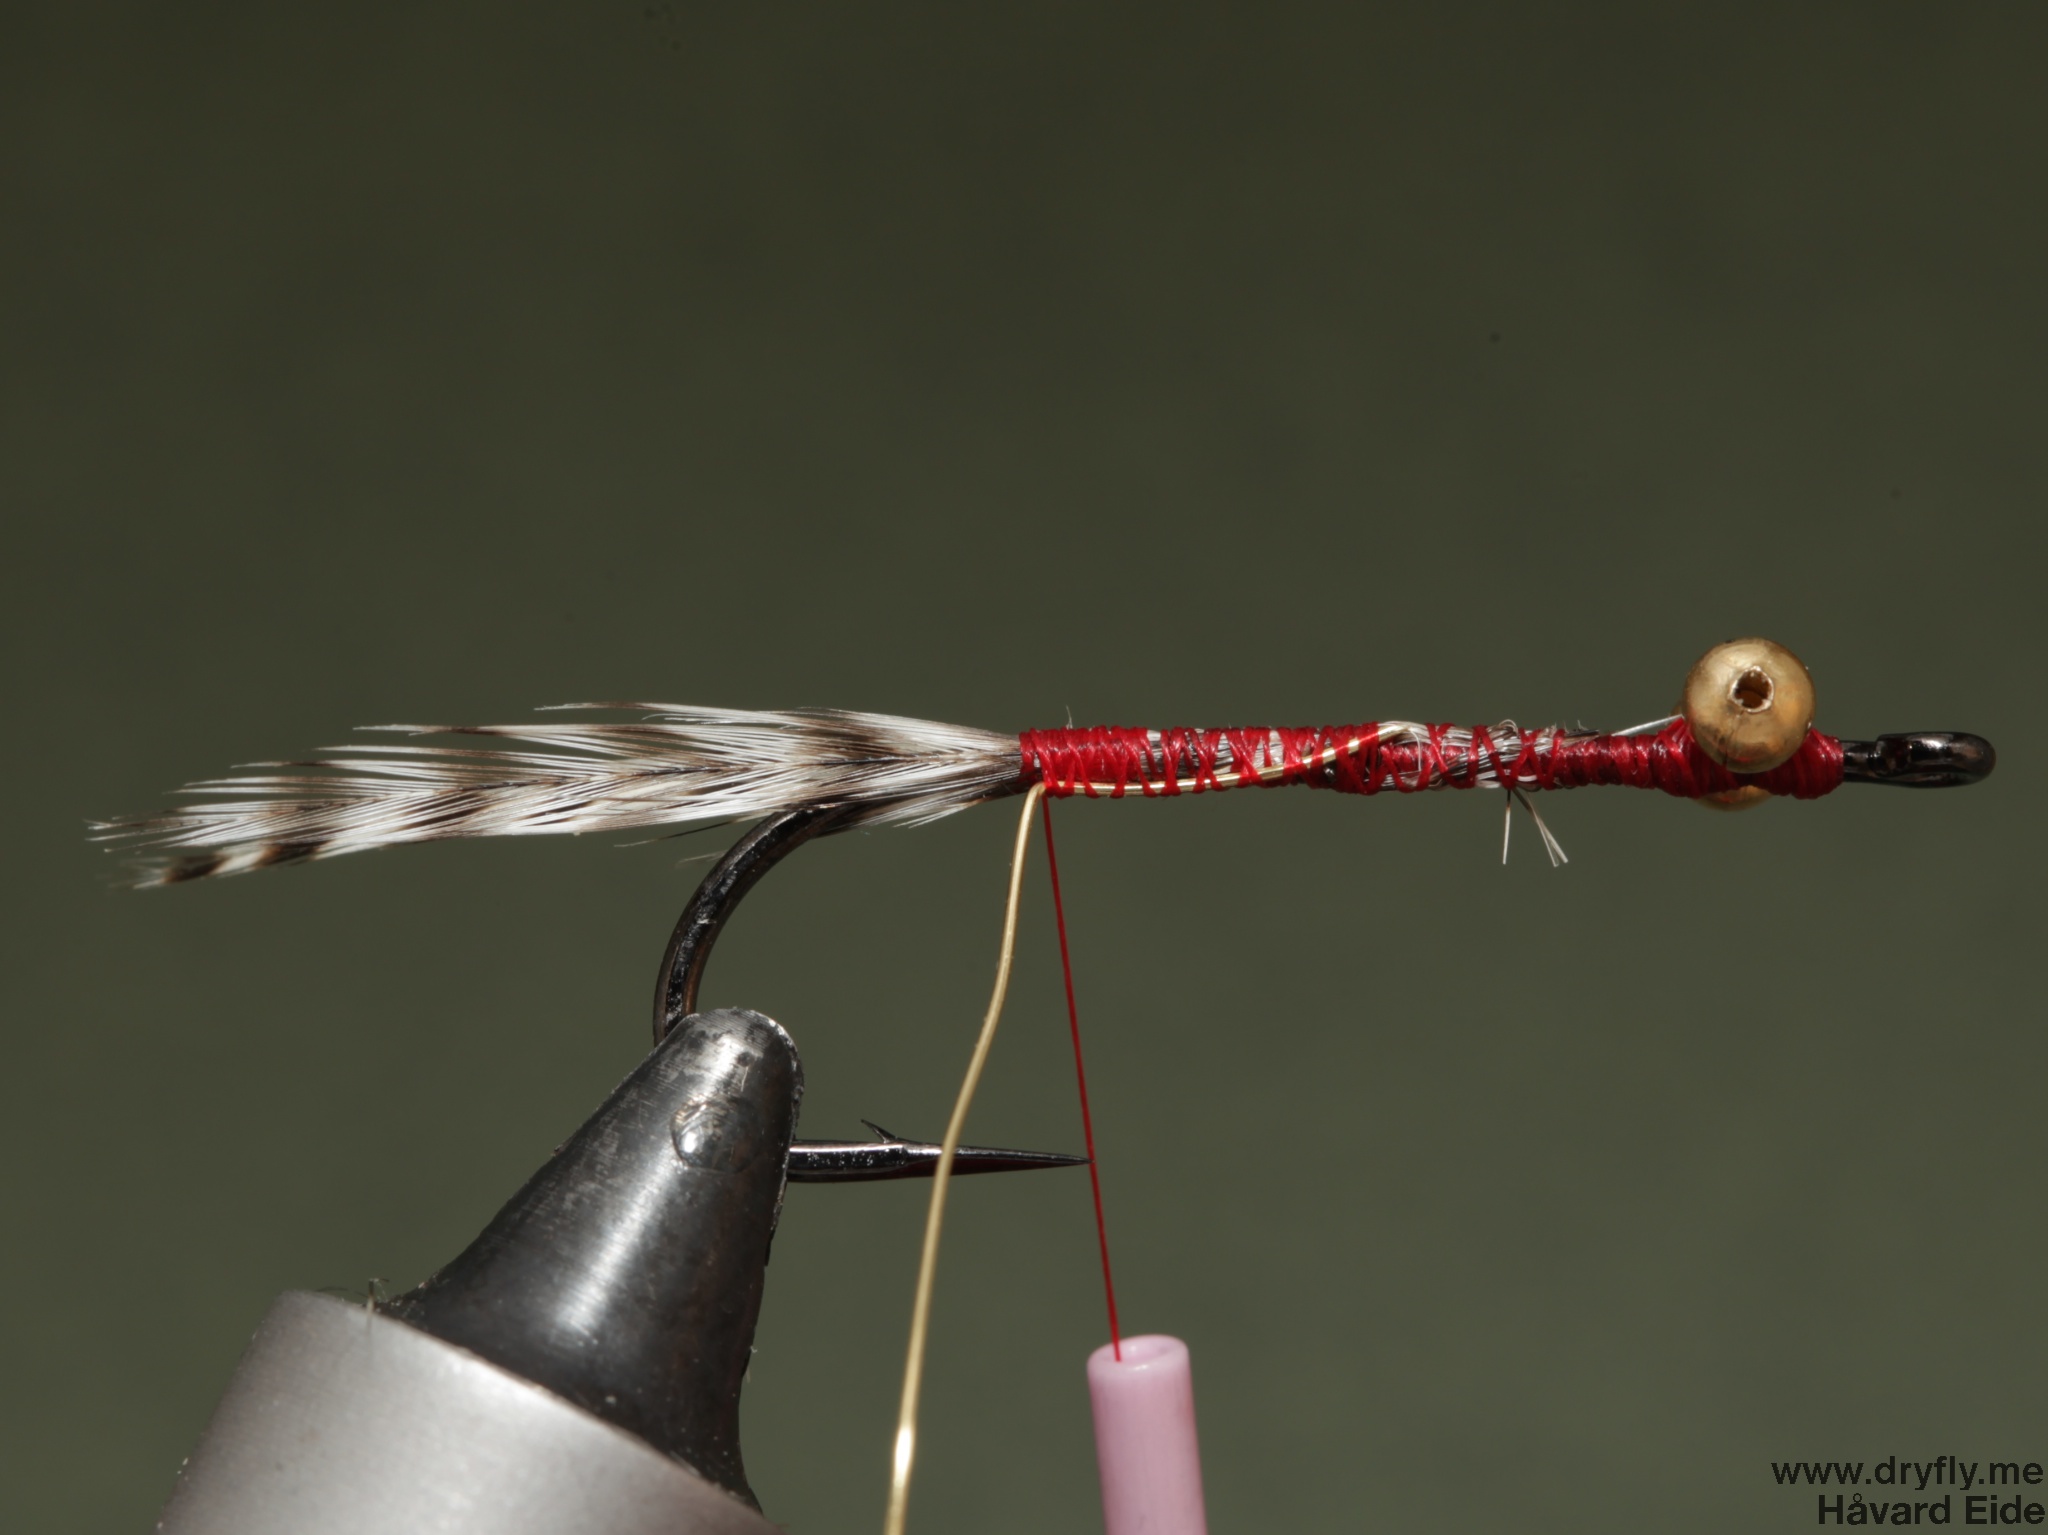
 5. Tie in the hackle and when going back add a copper wire
6. Add dubbing to the thread, this can be varied in different colors and variants but I like the Ice Dub on this fly
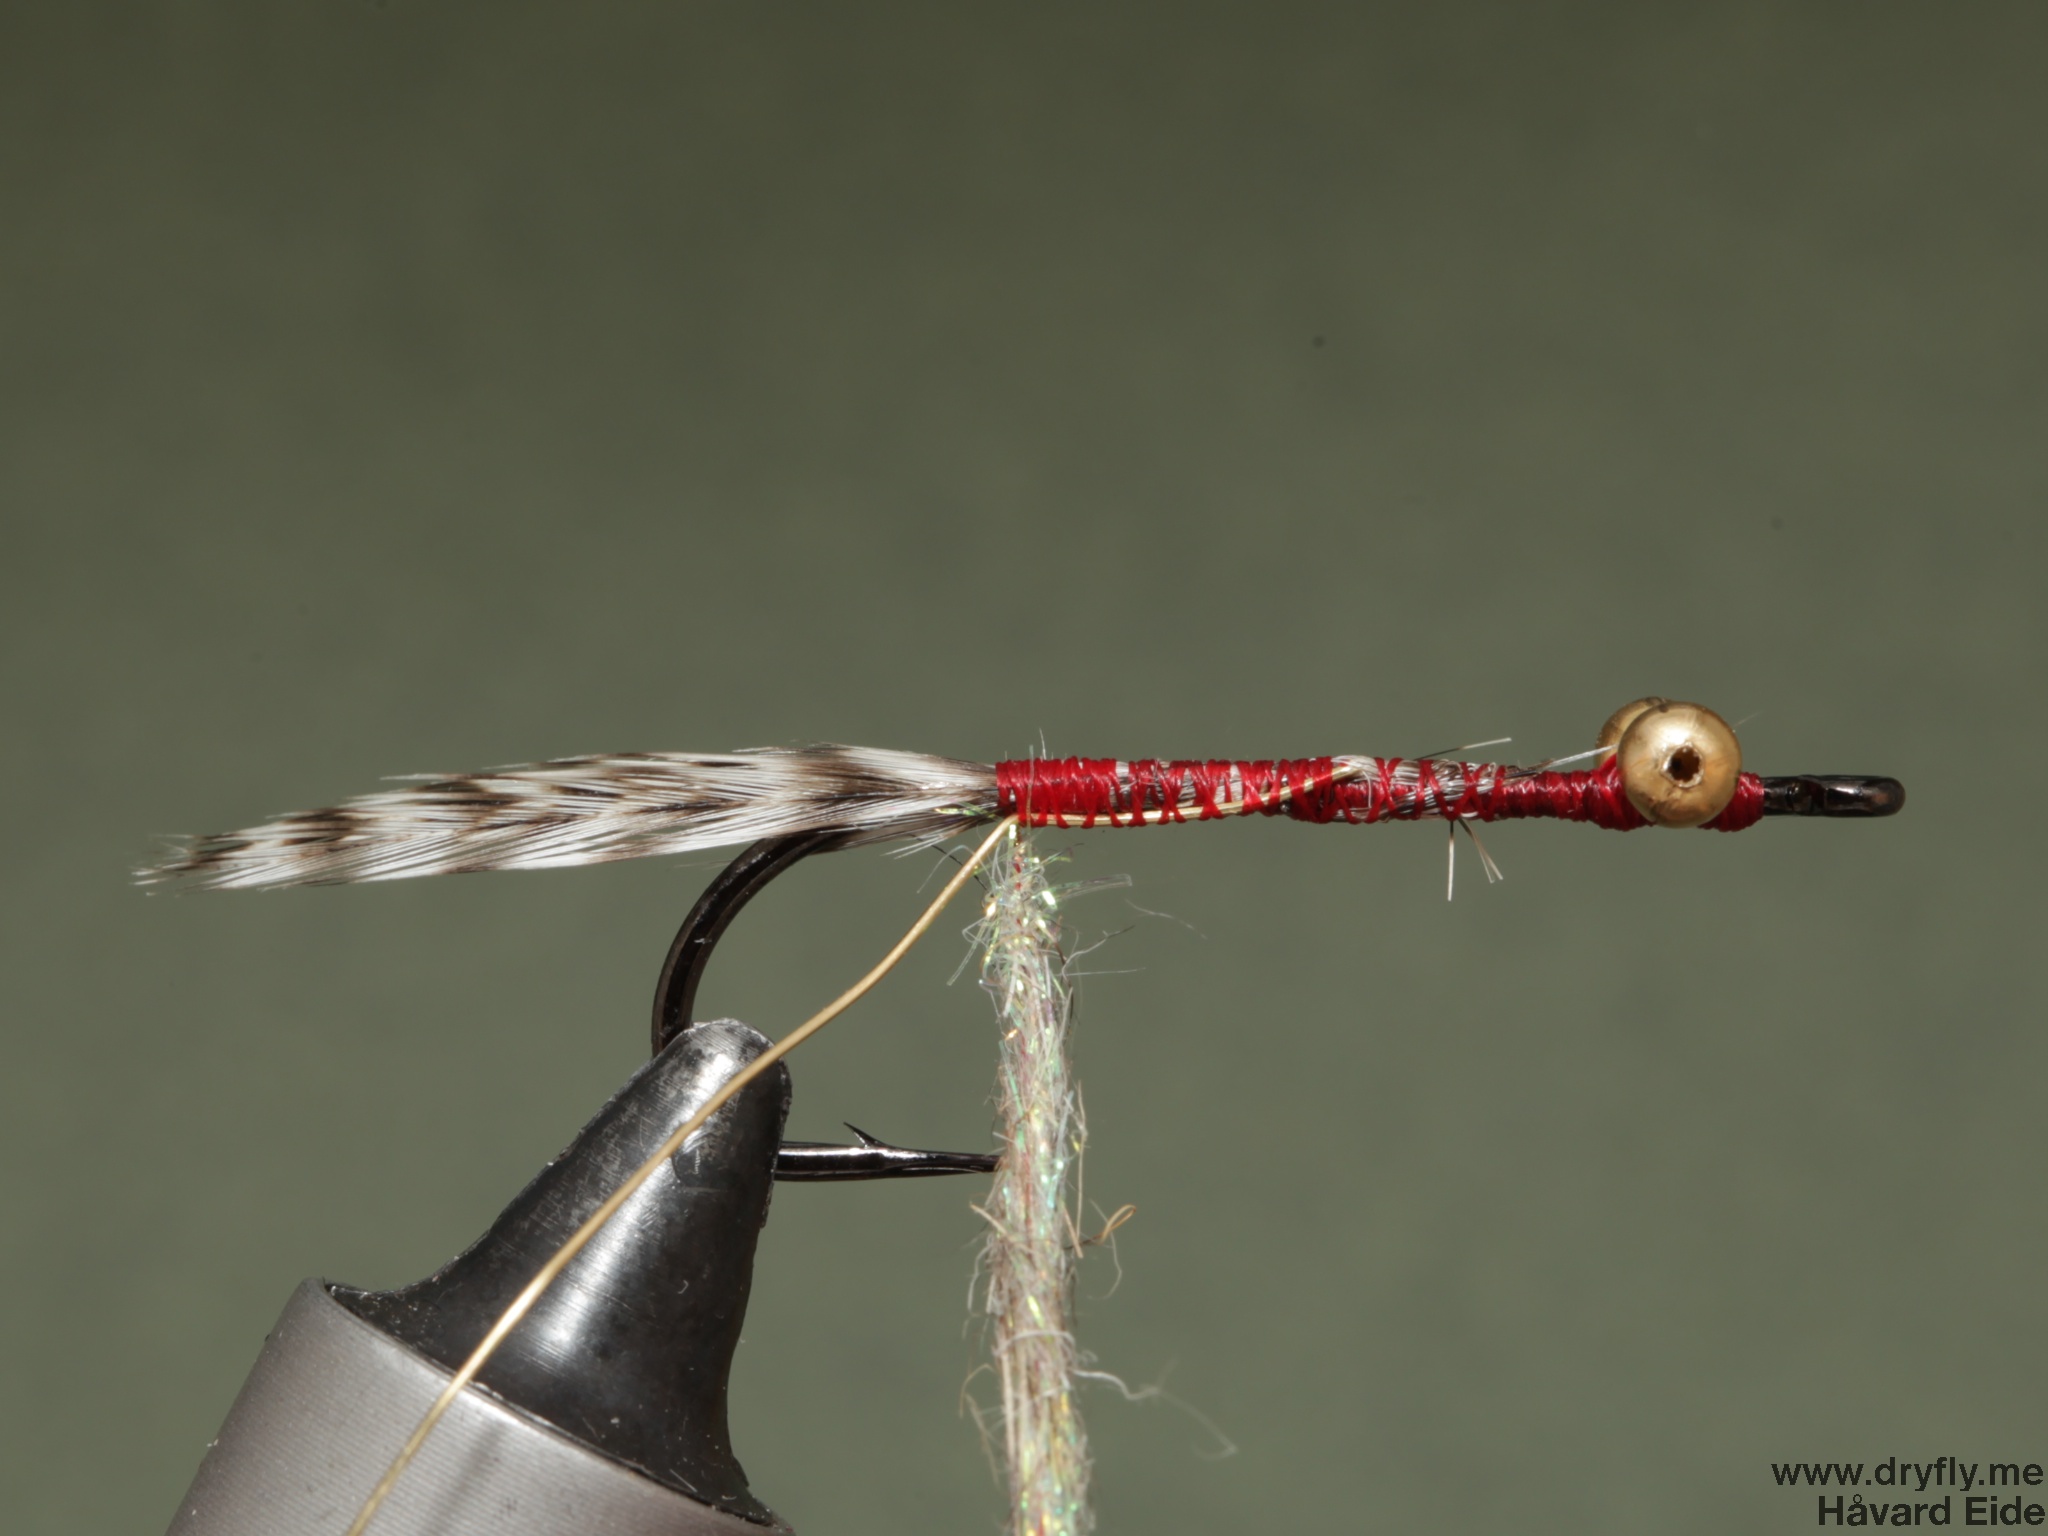
7. Dub the body but stop a little bit before the eyes: you want to have room to tie in the hackle

8. Tie in the body hackle, this can again be varied: short or long, and be added in short or longer turns around the hook, this depends on how you want the final fly to appear
9. When you reach the end of the dubbing make sure to keep the hackle tight while you counter-wrap the copper wire around the body all the way to the front of the dubbing
10. The first copper wrap here is keeping the hackle down and secures it in place. Make sure to not get the wire above the hackle so that it is trapped
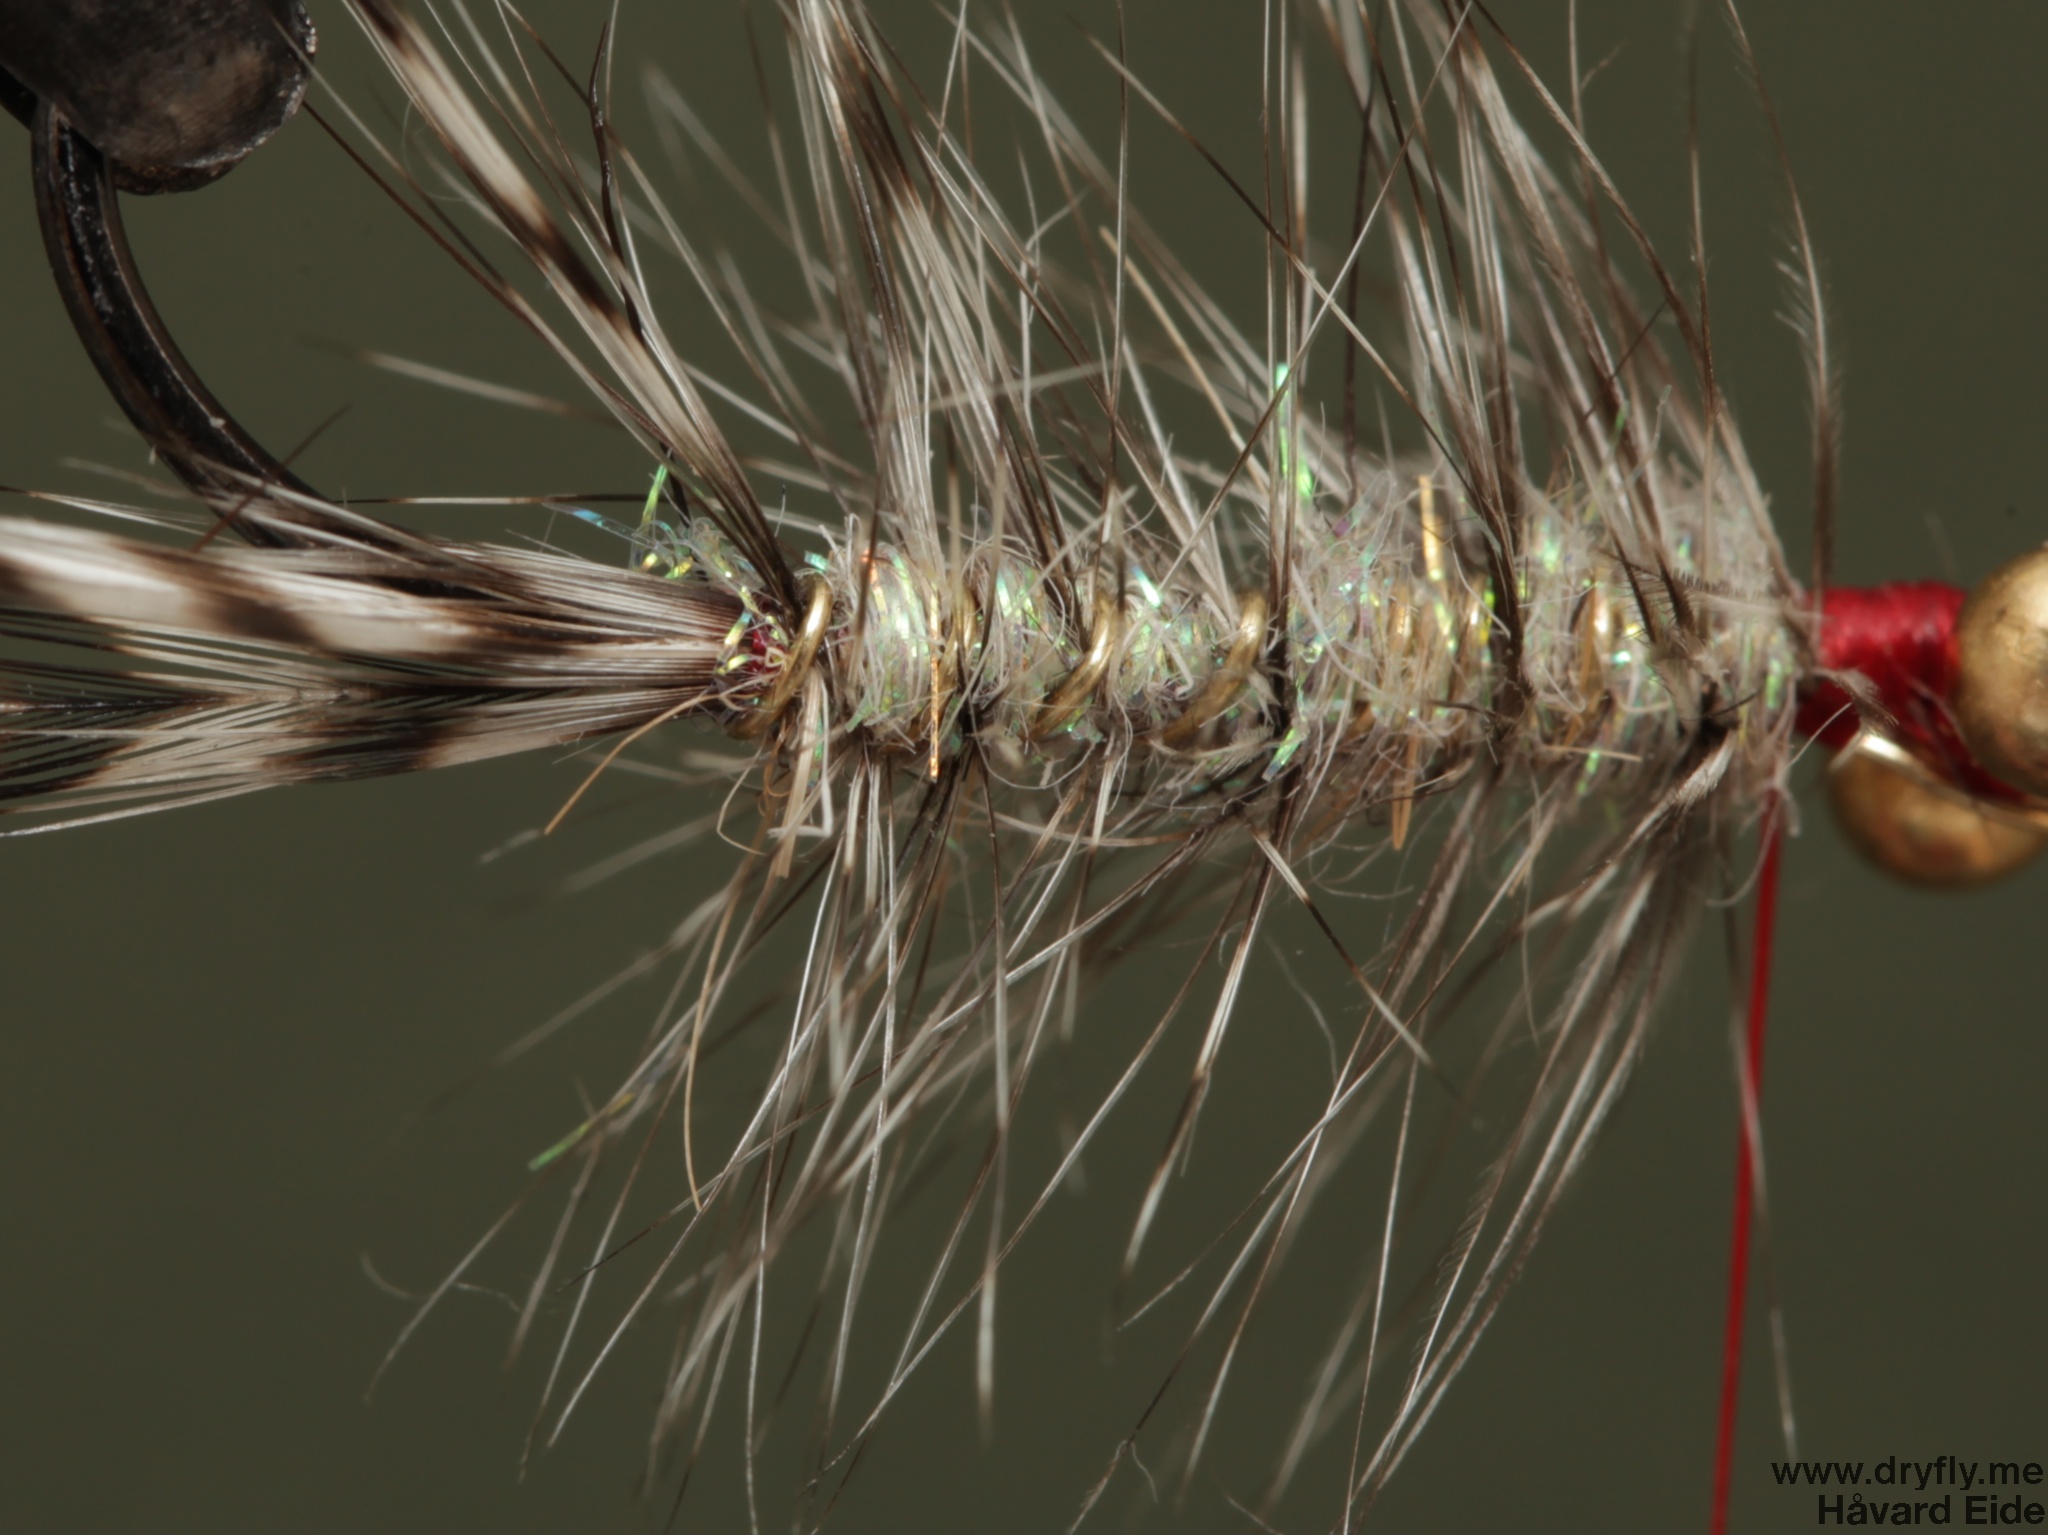
11. I have ribbed the fly with a lot of turns here, this will make sure the fly is durable and will add a little bit of extra weight to it as well

12. After cutting away the hackle tip (keep it to make more tails on other polar magnus!) and the wire tie in a red (or pink) hackle
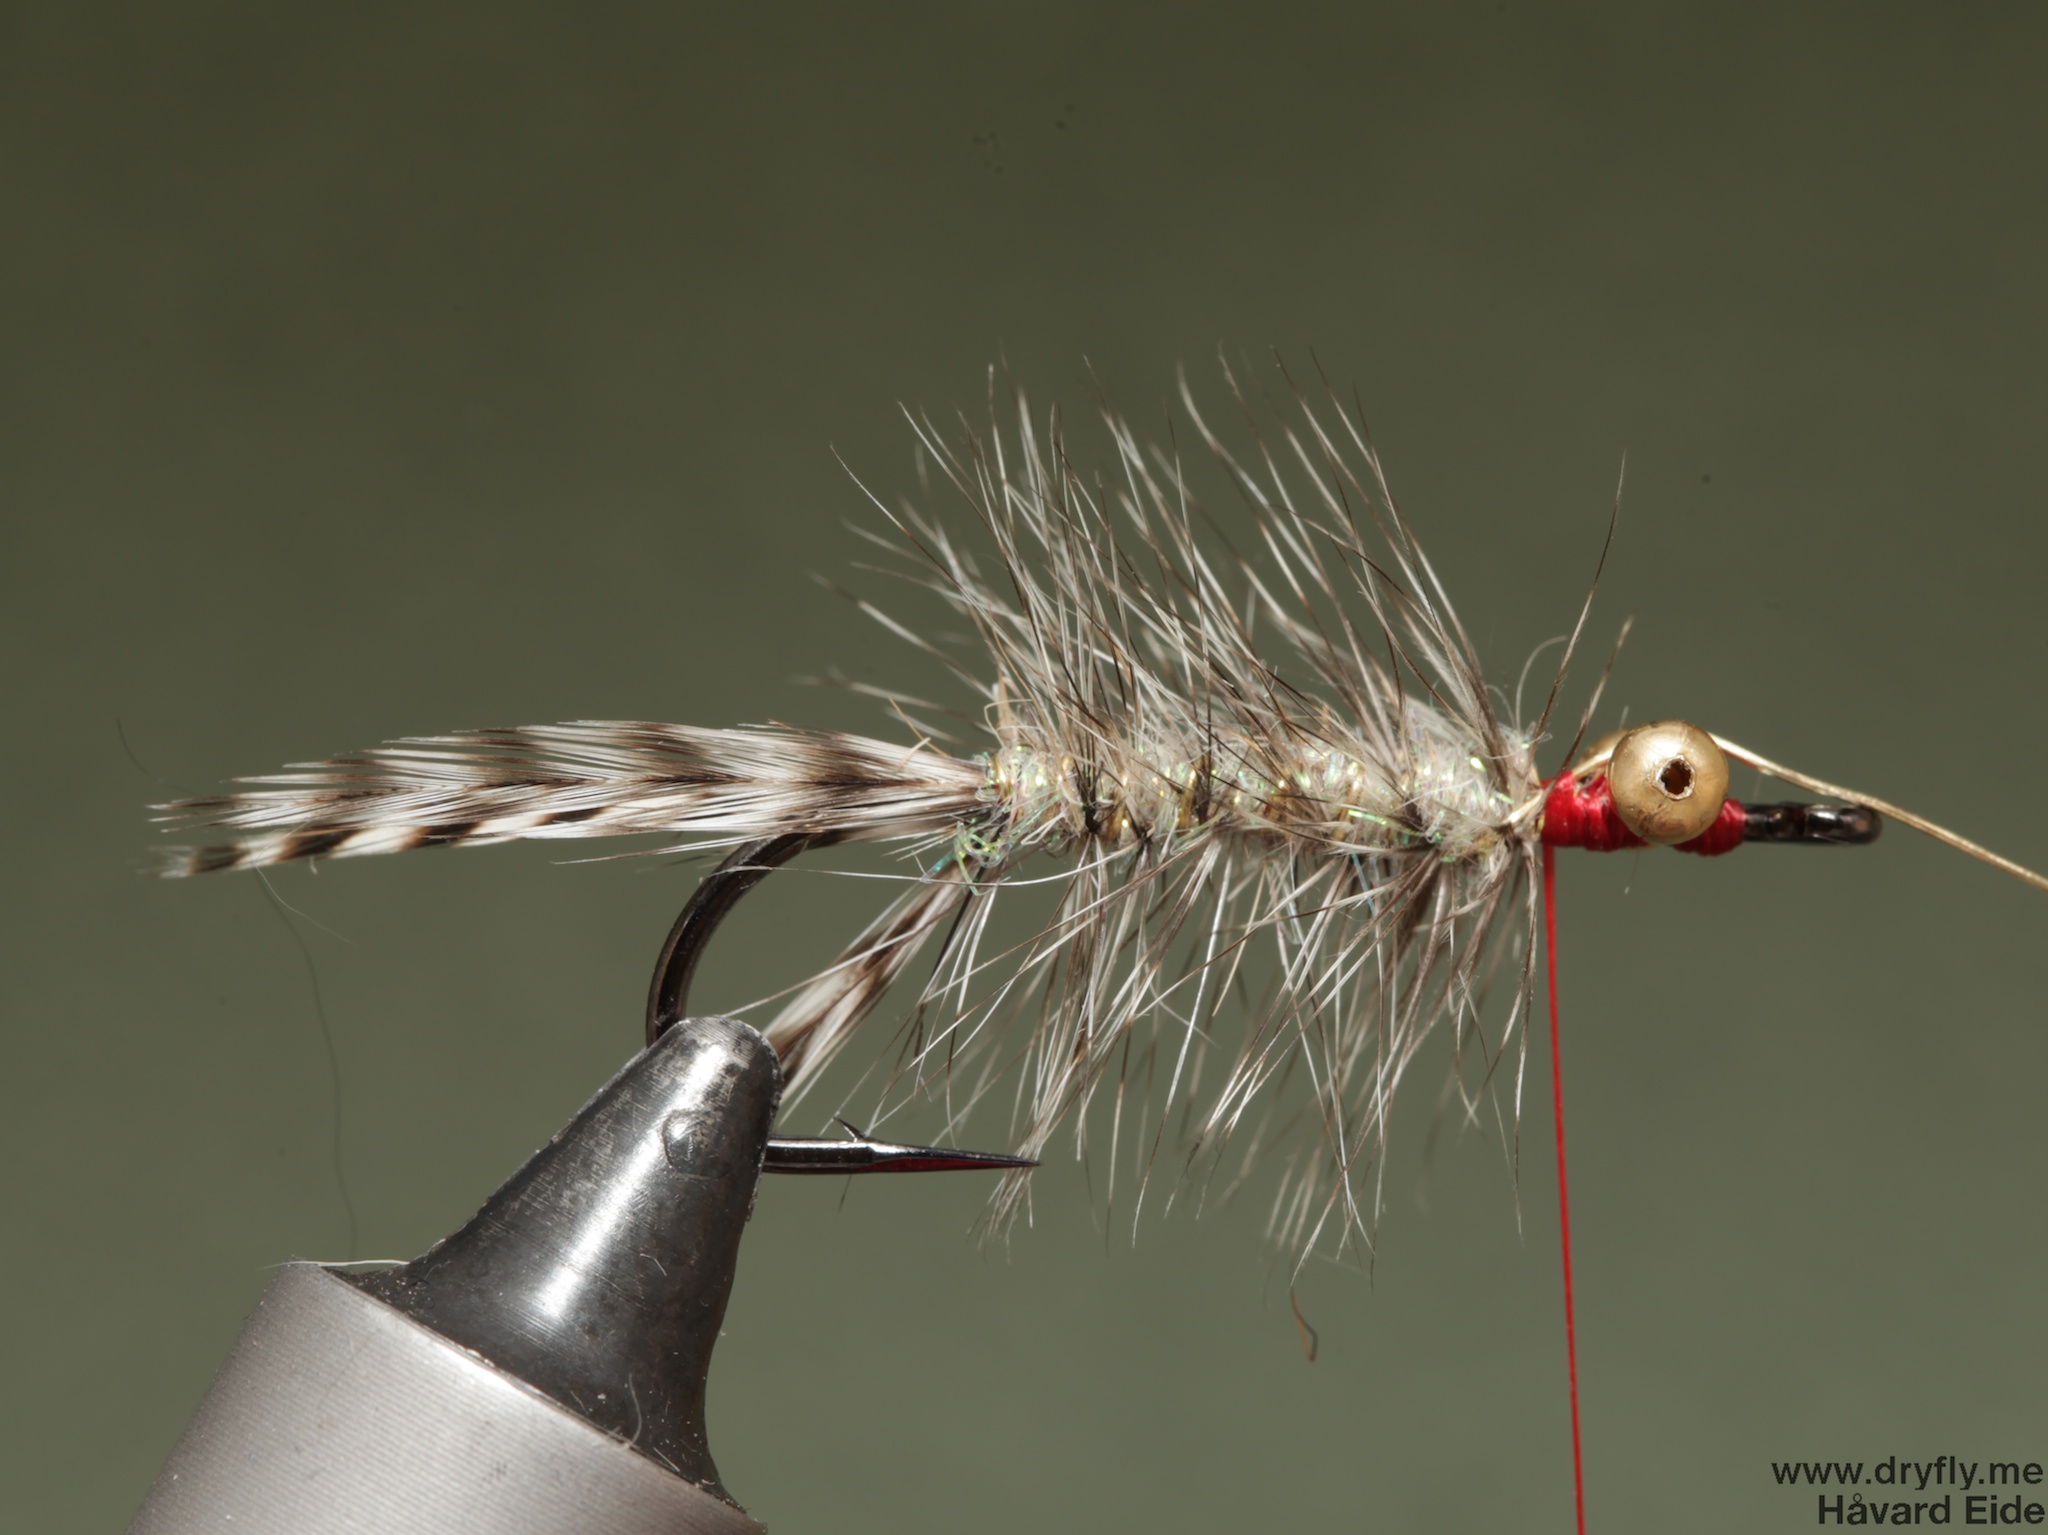
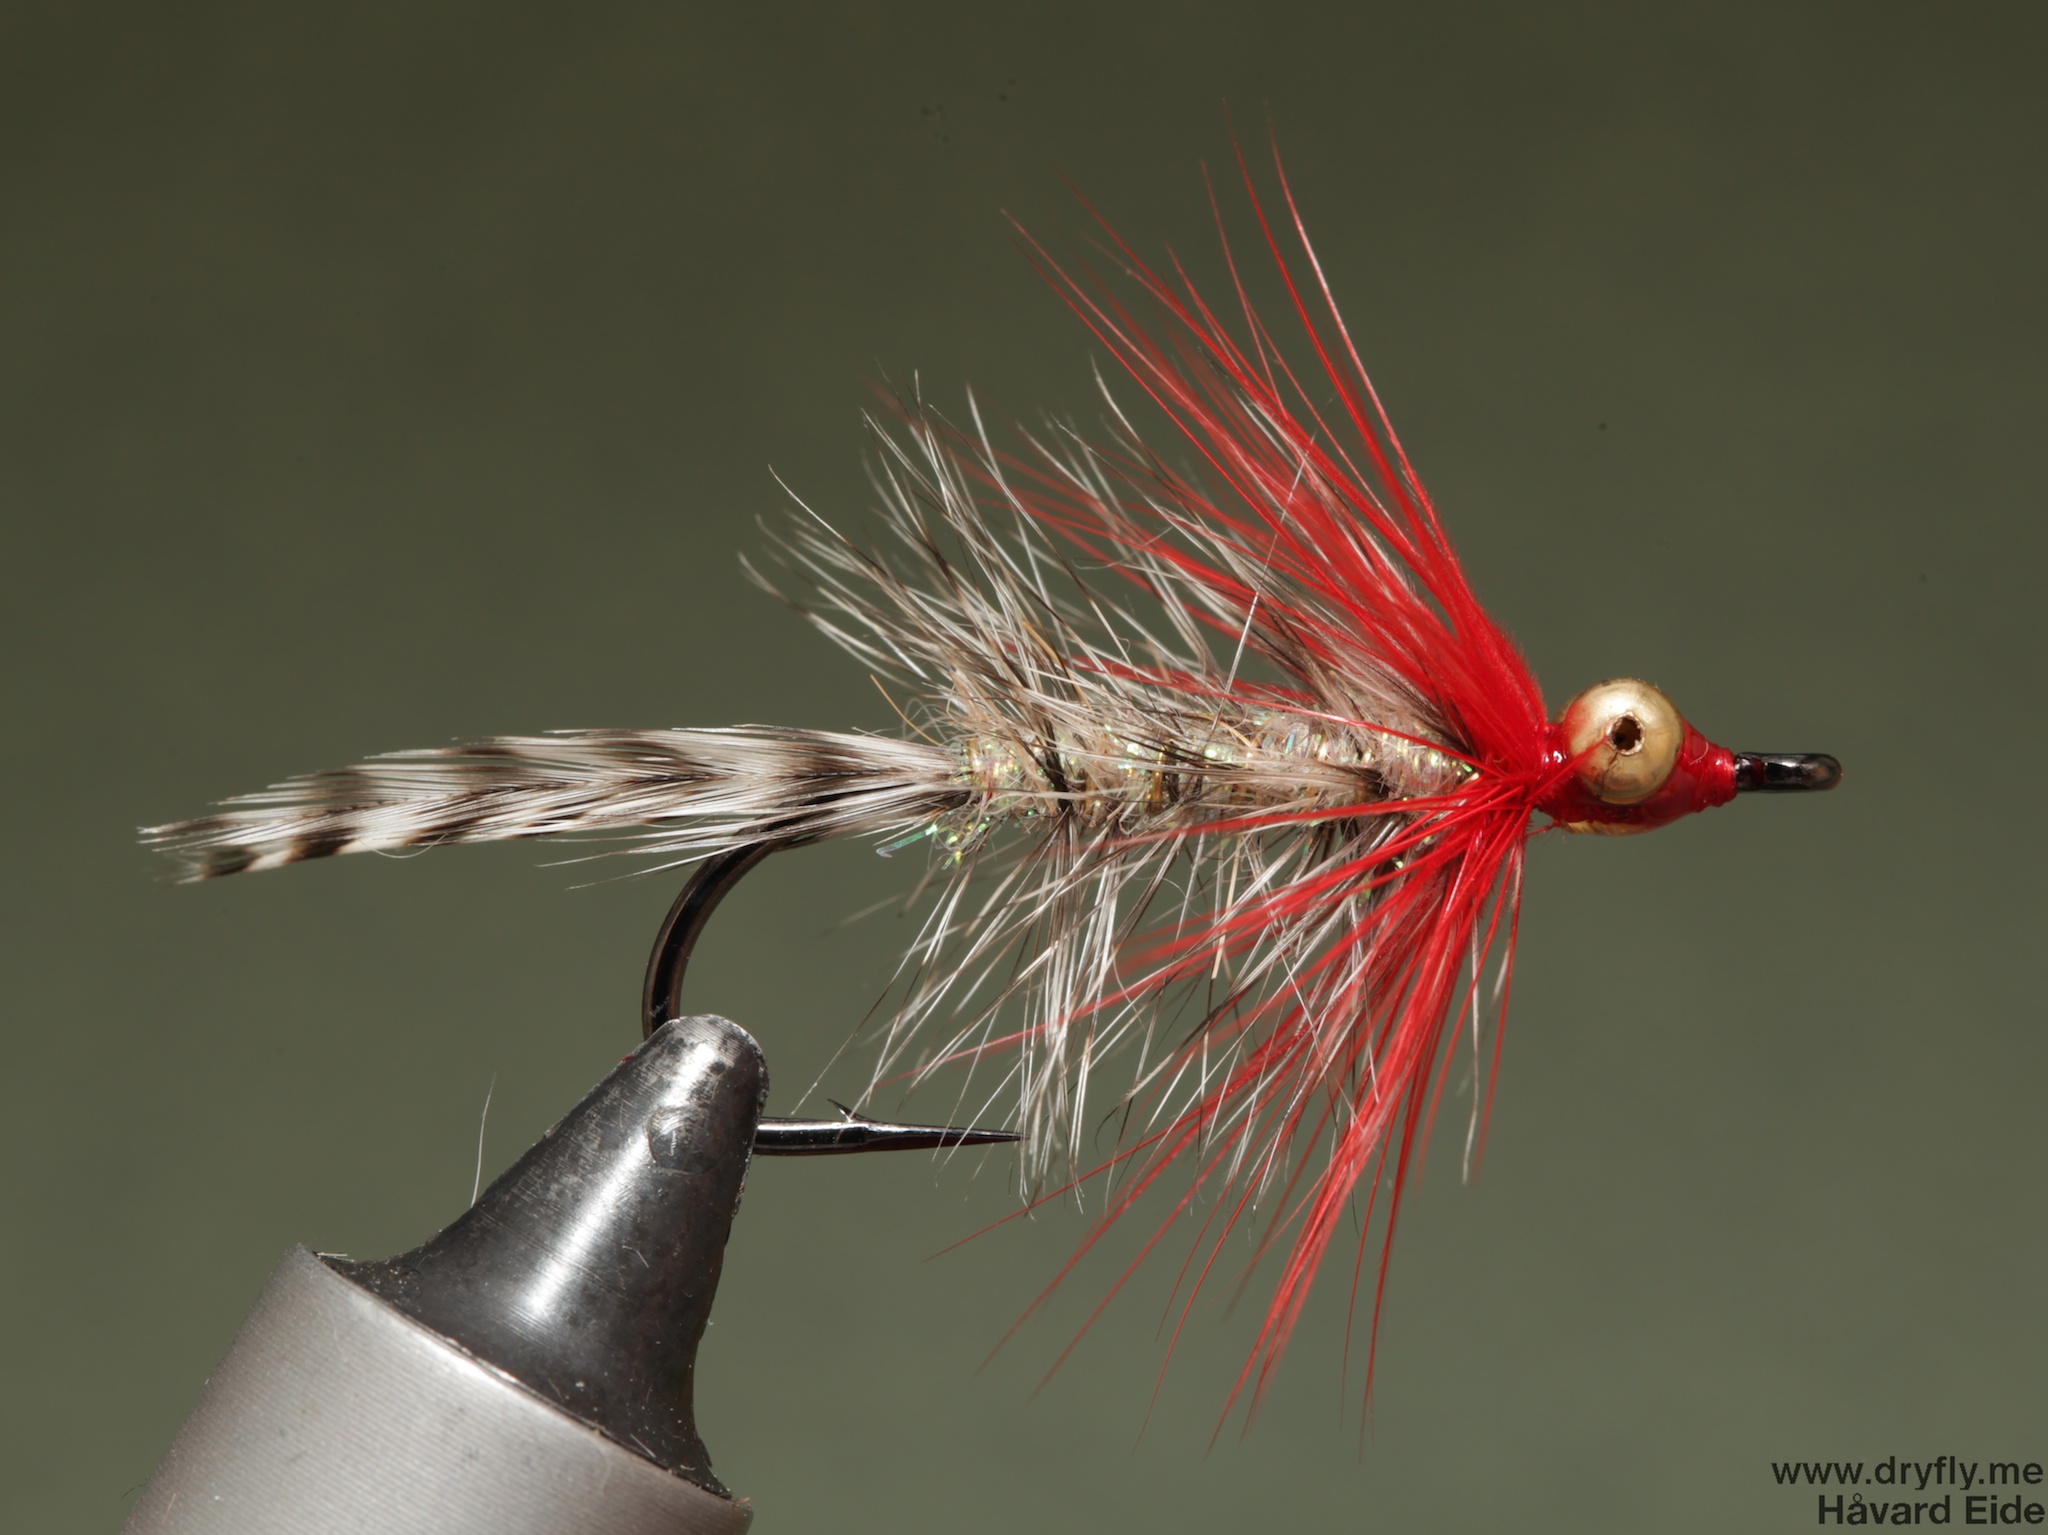
13. Wrap the hackle 2-3-4 times (depending on how much hackle you want and the profile you want the fly to have) and tie it in just behind the eyes. Secure the thread with a whipfinish and you have the final fly:
14. To make sure the fly is even more durable and will endure everything that happens to it I add some Bug Bond above the thread between the eyes and cure it with UV
15. The Bug Bond keeps the eyes securely in place, but make sure that you don’t cover the hackle in it

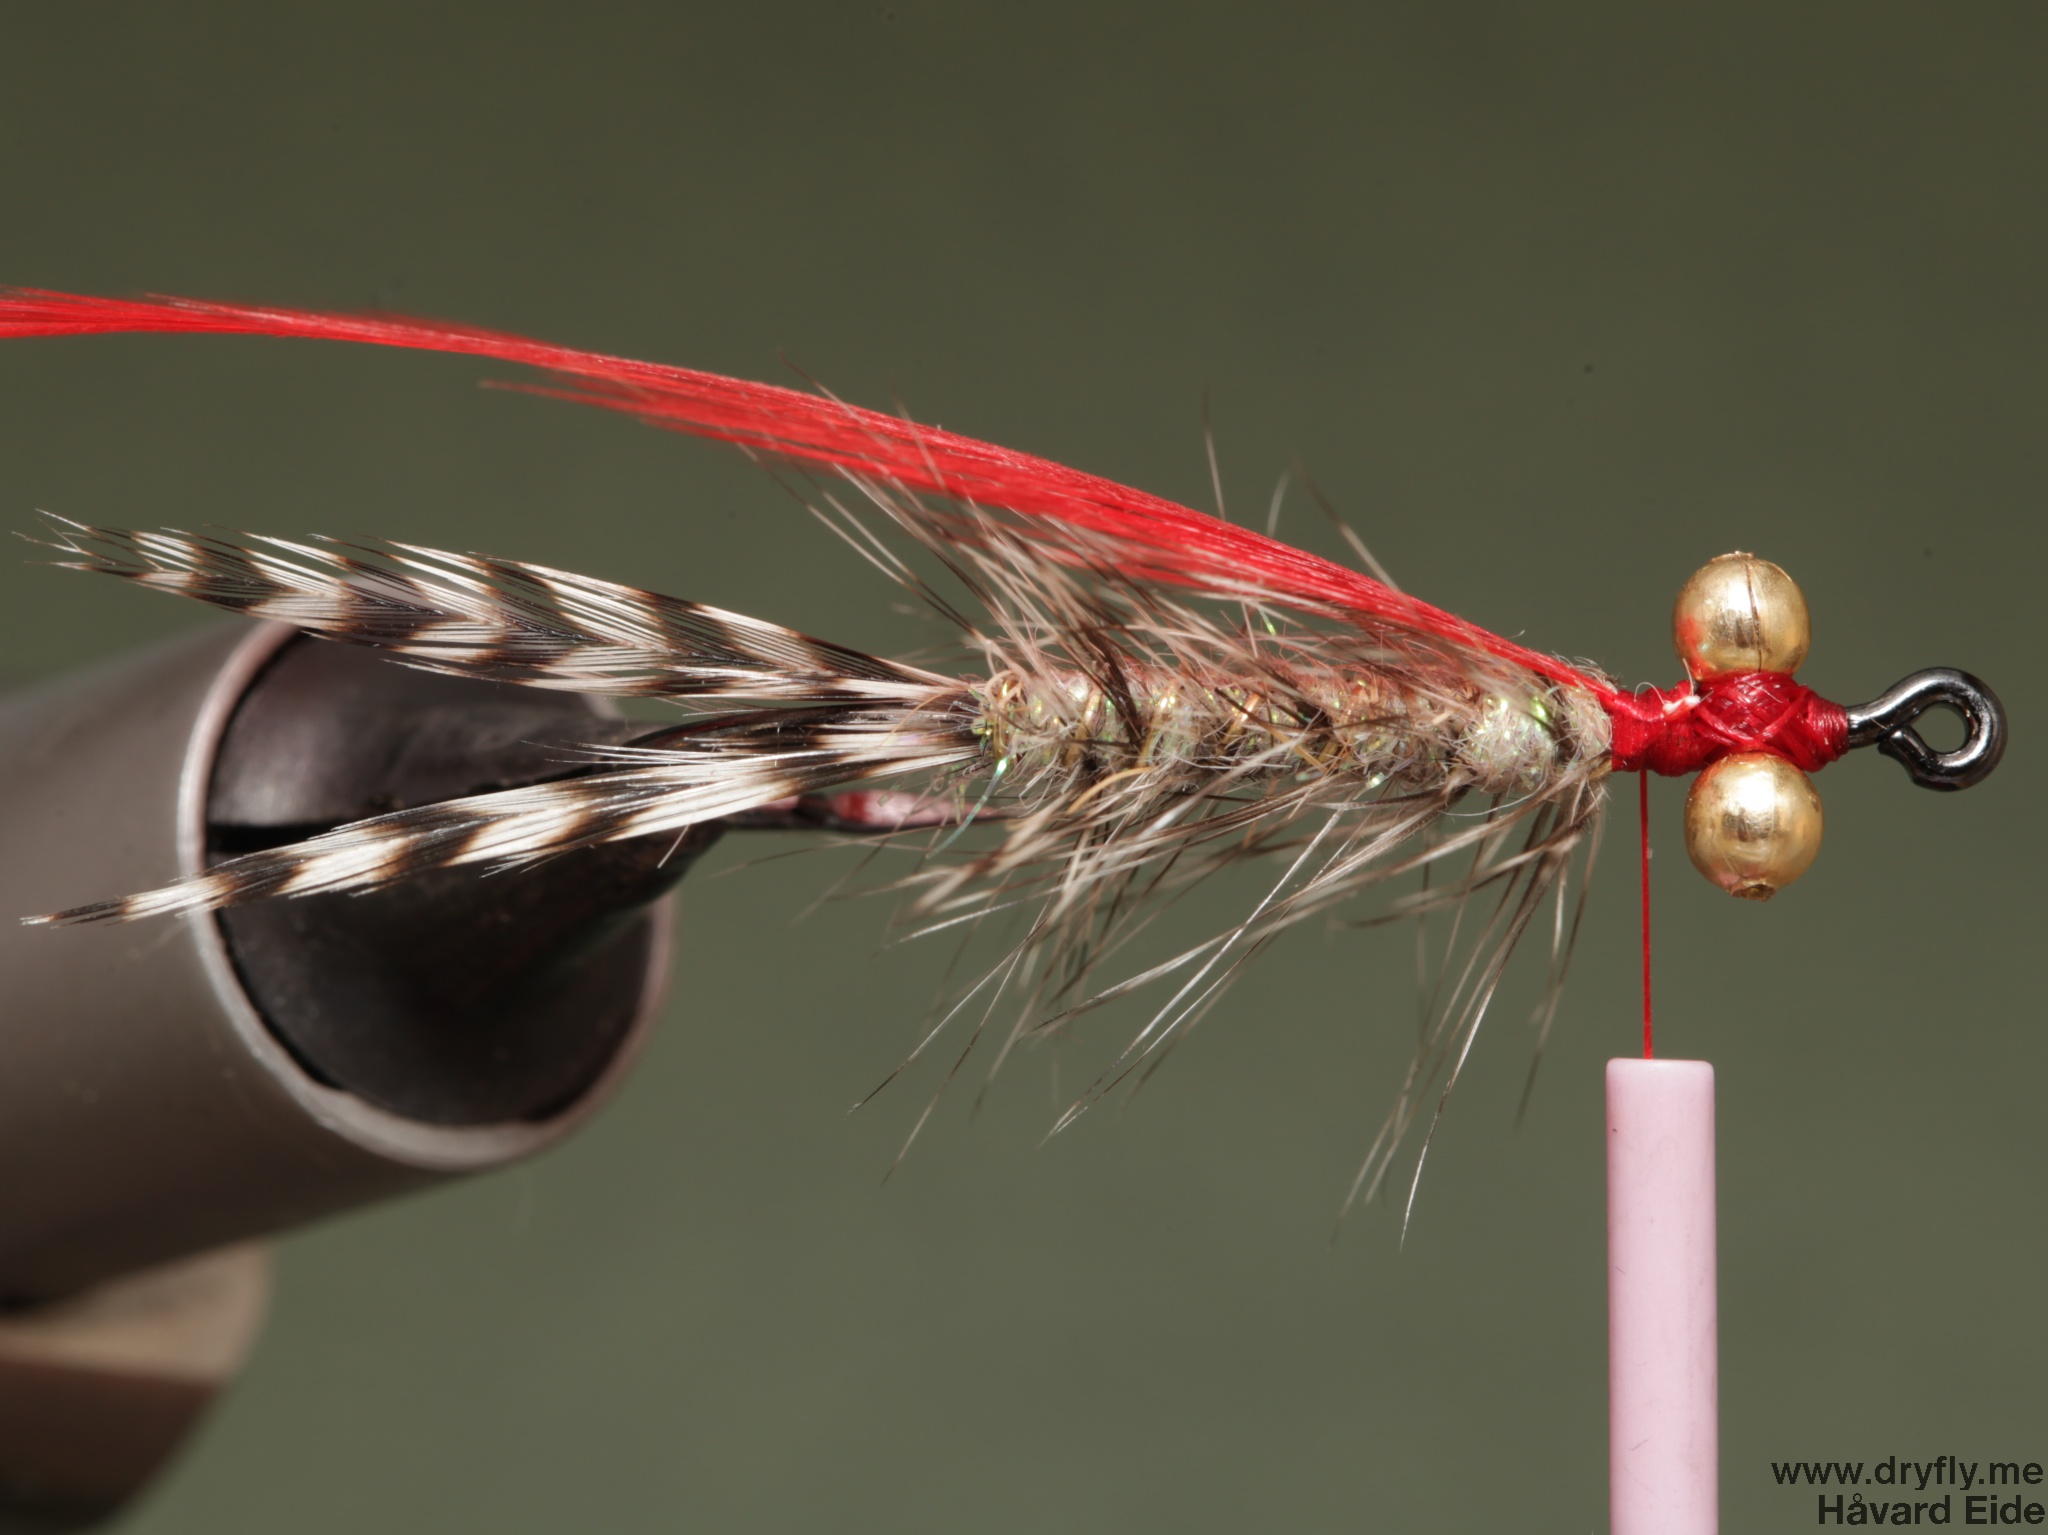
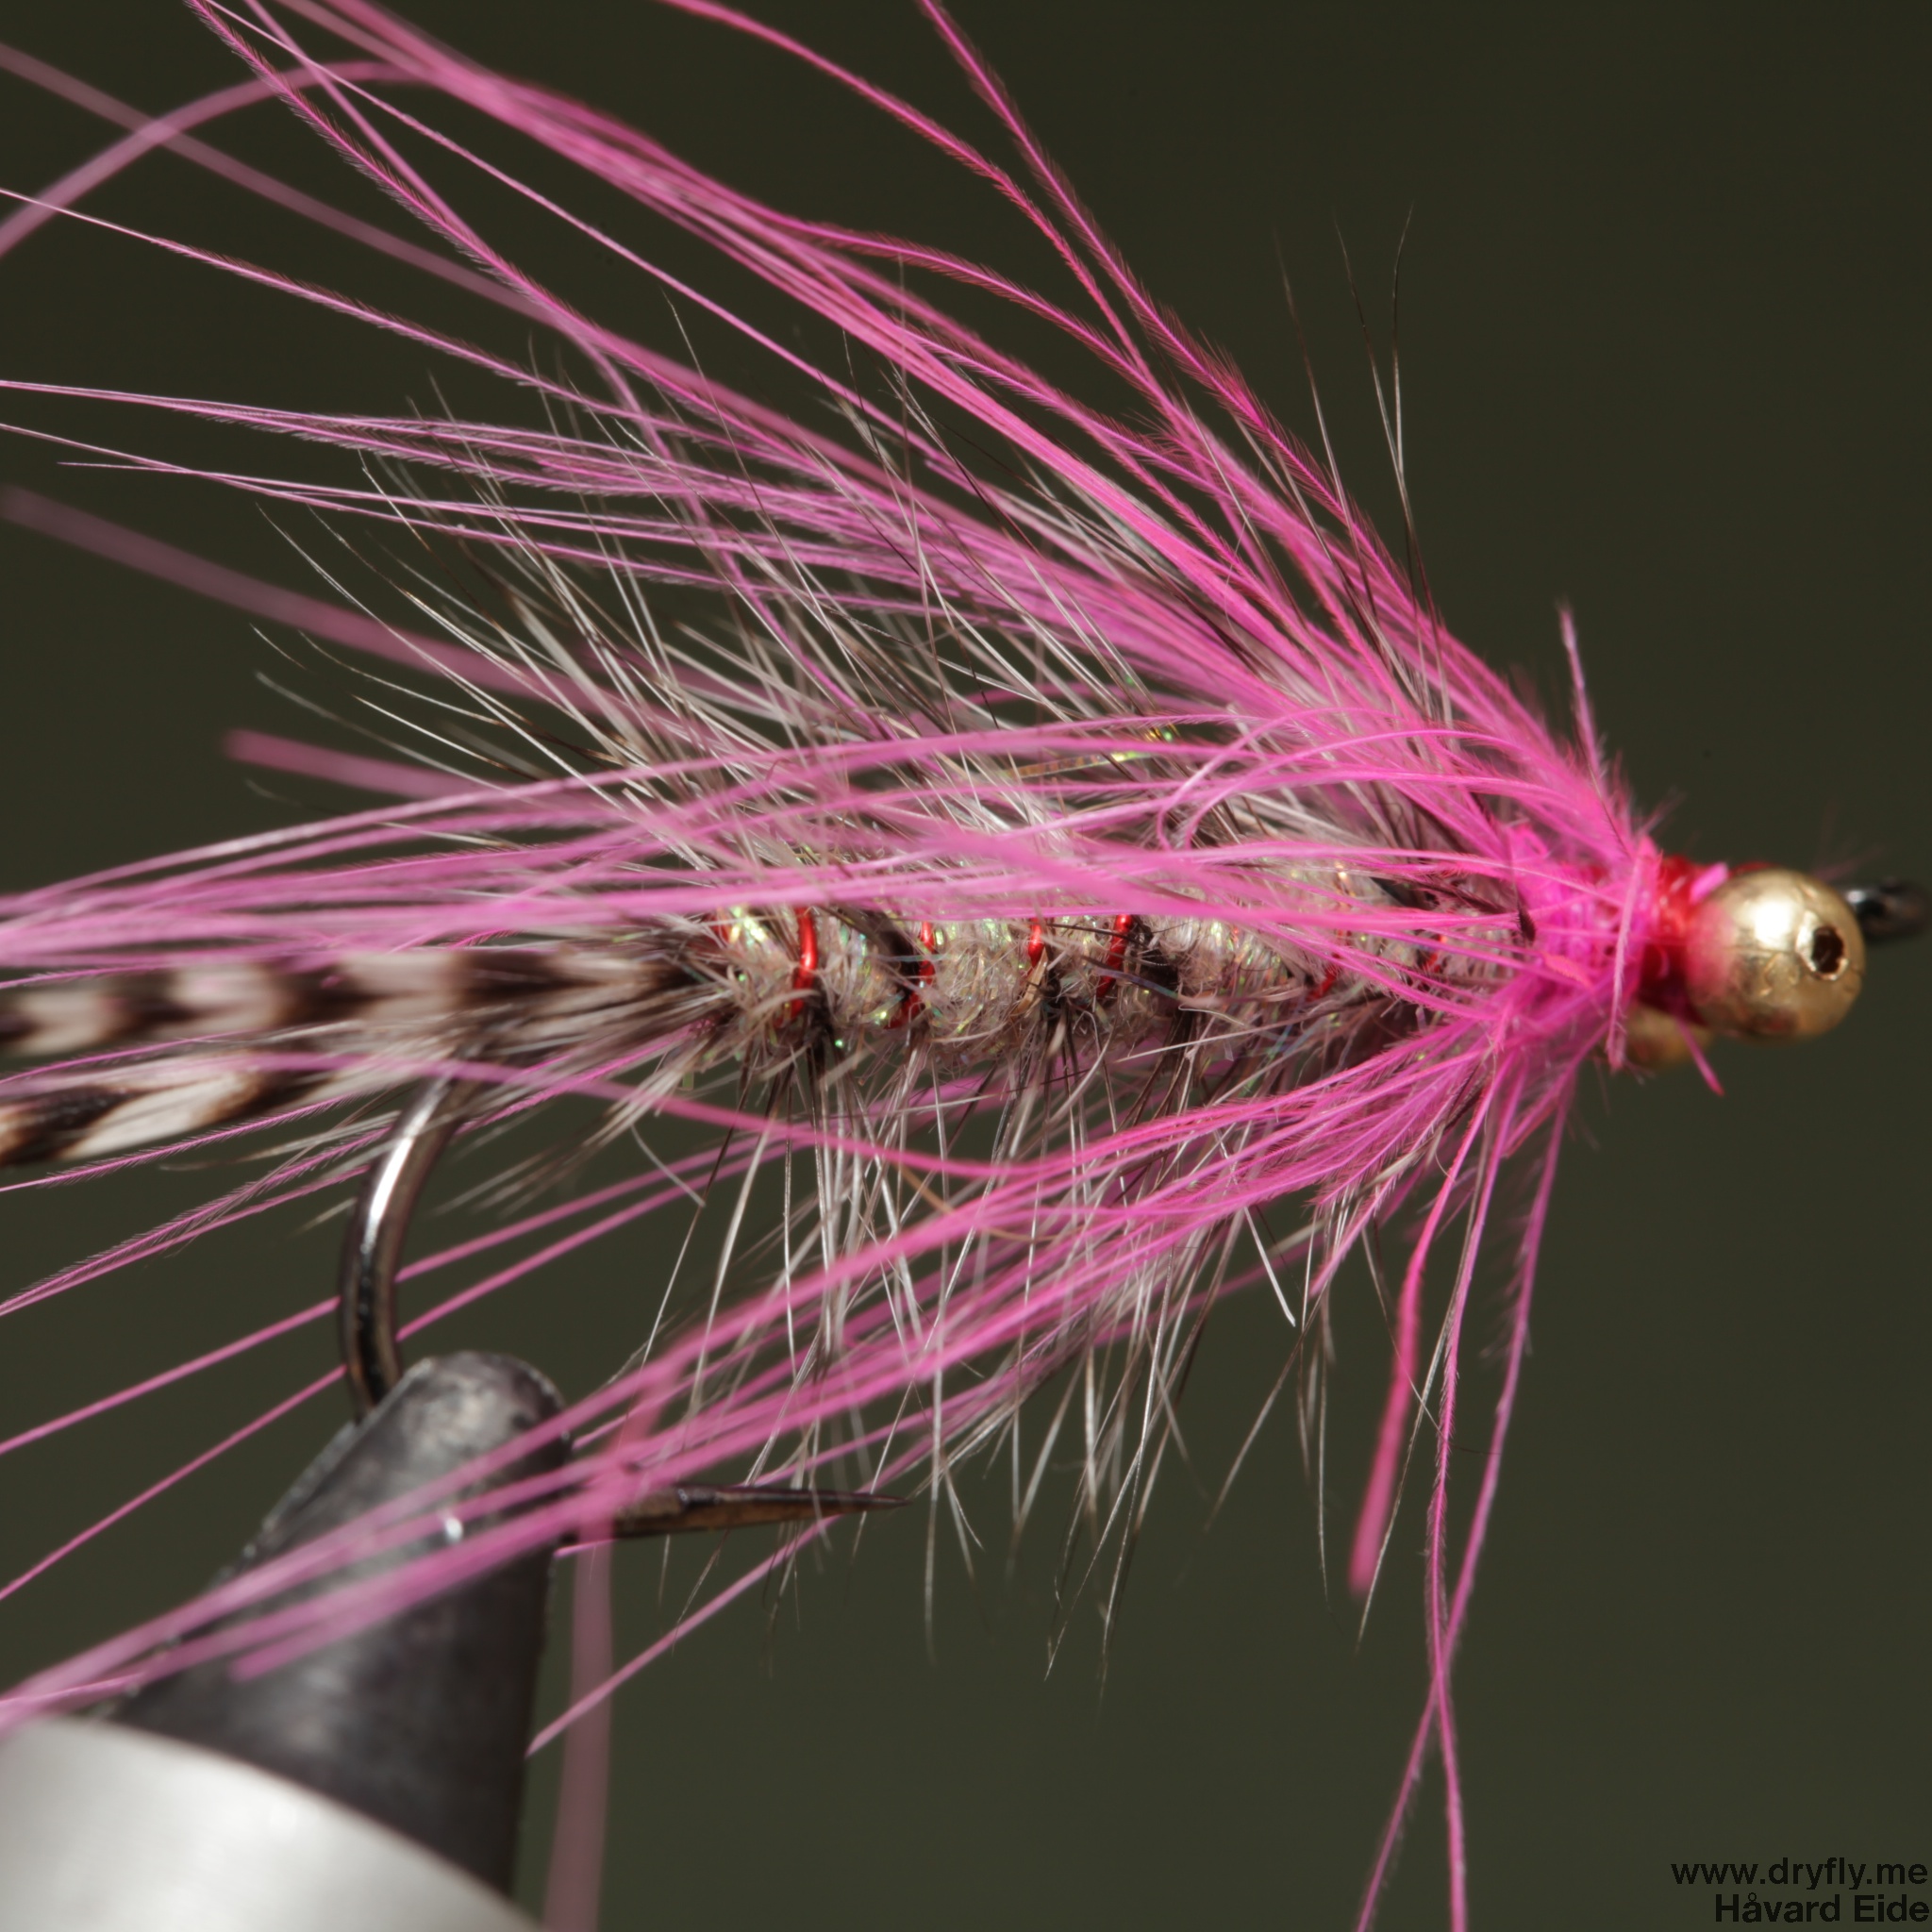
16. A alternative Polar magnus with red copper wire and pink spey hackle, just to show how you can mix this pattern up
A batch of Polar Magnus done and ready to fish:

Recent Comments